Mastering the Room of Requirement - The Ultimate Gold & Potion Factory Guide
Mastering the Room of Requirement is less about magic and more about resource management. To transform your space from a cluttered workshop into a hyper-efficient gold and potion factory, you need to understand its hidden systems. This guide breaks down the essential mechanics, layouts, and loops that will maximize your conjuration budget and profit per minute.
Understanding Room of Requirement Mechanics & Budget System
Conjuration Budget vs. Moonstone Budget Explained
The Room of Requirement feels like a magical blank canvas, but it's actually running two invisible resource pools that you have to manage at the same time. First is the Conjuration Budget, which works like a hard object cap - every single item you place, from potion stations to statues, fills up a hidden meter, and once it tops out, you're locked out no matter how much Moonstone you've got stashed. When you first get access, that limit is rough; you'll only fit about 30-35 mid-tier objects before hitting the wall.
Then there's Moonstone, and this is where people get confused. Moonstone isn't part of the budget at all - it's just the raw material fee you pay per item. A Level-3 Herbology Potting Table costs 3-5 Moonstone, a big statue might run you 10, and small décor pieces are usually just 1 each. The important thing to remember is that spending Moonstone does nothing for your Conjuration Budget, and when you delete items with Evanesco, you only get Moonstone back (especially if you grabbed the 15% refund talent), not budget space.
The only way to cram more stuff in is by grinding through Deek's quest line, opening all four Vivarium biomes, and acquiring new Spellcraft recipes from collection chests. Each milestone nudges that global object allowance up, and by the time you've finished the three major quests, you'll be sitting at roughly 70-75 items.
Essential Quest Unlocks for Maximum Capacity
Deek's side quests are the main lifeline for your decorating plans. The chain kicks off with 'The Elf, the Nab-Sack, and the Loom,' which rewards you with the Nab-Sack spell, your first Vivarium, the Enchanted Loom, and 260 XP. Immediately after, 'Interior Decorating' triggers - just place any conjuration inside the Vivarium and you'll complete it for 180 XP and a random cosmetic recipe, plus another solid budget increase.
The third quest in his line finishes the job, pushing your total allowance to that sweet spot of 70-75 items. If you're still hungry for more space, you can squeeze out smaller bumps by opening the remaining three Vivarium biomes and snagging new Spellcraft recipes from collection chests. It's not glamorous, but it's the difference between a bare-bones setup and a fully decked-out magical workshop.
Potion Station Optimization: The Triangle Brewing Layout
Triangle Layout Positioning & Angle Optimization
If you're still brewing potions in a straight line, you're wasting time and conjuration slots. The 45° triangle layout is the real MVP here - it lets you craft with zero camera swing and hits a 4.2-second cycle, which is just chef's kiss for efficiency.
Here's how you set it up: plant your first Potion Station dead center on a tile, facing north (0°). Then walk exactly three tiles northeast at a 45° angle - that's where Station #2 goes, but make sure it's facing southwest (225°). Finally, walk three tiles southeast (135°) for Station #3, which should face northwest (315°). All these measurements use the Room of Requirement's floor tiles, where one tile equals one large conjuration square, so it's actually pretty straightforward to eyeball once you know the trick.
Now for the secret sauce - plop a medium shelf in that 2-tile hollow at the center of your triangle. This single shelf reaches all three benches, which means you're saving an entire conjuration slot compared to cluttering each station with its own storage. Oh, and if you're struggling with the angles, just tap D-pad left/right or your Next Target keybind; it'll snap your camera to the next 45° increment automatically.
The math checks out too: this setup only costs 4 conjuration slots versus 5 for a boring straight line or 6 for a four-bench square. More potions, less clutter.
Essential Potion Assignments & Hotbar Strategy
You've got three stations, so you need three potions that actually matter. For combat, that's Maxima for offense, Edurus for defense, and Focus for cooldown reduction - everything else is just taking up space.
Maxima juices up your spell damage for 30 seconds and only needs Leech Juice plus Spider Fang. Edurus gives you that sweet rock-skin defense for 20 seconds with Ashwinder Eggs and Mongrel Fur. Focus is the clutch play - halves your spell cooldowns for 15 seconds, though it's pricier at Lacewing Flies, Fluxweed Stem, and Dugbog Tongue.
For hotbar muscle memory, lock these in: top slot for Maxima since it's your fastest thumb access, right slot for Edurus (perfect for panic-flicking when you're getting swarmed), and bottom slot for Focus. And please, for the love of Merlin, disable auto-swap on empty - this keeps your slots consistent so you can double-tap Maxima or Focus without your gear shuffling around.
One last pro tip: mirror your ingredient shelves clockwise around the triangle - left shelf for Maxima, centre for Edurus, right for Focus. This setup streamlines refills so you're not running in circles when you're low on supplies.
Herbology Zone: The 2-2-1 Flower-Bed Configuration
Pot Size Distribution & Plant Assignments
A 2-2-1 potting table gives you two small pots, two medium pots, and one large pot once you've grabbed the upgrade from Tomes and Scrolls, and that single large slot is way more valuable than it looks. The default setup ships with Dittany in the small pots, Mallowsweet in the medium ones, and Venomous Tentacula hogging the large plot, which actually makes a ton of sense once you see the timers line up.
Dittany's the real workhorse here - it finishes in 10 minutes flat, which perfectly matches the small pot's 10-plant capacity, and you need it in stacks of five for every Wiggenweld Potion you brew. Mallowsweet lives in the medium pots because you're burning through it constantly for Merlin Trials, and two medium plots give you a comfortable buffer without wasting the large slot on a plant that doesn't need it. That leaves Venomous Tentacula for the big pot, and it earns its keep: it's a combat plant that hits multiple enemies and sells for a clean 100 galleons per pop.
The beauty of the large pot is you can hot-swap it whenever you want. Mandrake and Chinese Chomping Cabbage both share that same 20-minute timer, so if you're prepping for a tough fight or just want to mix up your income, swap them in without losing a beat.
| Pot Size | Default Plant | Why It Works | Alternative |
|---|---|---|---|
| Small (x2) | Dittany | 10-min grow, fits 10-slot capacity, needed for Wiggenweld | - |
| Medium (x2) | Mallowsweet | Used for every Merlin Trial, two pots = surplus | - |
| Large (x1) | Venomous Tentacula | Combat multi-target, sells for 100 G | Mandrake / Chinese Chomping Cabbage |
Wall Placement & Harvest Queue Visualization
Wall Potting Stations - Mooncalf, Jobberknoll, Diricawl mounts - cheat the system by costing zero floor tiles, but they still eat into your seven-planter Harvest Queue cap, so you can't just plaster every wall and expect it to track everything. The trick is placement. Put Medium Wall Pots high enough above eye level and the glow from a mature Mandrake will hit you the second you fast-travel into the room, which means you never miss a harvest.
The game tracks your seven most recently planted pots in a rolling queue, and when any plant in that list matures, a leaf icon pops up on the left side of your screen. You can press △ / Y / R the moment you see that icon and the game will auto-path you straight to the exact planter - no hunting required. If you're a symmetry freak, the Greenhouse Décor Moonstone pieces snap on a 0.5 m grid instead of the castle stone's 1 m, so you can get pixel-perfect alignment.
Ready plants also give you visual and audio cues. They pulse with a soft gold glow that Revelio intensifies, and each one makes a distinct noise when mature: Mandrakes scream louder, Venomous Tentacula hiss, and Chinese Chomping Cabbages clack their jaws like they're starving. Line your pots along the back wall in ascending size order and you'll see your entire harvest queue at a glance.
Beast Vivarium Optimization: 4-Biome Breeding Efficiency
Forest Vivarium: Fast-Timer Species (20-min breeds)
Your Forest Vivarium is your fast-cash workhorse, packing 12 beasts across 4 species. Fill it with Diricawl, Puffskein, and Mooncalf for their 20-minute breed cycles, and place two breeding pens roughly 5 meters apart - this shaves precious seconds off egg pickup runs.
Both Diricawl and Puffskein pairs pop out eggs every 30-second animation, but they only hatch in 20 minutes if happiness stays at 100%. Mooncalfs are trickier since they're nocturnal; you'll need to skip to night in the Vivarium menu. Run two Mooncalf pens and you'll net 4 Mooncalf Hair plus 2 eggs that'll be ready to hatch by 12:00 PM in-game, perfectly syncing with that 20-minute loop.
Coastal Vivarium: Standard-Timer Species (30-min breeds)
The Coastal Vivarium runs on a longer 30-minute timer, but it's practically hands-off once set up. You're working with Kneazle, Niffler, and Grindylow, all sharing the same 12-beast cap and 4-species limit.
Centralize everything: one feeder with 12 Moonstone berries plus a ball and springs in the middle hits all three species at once, which means happiness stays pinned at 100% for 30+ minutes. Position Kneazle huts on the sandy patches, the Niffler rock arch nearby, and Grindylow in the eastern shallows. Once it's running, you can literally forget about it.
Swamp & Snow Vivariums: High-Value Species
Now we're talking high-rollers. The Swamp and Snow Vivariums are where your real galleon-per-minute rates come from, but they need completely different approaches.
For the Swamp, pack in 5 Giant Purple Toads, 3 Hippogriffs, and 4 Jobberknolls - this trio hits that 20-minute cycle sweet spot while churning out expensive materials. Layout matters: plant central feeders on the mud island, perch Hippogriffs on the left-corner mini-cliff, drop Toads midway around the pond loop, and stick Jobberknolls on wall shelves to save floor space.
The Snow Vivarium is stricter - Thestral, Graphorn, Fwooper, and Phoenix only. And here's a heads-up: Unicorns hate Thestrals, so don't even think about mixing them. You'll need to banish Unicorns to the Meadow Vivarium if you want both species happy.
Breeding Rotation & Micro-Management Loop
This is where you turn decent income into insane profit. Every breeding cycle runs on a hard 30-minute timer, so start a real-world clock when you click that Breeding Pen signpost.
Always hit the Snow Vivarium first - those Graphorn Horns and Thestral Hair sell for 112 galleons each, so grab them before anything else. As soon as you spawn in, brush and feed every baby; this triggers a +20% material yield buff that stacks over time.
But the real pro move is chain breeding. The instant an offspring matures, release it immediately. Your parent beast becomes breedable again in just 6 minutes instead of waiting the full 30, which cuts your effective cooldown by 80%. You're now pulling materials almost five times faster than casual breeders.
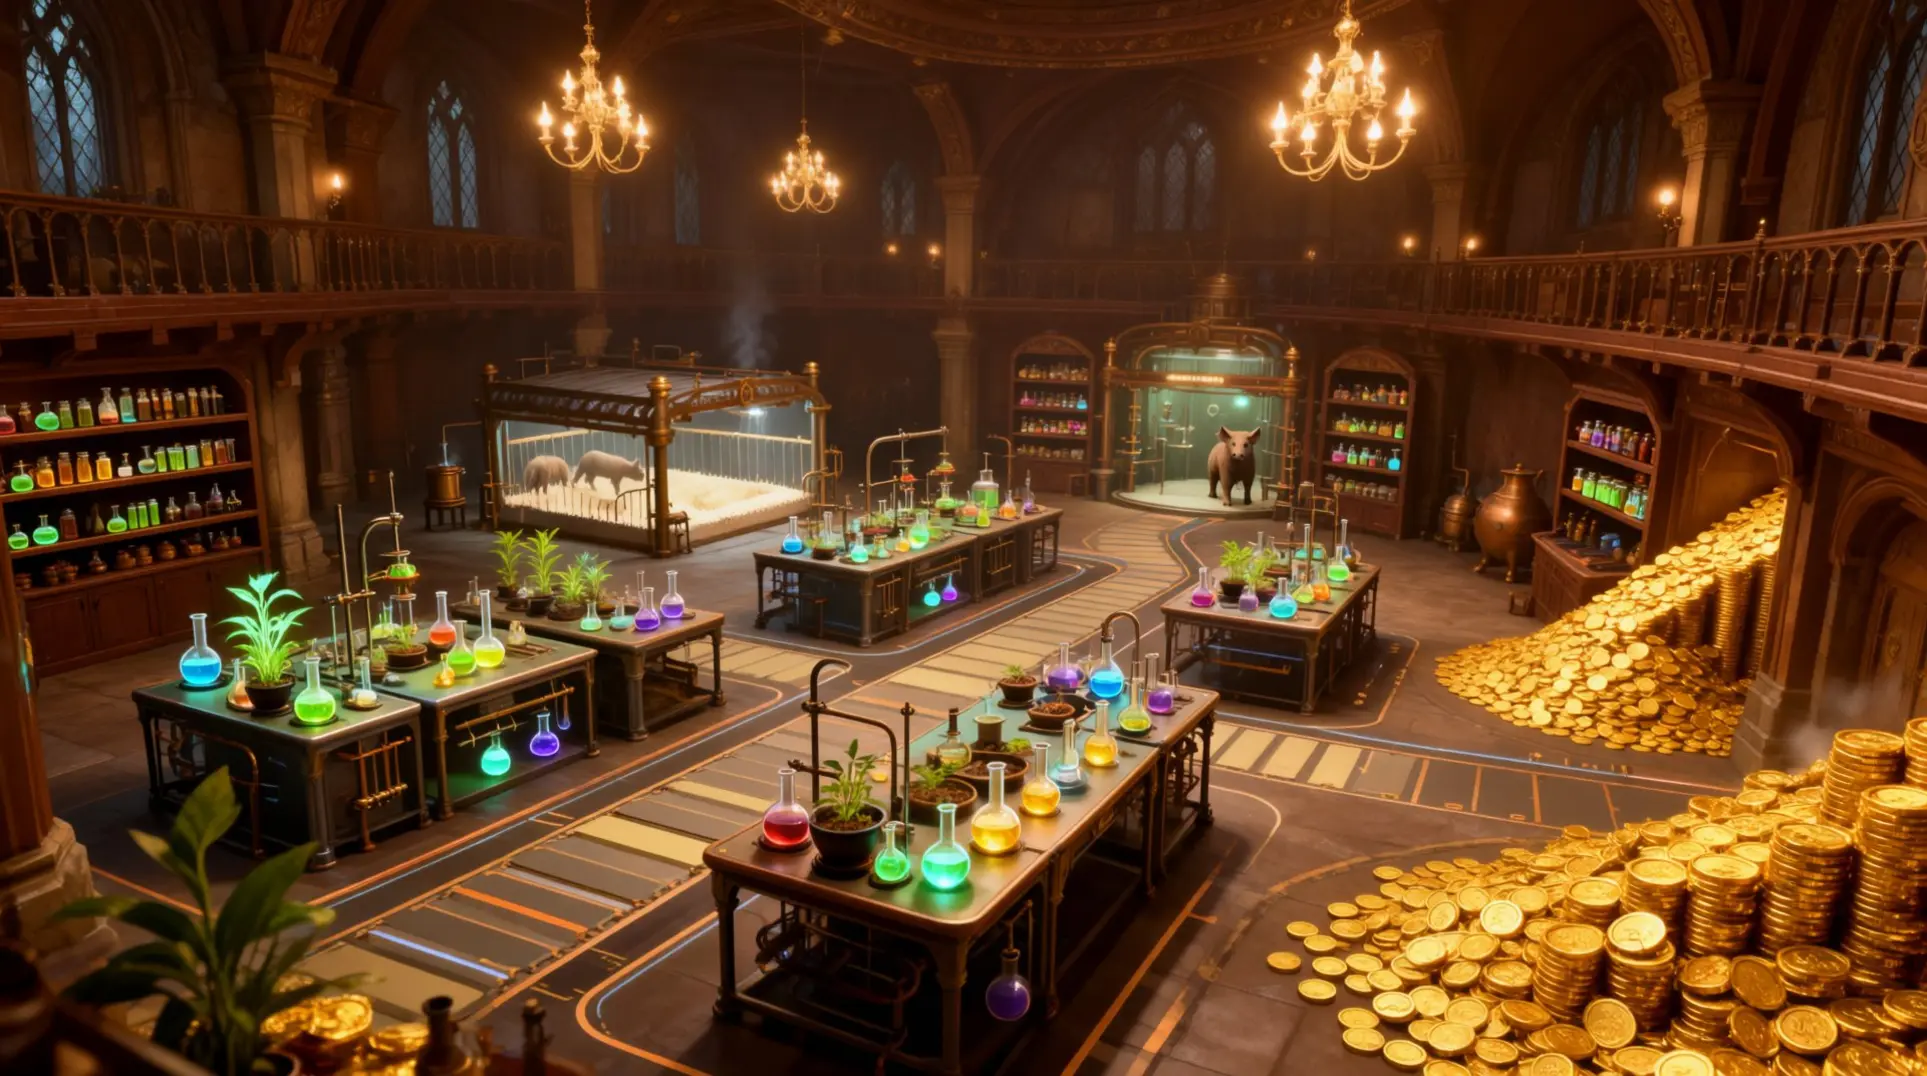
Utility Corner & Moonstone Economics
Identification Station & Material Chest Placement
Alright, first things first - your Room of Requirement needs a proper workflow. You want to plant the Desk of Description right at the entrance, specifically one step inside the doorway. This positioning is key because it guarantees you'll hit the station every single time you fast-travel back to your room, which means you'll never forget to identify that stack of mysterious gear cluttering your inventory.
Cluster your Material Chests directly next to the desk. We're talking immediate adjacency here - no running across the room. The goal is to create an instant deposit loop: identify, sort, stash, repeat. For the chests themselves, you'll want two distinct containers. Label a small chest 'Sell' and a larger one 'Keep'. This system isn't just for organization; it's critical for managing that brutal 40-gear soft cap. If you don't sort immediately, you risk hitting the cap and triggering nasty inventory bugs that can delete your new loot before you even see it.
Moonstone Farming Route & Cost Efficiency
Now for the real grind - moonstones. The Forbidden Forest route is your best bet, and it'll net you roughly 80 moonstones in a 10-minute loop. The trick is to hug the tree line consistently and cross the river at coordinates X:-4200, Z:2400 - this specific crossing forces the nodes to respawn reliably, so you're not wasting time.
Here's why that matters: a Material Refiner costs 15 moonstones to conjure, produces 1 moonstone per minute, and caps at 10 units per machine. With three refiners running, you're passively generating 30 moonstones every 10 minutes. But that single farm run? That's 16 full refiner cycles you don't have to wait for, saving you a solid 40 minutes of passive production.
Or think of it this way: at Tomes & Scrolls, 80 moonstones costs 2,400 galleons. So every ten-minute loop is either saving you nearly an hour of refiner time or pocketing you enough gold for some serious gear upgrades. Either way, that's value you can't ignore.
Advanced Optimization: Vertical Building & Zone Clustering
Build Tall Strategy: Platform Stacking
Don't let floor space be your bottleneck. The real trick is building up, not out - mezzanine-grade platforms can handle 125 psf, which means you can stack potion stations and potting tables two or even three levels high without spending extra Moonstone on floor panels. Same cost, triple the workspace.
You'll want to install those telescopic gutter posts too; they crank from 3.5 meters to 4.5 meters in under 30 minutes, letting you park high-DMi finishing shelves above low-DMi propagation trays. It's basically a two-story operation in one zone. For lighting, skip the ground units entirely and sling your vertical lift modules or rolling LED bars from magnetic C-hooks on the upper purlins. You're paying the same price, but now you've freed up floor space for a second cluster.
Micro-Zone Creation with Greenhouse Structures
Greenhouse shells aren't just for aesthetics - they're the ultimate clutter hiders. Every 4.0 or 4.8 meter bay is a snap-in module, so you can drop a two-level greenhouse over your whole setup and compartmentalize everything into micro-zones without drilling a single hole.
The real magic lies in those retractable thermal screens and fold-down insect-net walls. They let you split your main shell into bio-secure islands or warm/cool zones in about 30 seconds, and when you're not using a section, just drop the fabric and watch all that visual chaos disappear. Use color-coded floor LED strips and MZ-Cards to stay organized - red for high-humidity prop zones, blue for dry packing - so even when storage racks are crammed with ingredients, they're contained within their own visual bubble.
Plain Variant Swapping for Moonstone Savings
This is where patience pays off. Before you commit any Moonstone, preview everything in free wooden-floor placeholder mode and walk the paths yourself. You'll spot waste immediately - those glowing variants might look cool, but they don't brew a single extra potion.
Stick to the Vanilla-First Rule: when a conjured object has served its purpose, vanish it for a 100% Moonstone refund, then replace it with a plain stone or wood variant. No glow, no sparkle, but you'll save 8+ Moonstone per tile. For storage, grab House Shelves over the Crystal Beast Statue every time - they hide 24 potion bottles inside a decorative shell, giving you the same capacity for way less cost.
The Complete 90-Second Circuit
Alright, here's the money printer. A full lap through your Room of Requirement can clock in under ninety seconds if you hit every station in order, and the secret is letting the timers work for you.
First, you'll want to start in any Vivarium. Spam Feed then Brush on every glowing beast (you can have up to 12) which takes about ten seconds total. While you're there, grab the three free random plants that sprout in each biome - they respawn every 150 seconds real time, so you'll always have fresh mats waiting.
Next, head to the Herbology corner. Use the 'Seed Stack' spellcraft to instantly replant any emptied large pots with Fluxweed, Knotgrass, or Mallowsweet. The three small pots for Dittany, Mandrake, and Lacewing Flies finish in ten minutes real-time, which means they'll be ready by your next lap or two.
Now hit the Potions station. Collect whatever's finished - Focus, Invisibility, Thunderbrew, Felix Felicis - and immediately queue new batches. The smart move is one Thunderbrew (it sells for 300 Galleons) and two Invisibility potions (60 G each) since all five pots run simultaneously. That Thunderbrew is your big ticket item.
While the potions brew, open the Loom and upgrade any gear with a red lock icon. Burn through surplus beast ingredients - maybe eight to twelve mats per item - to bump green gear to blue, blue to purple. Each upgrade raises the sale price by roughly 80 Galleons, and you can skip animations to save precious seconds.
Finally, teleport to Hogsmeade and hit Brood & Peck. Sell every upgraded piece (a purple scarf goes for around 560 Galleons versus 320 unimproved) and dump any leftover beast materials. One clean lap pulls in 900 to 1,400 Galleons depending on your RNG gear drops.
Teleport back to the Room's secret door, jog five meters to the Vivarium portal, and you're ready to start again. The beasts are already sparkle-ready since their cooldown is only 60 seconds, which means you can bang out another full circuit before your potions even finish. It's a beautiful loop.
End-Game Material Usage & Profit Strategy
Once you hit late game, you'll be swimming in beast parts but you need to know what's actually worth keeping.
Graphorn Horns are the real MVP here. Each one sells for 120 Galleons at any vendor like Brood & Peck, but they're also used for high-tier Traits and level-III gear upgrades at the Loom. The den near Clagmar Coast respawns one new Graphorn per visit after you complete San Bakar's Trial, which means infinite horns if you're willing to trek.
But don't just waltz in there. Graphorns hit like a truck, so you'll want to brew 10 to 15 Edurus Potions beforehand. That 20-second rock-skin buff deflects spells and creature attacks, letting you ignore its charge damage while you capture it. The potion is cheap insurance for a 120 Galleon payout.
Then you've got Phoenix Feathers, and here's the deal. You can only capture one Phoenix per playthrough, but the good news is it generates one feather per in-game day-night cycle when placed in any Vivarium. You can't trade or gift these to other players, so hoard them for your own rare +III upgrades.
Here's the five-step loop that ties it all together: 1) Hit Clagmar Coast for a Graphorn horn (120G); 2) Pop Edurus before the fight; 3) Upgrade gear at the Loom; 4) Grab your Phoenix feather from the Vivarium (daily cycle); 5) Sell surplus horns, but hoard those feathers. That's how you turn end-game farming into actual progression instead of just vendor trash.
Efficiency in the Room of Requirement comes from understanding its two budgets and building smart, vertical layouts. By mastering the 90-second circuit and the end-game material loop, you turn passive systems into an active gold mine. Now, apply these principles to build your own optimized magical workshop.
More hogwarts-legacy-the-collected-edition Guides

Ultimate Hogwarts Legacy Farming Guide: Chinese Chomping Cabbage & Moonstone
Efficient farming guide for Chinese Chomping Cabbage and Moonstone in Hogwarts Legacy. Master combat and Room of Requirement customization with proven strategies.

Hogwarts Legacy Evil Ending: Complete Consequences and Sequel Theories
Explore the full impact of choosing the evil ending in Hogwarts Legacy, including immediate fallout, long-term gameplay, lore implications, and future sequel possibilities.

Hogwarts Legacy Editions: The Complete Guide to Standard, Deluxe, and Collector's
Debunking the 'Collected Edition' myth. A definitive breakdown of every Hogwarts Legacy version, their real value, and how to get all the content.
AI Tactical Companion
Consult with our specialized tactical engine for hogwarts-legacy-the-collected-edition to master the meta instantly.