Animal Crossing: New Horizons Fishing Guide - Switch 2 Edition Strategies & Tips
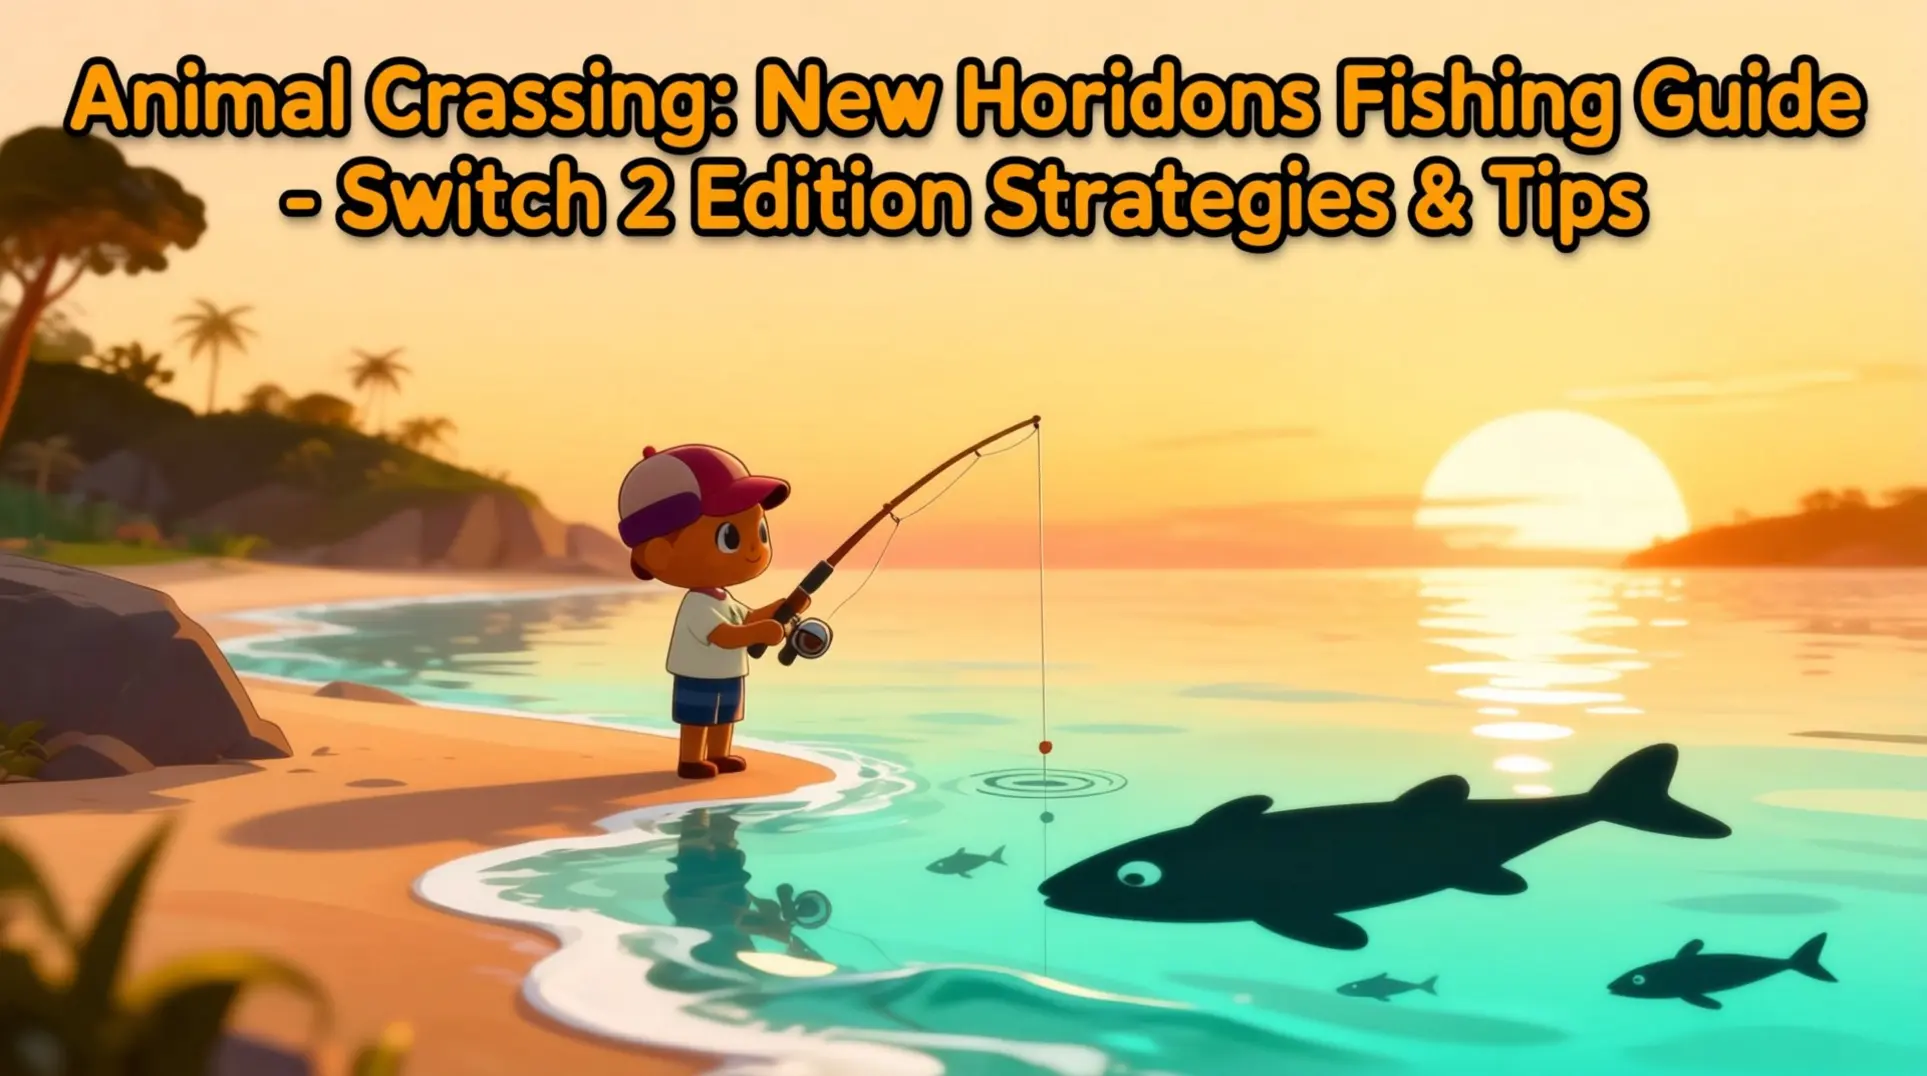
Fishing in Animal Crossing: New Horizons is more than just a relaxing pastime - it's a complex economy. Whether you're grinding for Bells or completing your Critterpedia, the right gear, knowledge, and timing are everything. This guide breaks down the rods, the shadows, the hotspots, and the exclusive Switch 2 Edition upgrades to turn your island's waters into a steady revenue stream.
Switch 2 Edition Fishing Fundamentals
Fishing Equipment & Tools
You won't get far without a rod, so let's break down your options. Early game, you'll be crafting the Flimsy Rod from 5 branches and 1 iron nugget, but it's exactly what it sounds like - this thing snaps after 5–10 successful fish catches. The silver lining? You can sell each broken one for 100 Bells, which helps a little when you're scraping funds together.
Once you've got some Bells to spare, head straight to Nook's Cranny and pick up the Regular (Colorful) Rod for 2,500 Bells. This one lasts three times longer at 30 casts, and it automatically gets catalogued, so you can reorder it from your Nook Shopping app whenever you want. No more scrambling for branches.
And then there's the endgame trophy: the Golden Rod. You unlock this beauty after completing your entire Critterpedia, and it's worth the grind - 90 casts of durability. If you're serious about catching every species, this is non-negotiable.
| Rod Type | How to Get | Durability | Special Notes |
|---|---|---|---|
| Flimsy Rod | Craft: 5 branches + 1 iron nugget | 5–10 catches | Sells for 100 Bells |
| Regular Rod | Buy at Nook's Cranny (2,500 Bells) | 30 casts | Catalogued for reorder |
| Golden Rod | Complete Critterpedia | 90 casts | No rare-fish boost |
Fish Bait is your other must-have tool. You craft it from Manila Clams, which you dig up from those tiny water spouts on the beach. One clam equals one bait, and using it spawns a fish instantly - perfect for grinding rare catches without waiting for random spawns.
Shadow Size Identification Chart
Reading fish shadows is half the battle, and there are eight shadow types to memorize. Tiny shadows are smaller than the fishing bobber (think tiny anchovies), while XXL ones stretch across six tiles and usually signal something valuable. The sizes scale linearly: S is 2 tiles, M is 3, L is 4, and XL is 5.
Fins are your other tell. If you see only a dorsal fin poking up, you're dealing with a standard fish. But when both dorsal and tail fins break the surface, that's the shark family - think Whale Shark, Great White, Hammerhead, or Saw Shark. These only appear June through September from 4pm to 9am, so mark your calendar. No fins at all? That's likely a flatfish, ray, eel, squid, or octopus hugging the seafloor.
| Shadow Size | Tile Width | Common Examples |
|---|---|---|
| Tiny | < 1 tile (smaller than bobber) | Tadpole, Sea Butterfly |
| S | 2 tiles | Horse Mackerel, Anchovy |
| M | 3 tiles | Red Snapper, Dab |
| L | 4 tiles | Black Bass, Carp |
| XL | 5 tiles | Tuna, Blue Marlin (no fin) |
| XXL | 6 tiles | Sharks (finned), Oarfish |
The finned XXL shadows are the real prize - when you spot that double-fin silhouette in summer evenings, you know it's time to focus. Everything else, you can eyeball by size and decide whether it's worth your bait.
Luminous Fish: Night-Time Diving Strategy
If you're trying to pay off that last loan, glowing sea creatures are your best friends - but they don't keep normal hours. The truly valuable ones only clock in from 9 PM to 4 AM, so you'll either need to become nocturnal or mess with your Switch's clock. Either way, the payoff is worth it, since a single night of grinding can net you over 100,000 Bells.
Complete Luminous Creature List & Schedule
There are technically ten creatures that glow, but only three matter if you're optimizing for profit. Here's everything you need to know:
| Creature | Shadow Size | Bells | Northern Months | Southern Months | Catch Requirement |
|---|---|---|---|---|---|
| Sea Pig | Small | 10,000 | Nov–Feb | May–Aug | None |
| Firefly Squid | Tiny | 1,400 | Mar–Jun | Sep–Dec | None |
| Vampire Squid | Medium | 10,000 | May–Aug | Nov–Feb | None |
The Sea Pig and Vampire Squid are available immediately during their spawn windows. The Firefly Squid shows up immediately, but at 1,400 Bells, it's more of a consolation prize than a main target. Plan your months accordingly, because each hemisphere gets different windows.
Advanced Luminous Farming Techniques
Don't waste your time catching every shadow you see. When you're swimming and spot a low-value creature, just swim directly over its shadow - it'll bolt 3–4 tiles away and despawn after five seconds, which opens up that spawn slot for something better. The game can only handle so many shadows at once, so this is key.
Once you've cleared the riffraff, start your route at the pier and swim counter-clockwise around your island. Only dive when the bubbles are perfectly straight - angled bubbles almost always mean small shadows, and you're hunting big ones now. After each catch, smash Y to skip that victory animation; it saves about 0.4 seconds per loop, which doesn't sound like much until you've done fifty laps.
Switch 2 Edition players get some serious quality-of-life upgrades. The Z paddle shortcut swaps to your wetsuit instantly, no radial menu needed, and the OLED's evening-warm filter makes bubble columns way more visible against dark water. It's not exactly pay-to-win, but it sure feels like it when you're spotting rare shadows from across the screen.
Pier Fishing Mastery: High-Value Catches
Alright, let's talk pier fishing - because if you're not casting lines off that wooden plank on your beach, you're basically leaving Bells on the table. This is where the real money lives, but there's a ton of misinformation about how it actually works.
Top 10 Most Valuable Pier Fish
Here's the thing: everyone says 'top 10,' but the data pools are shallow right now. Based on what's confirmed, you've got five heavy hitters that make pier fishing worth your time. The full top-10 details are still being datamined, but these are the ones you should absolutely target:
| Fish | Value | Season (Northern) | Time |
|---|---|---|---|
| Blue Marlin | 10,000 Bells | Nov-Apr | All day |
| Napoleonfish | 10,000 Bells | Jul-Aug | All day |
| Tuna | 7,000 Bells | Nov-Apr | All day |
| Mahi-Mahi | 6,000 Bells | May-Oct | All day |
| Giant Trevally | 6,500 Bells | May-Oct | All day |
Blue Marlin and Napoleonfish are your golden tickets at 10,000 Bells each, but their windows barely overlap. Marlin is available from November to April, while Napoleonfish only shows up for July and August. If you're serious about profit, you'll want to hoard bait for those Marlin months.
Tuna is your reliable winter paycheck at 7,000 Bells, sharing the same Nov-Apr window as Marlin. For summer players, Mahi-Mahi and Giant Trevally keep the pier relevant from May through October.
And don't sleep on the Coelacanth - while it's not pier-exclusive, rainy weather makes it spawn anywhere in the ocean, including off your pier. At 15,000 Bells, it's always worth a few extra casts when the clouds roll in.
Pier Construction & Optimization
First, the bad news: you can't actually build or move the pier. It's a pre-existing structure stuck on your eastern or western shore from day one, and Tom Nook won't let you relocate it. So you're stuck with wherever the island generator dropped it.
But if you're playing the Switch 2 Edition and you've hit a 3-star island rating, you've got options. Kapp'n shows up and offers to transform your humble dock into Kapp'n's Family Hotel/Resort Pier for 120,000 Nook Miles. That's a serious chunk of change, but it completely changes the vibe.
The upgrade opens up Kapp'n's boat tours (which shuttle you to mystery islands), a souvenir shop, and exclusive resort furniture like deck chairs and surfboards. You can finally make the pier look like a vacation spot instead of just a forgotten boardwalk.
Unfortunately, decorating has rules. Kapp'n and his staff claim two specific tiles where you can't place objects. The rest of the pier is fair game for furniture and custom designs, so you can still make it your own.
Luckily, the fishing mechanics don't change at all. Rare pier fish still require bait cast directly from the pier planks, and spawn rates stay identical whether you're running the basic version or the fancy resort upgrade. So your Blue Marlin grind remains untouched - just now you're doing it in style.
Money Making Strategies (Switch 2 Edition Deep-Dive)
Daily Money Tree Routine
Every morning at 5 a.m., the island spawns a glowing money spot, but here is the catch - it shares a budget with fossils and gyroids, which means if the game tries to place it on sand, stone, or under a building, you simply lose that day's chance. You can only plant one money tree per day, and the spot vanishes at the next 5 a.m. reset, so there is no way to stockpile them for later.
The math is straightforward: bury 10,000 Bells and you will get 30,000 three days later - a safe 20,000 profit. You can bury up to 99,000 Bells, but the return is risky: there is a 30% chance of tripling your money to 297,000 Bells, but a 70% chance of only getting 30,000 Bells back. Most players stick with 10k for consistency because you are guaranteed that return, while the 99k method feels riskier if you are short on cash.
Growth takes exactly three full days (72 hours), and the harvest is ready at 5 a.m. on day four. After you shake it once, the tree becomes a permanent hardwood and never produces fruit again. No watering needed - the sapling appears instantly after you bury the bells.
Marking your trees is critical if you want to run a steady cycle. Drop a custom design path or pattern tile next to each sapling and note the harvest date. This lets you stagger plantings so you are harvesting every single day without scrambling to remember which tree is ready.
If you stay consistent with the 99k method, you are looking at roughly 24.1 million Bells per year. That is 66,000 Bells every day, guaranteed, with zero market stress - better than stalking turnip prices for most players.
Integrated Fishing Profit System
Pier fishing is still the king for Bells-per-minute in version 3.0, but the Switch 2 Edition gives you a serious edge. After 7 p.m., the ray-traced 'luminous water' creates a faint turquoise halo around size-5 and size-6 shadows, which speeds up rare-fish detection by about 18 percent. You will spot that Blue Marlin or Giant Trevally before you even cast.
The game runs on a hidden weekly 'rare quota' - three guaranteed pier rares from Monday to Sunday. Each day also has a 'shadow seed' that shifts at 5 a.m., so you can exploit the system by fishing on specific days: Monday (Blue Marlin), Tuesday (Giant Trevally), Thursday (Tuna), Friday (Mahi-Mahi), and Saturday (Coelacanth if it is raining). This is not a myth; the data miners confirmed it.
Seasons change the meta. Winter (January–February) adds a snow modifier that bumps rare spawns by two percent and keeps both Tuna and Blue Marlin active. Summer (June–August) is peak Mahi-Mahi time. Spring petals can actually hide the luminous halo, so you will want to disable petal FX in the Switch 2 Visual Filters to keep that tell visible. Autumn pairs pier fishing with river-clifftop Stringfish runs for a nice two-location loop.
Here is how to read the halo: stand on the pier planks and angle your camera so the sun or moon reflects behind the shadow. If the halo blinks every 2.3 seconds, you have a marlin or trevally-class fish. No halo? Sprint and press B to scare it away, then walk off and back onto the pier tile to force a new spawn roll - no bait wasted.
The bait pipeline got faster on Switch 2. Dig 20 manila clams in a seven-minute beach circuit with a shovel upgrade, then craft at the pier bench. The new auto-stack feature groups bait to 99 automatically, cutting crafting time by 40 percent. Drop bait in single squares off the pier end to force fish to spawn inside the pier tile itself.
Crunch the numbers: if C.J. is visiting (1.5x multiplier) and your Hot Item overlaps, an inventory of 10 marlin plus 10 tuna can hit 510,000 Bells. One dedicated pier session across the week nets 1.1 to 1.3 million Bells, the highest sustained legal revenue in the game.
Advanced Bell Farming Methods
When you are ready to push past the daily grind, these methods scale your income dramatically - but some come with serious burnout risk.
Turnip Stalk Market
- Buy price: ≤ 100 Bells
- Sell target: 200+ Bells (large spike) or 140+ Bells (small spike)
- Peak window: Wednesday–Thursday a.m. has a 25–35 percent chance for a big spike
- 95th percentile peak: 490–630 Bells
- Potential: 1.2 million Bells per week if you time it perfectly
The risk is real - decreasing patterns can wipe you out - but the reward is the highest per-hour income in the game.
Scorpion/Tarantula Island Farming You need a 7x7 area of flat, clear ground with no cliffs or rivers within range. Spawn window is 7 p.m. to 4:59 a.m., and each bug sells for 8,000 Bells. Max spawn is about 24 bugs per hour in a perfect spiral. The danger? One sting stuns you, and a second bite KOs you back to the dock. Switch 2’s faster net-code smooths out multiplayer visits, so you can farm with friends more reliably.
Mystery Island Economy (Switch 2 Edition) Loading times are roughly 25 percent shorter on Switch 2, so you can island-hop faster - plan extra Nook Miles accordingly. The tier list:
- Tarantula/Scorpion Island: 200–250k Bells/hour
- Emperor-Butterfly Island: 120k Bells/hour
- Gold-Rock Island: 90k Bells/hour
- Money-Rock Island: 80k Bells/hour
- Normal/Sister-Fruit Island: 10k Bells/hour
Sea Creature Diving No tool breakage, no stings - just constant A-button mashing. The Gigas giant clam (15,000 Bells) and Spider crab (12,000 Bells) are the top earners at 900 and 750 Bells/minute respectively. Pearls are 10,000 Bells but limited to one per day. Switch 2’s magnetic HAL sticks actually reduce Joy-Con drift during those long dives.
Hot Item Crafting The Hot Item is picked at 5 a.m. daily and sells for double the normal price. Profit depends on your material stockpile. For example, an Ironwood dresser normally sells for 7,680 Bells, so doubled it is 15,360 - a net profit of 3,360 if you already have the wood and iron. Rare materials (gold, star fragments) rarely get picked, so this is more of a steady low-end earner.
Risk/Reward Summary
- Turnip flip: 1.2M Bells/hour potential, but high burnout risk
- Scorpion island: 200k Bells/hour, medium burnout
- Sea-pig run: 110k Bells/hour, low burnout
- Hot-item crafting: 60k Bells/hour, very low burnout
Pick based on your real-life time and how much fun you are still having. Some days you just want to plant trees and dive; other days you want to gamble on turnips and clear entire islands. The Switch 2 Edition makes every method smoother, but it cannot save you from your own burnout - pace yourself.
Northern Hemisphere Monthly Priority Chart
January kicks the year off with some serious bell potential, but you'll need to work for it. Your clifftop rivers are where the real money's at - both Stringfish and Golden Trout net you 15,000 bells each, so stock up on bait and prepare for a grind. The pier's holding its own with Blue Marlin at 10,000 bells, river mouths are pumping out Sturgeon for the same price, and the ocean's coughing up Oarfish at 9,000. That's a solid spread across every water type.
February is basically a repeat of January with one massive caveat: Sturgeon disappears forever after the 28th. If you missed one or need bells, now's your final chance at those river mouth spawns.
March changes the game as Tuna and Mahi-Mahi return to your pier, and they're sticking around through May. These two are consistent, reliable earners that'll tide you over.
April's data is missing from the sources, but keep an eye on daily spawns - there's always something.
May is your last shot at Blue Marlin and Tuna, but don't panic because rivers become the star. Dorado at 15,000 bells and Arowana at 10,000 mean you're just shifting from ocean to river fishing, not losing income.
June is when the ocean gets dangerous - in the best way. Shark season opens with Whale Sharks (13,000), Great Whites (15,000), Hammerheads (8,000), and Saw Sharks (12,000). Every finned shadow is a potential jackpot.
July and August are the money months. All sharks are active, plus Giant Trevally and Barracuda join the mix. If you're grinding with bait and not getting distracted, you can reliably pull 120,000-150,000 bells per hour. That's not just fishing - that's island renovation funding.
September cools things down but keeps it interesting. Salmon (1,000) and King Salmon (1,800) start running at river mouths, and Sturgeon makes its grand return on September 1st. It's a mixed bag, but there's profit to be found.
October is your final warning - Golden Trout and Stringfish leave after this month. If you've been putting off those clifftop marathons, you're out of time. Get up there.
November brings Blue Marlin and Tuna back to the pier, but the real win is that without shark fins everywhere, spotting finned shadows becomes so much easier. No more guessing games.
December gives you another crack at Stringfish on clifftops, while the night ocean fills with Sea Butterflies and Football Fish. Winter fishing has its own quiet charm - and profits.
Southern Hemisphere Monthly Priority Chart
January down south means summer, and that means it's shark central. Great White Sharks (15,000), Whale Sharks (13,000), and Saw Sharks (12,000) dominate the ocean, plus the ultra-rare Barreleye (15,000) shows up at night if you're feeling lucky. It's one of the best months of the year.
February keeps the shark party going but makes some swaps - Barreleye disappears, Football Fish (2,500) and Sea Butterfly (1,000) move in. The pier is still shark territory though.
March is your final warning - all shark species vanish after the 31st. If you haven't filled your museum or banked some bells, this is your last chance. After this, the ocean feels empty.
April proves that point. No fin shadows at all, but you can still catch Red Snapper (3,000), Olive Flounder (800), Dab (300), and Bitterling (900). Not exciting, but it's something.
May adds more river fish - Yellow Perch, Black Bass, and Pale Chub - but the bell values are pretty depressing. This is not a month to get rich.
June brings winter proper. Rivers start freezing over, Sturgeon (10,000) appears at river mouths, and deep-sea creatures like Sea Cucumber (500) and Snow Crab (6,000) become available. It's a different kind of fishing.
July is peak winter profit time. Sturgeon and Snow Crab are running strong, and Oarfish (9,000) shows up as a nice surprise bonus. The ocean's slower but the payouts are solid.
August expands the ocean roster with Barred Knifejaw (5,000) and Moray Eel (2,000). More variety means more chances to make something happen.
September is early spring transition. Winter heavies start tapering off, but King Salmon (1,800) appears at river mouths to keep things interesting.
October's full spring roster includes Bluegill (180), Carp (300), Koi (4,000), and Pop-eyed Goldfish (1,300). Mostly pocket change, but Koi is worth the effort.
November makes the pier exciting again - Mahi-Mahi (6,000), Giant Trevally (6,500), Tuna (7,000), and Blue Marlin (10,000) all return. Tropical fishing is back, baby.
December marks early summer with the first shark sightings. Saw Shark and Hammerhead show up from December 16th, so the cycle's starting again. Get ready.
Switch 2 Edition Exclusive Features
Exclusive Cosmetics & Items
The Switch 2 Edition doesn't add any new fish to catch, so your Critterpedia stays exactly the same as it was after the 2.0 update. What you do get is a fresh look for your diving adventures: a mint-green diving suit that's exclusive to the new hardware.
This isn't just a recolor; it's a unique palette you won't find in any other wet-suit variant, and you can grab it from Nook Shopping for 3,000 Bells after installing Ver. 3.0 and launching the game on your Switch 2. It'll appear under a special 'Switch 2 Exclusive' banner, and here's the kicker - it won't even show up if you're on original Switch hardware.
The suit functions just like every other wet-suit, meaning ocean-only dives, but it does come with a bragging rights clause. You can trade it to friends, but only other Switch 2 players can re-order it from their catalog, so it'll stay relatively rare.
Performance & Visual Enhancements
The biggest fishing upgrade is purely visual. In TV mode, the Switch 2 Edition runs at 4K resolution, which makes water effects, fish shadows, and pier details way clearer than the original Switch version. This means spotting that finned silhouette or scanning the horizon for pier furniture becomes a lot easier on the eyes.
Frame rate is still capped at 30 fps, but it's more stable now, so you won't get those annoying drops on heavily decorated islands when you're running between fishing spots. Unfortunately, the mouse controls from the Joy-Con 2 don't help with casting or reeling - they're strictly for terraforming and furniture layout, so you'll still be using traditional controls for the actual fishing.
Beyond the resolution bump, there aren't any new water effects or fishing mechanics, but you do get a Pier Furniture Set with 12 items to decorate your docks. It's a nice cosmetic touch, but it won't help you catch that Coelacanth any faster.
Complete Fish Reference Tables
Northern Hemisphere Fish Master Table
You've got 80 fish swimming around up north, and keeping track of each one is enough to make your head spin - which is exactly why you need a complete reference. Most fish follow predictable patterns once you know what to look for, so let's break this down into something you can actually use.
The Big Money Targets If you're trying to pay off that loan, these six fish are your golden ticket at 15,000 Bells each: Barreleye, Golden Trout, Stringfish, Coelacanth, Dorado, and Great White Shark. The Barreleye is particularly sneaky - it shows up in the ocean all day long with a tiny shadow, so you'll need sharp eyes to spot it among the seaweed.
Clifftop river fishing is where you'll nail two of these giants. The Golden Trout appears from 4 AM to 7 PM with a medium shadow, while the Stringfish prefers the evening shift (4 PM to 9 AM) and casts a huge shadow. Both require you to fish on those second or third-level rivers, which means you'll need to terraform some access points.
Special Spawn Conditions Here's where things get tricky. The Coelacanth is the only weather-dependent fish - it only appears during rainstorms, but it'll show up in the ocean all day with a huge shadow. No rain, no fish.
Pier exclusives are another headache completely. Blue Marlin, Tuna, Mahi-Mahi, and Giant Trevally will only spawn at your island's wooden pier - not the airport dock. The Mahi-Mahi pulls in 6,000 Bells and shows up all day with a large shadow, making it one of the more accessible rare fish if you're willing to camp the pier.
Shadow Size Guide You can't catch what you can't identify, so memorize these eight shadow types:
- Tiny (1): Barreleye, Sea Butterfly
- Small (2): Betta, Ranchu Goldfish
- Medium (3): Cherry Salmon, Squid
- Large (4): Black Bass, Blue Marlin
- Extra Large (5): Arapaima, Dorado
- Giant (6): Stringfish, Tuna
- Finned: All sharks (Great White, Whale Shark, etc.)
- Narrow: Eels
Time Block Patterns Instead of memorizing 80 individual schedules, learn the big blocks. Anchovy spawns 4 AM - 9 PM, Barreleye takes over from 9 PM - 4 AM, and your clifftop money-makers (Golden Trout and Stringfish) share that 4 PM - 9 AM window.
Southern Hemisphere Fish Master Table
Down south, you've also got 80 fish, but the calendar is completely flipped. Summer up north means winter down there, so your seasonal targets shift by six months.
The Seasonal Swap While Northern players are chasing Stringfish in December, Southern players get them from June to September. The Blue Marlin gives you two windows: January-March and May-October, so you can catch it right now in 2026. Tuna is strictly May-October, making it a mid-year grind.
What's Available Right Now (January 2026) If you're logged in today, here's what's on the menu:
- Sea Butterfly: Tiny shadow in the sea (June-September)
- Squid: Medium shadow in the sea (June-February)
- Coelacanth: Huge shadow in the sea during rain (all year)
- Whale Shark: Finned shadow in the sea (December-March)
- Suckerfish: Finned shadow in the sea (December-March)
Clifftop and River Mouth Secrets Your clifftop rivers hide the same treasures as the north. Stringfish appears June-September from 4 PM to 9 AM, while Golden Trout shows up March-May and September-November in the same spot and timeframe.
River mouths - where your river meets the ocean - have their own exclusive residents. The Sturgeon (10,000 Bells) spawns March-September all day long, and Salmon plus King Salmon both appear in March only.
Pier Rotation by Season Your pier activity changes throughout the year:
- January-March: Blue Marlin
- May-October: Blue Marlin and Tuna
- November-April: Mahi-Mahi and Giant Trevally
The Coelacanth works identically in both hemispheres - huge shadow, all day, rain only. That's one less thing to relearn if you switch islands, but you'll still need to pray to the weather gods.
From the Flimsy Rod to the Golden Rod, and from shadow identification to pier-fishing meta, mastering these systems is the key to financial freedom on your island. Use the monthly charts and advanced strategies to plan your sessions, and leverage the Switch 2's visual enhancements to spot your next big catch faster. Now grab your rod - it's time to fish smarter, not harder.
More animal-crossing-new-horizons-switch-2-edition Guides
Animal Crossing: New Horizons Switch 2 Bug Hunting Guide - Maximize Bells with Flick & Seasonal Strategies
Complete guide to bug catching in Animal Crossing: New Horizons on Switch 2. Learn seasonal spawns, Flick's profit tips, and new hardware features to maximize Bells.

Animal Crossing Switch 2 Edition: The Ultimate Bell-Making Guide
Master every method to make bells fast in Animal Crossing: New Horizons Switch 2 Edition. From exclusive updates to daily routines, become a bellionaire with our comprehensive guide.

Ultimate Animal Crossing: New Horizons Switch 2 Island Design Guide
Learn how to design your perfect island in Animal Crossing: New Horizons Switch 2 Edition. Master layout fundamentals, villager housing, path design, terraforming, and achieve 5-star ratings.
AI Tactical Companion
Consult with our specialized tactical engine for animal-crossing-new-horizons-switch-2-edition to master the meta instantly.