Mastering Pioneers of Pagonia: The Ultimate Guide to Logistics, Ratios, and Traffic
Introduction
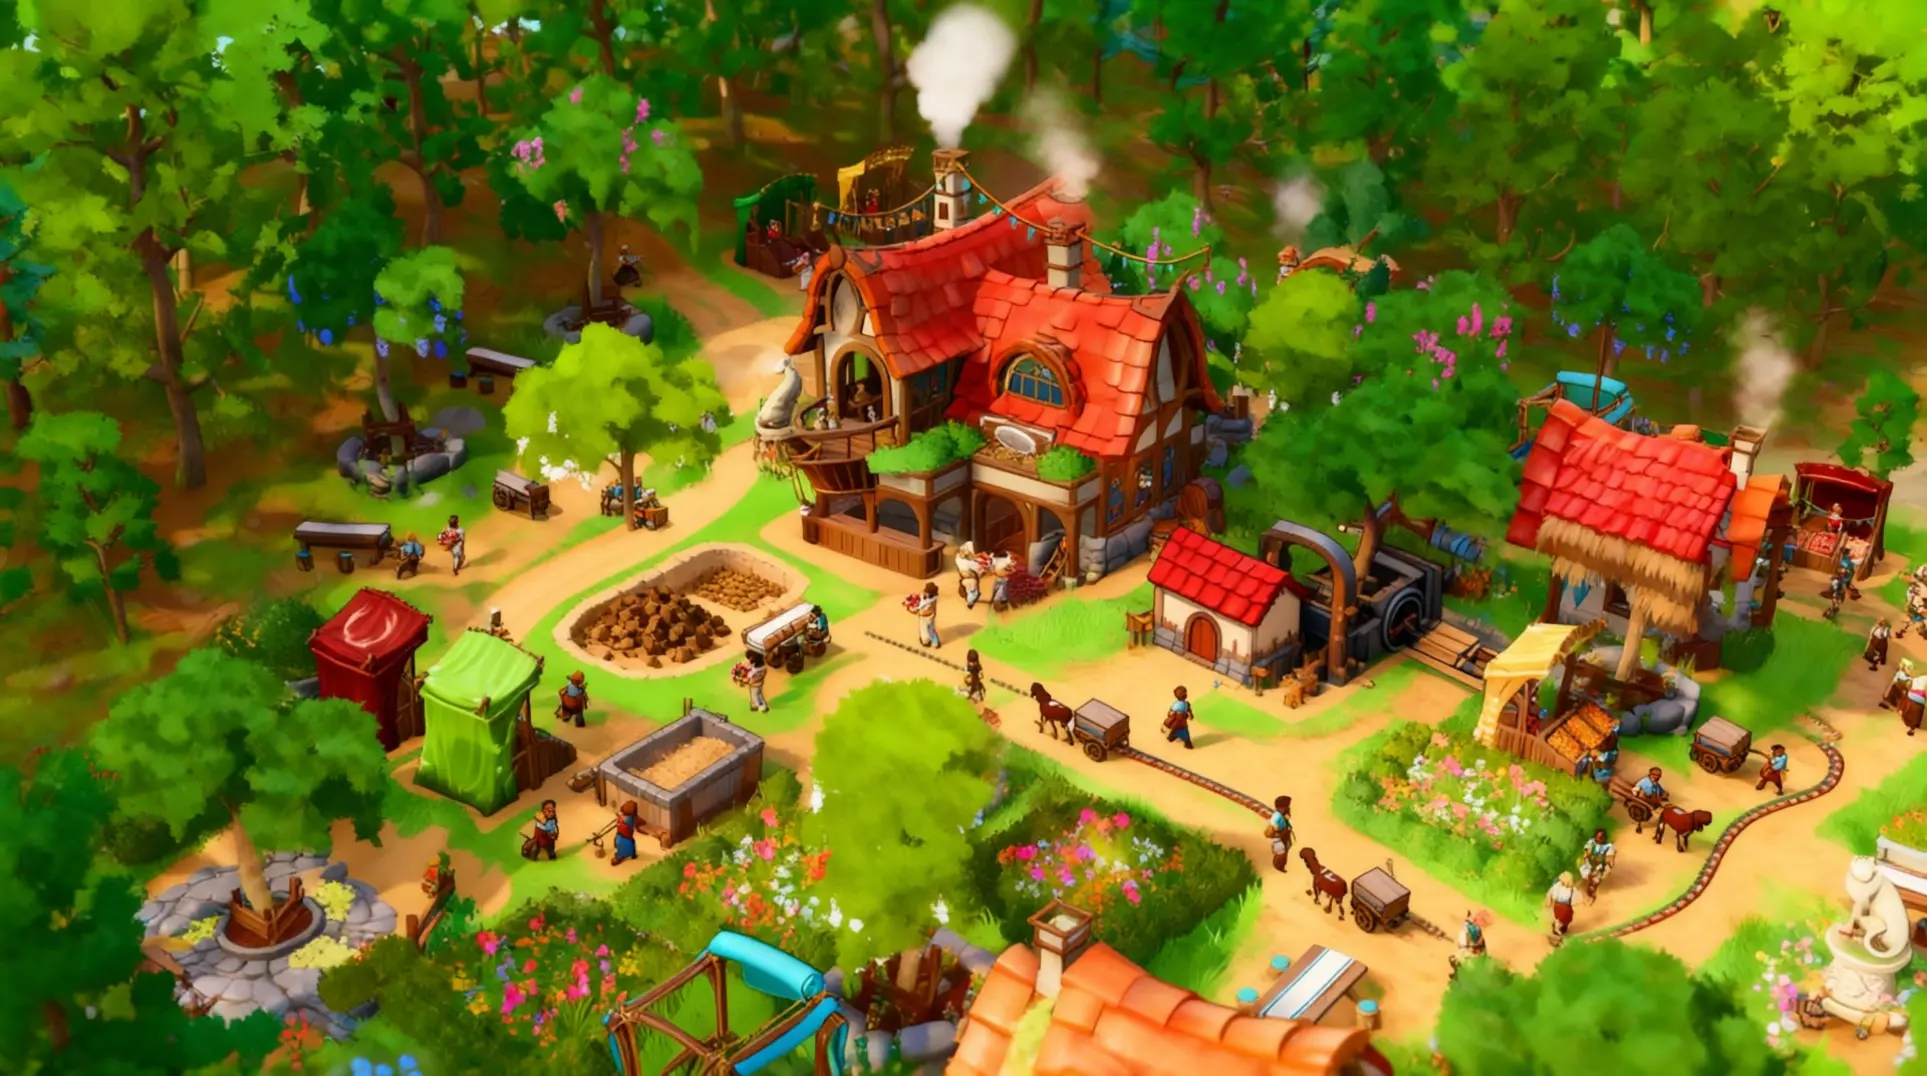
Mastering Pioneers of Pagonia means conquering its intricate production chains and punishing logistics. Every item is carried by hand, and distance is your greatest enemy. This guide breaks down the essential systems - from micro-hubs and optimal ratios to traffic management - to transform your settlement from a struggling outpost into a smoothly running machine.
Understanding Pioneers of Pagonia's Production Chain Ecosystem
The Physical Logistics Challenge: Why Distance Matters
Here's the thing about Pagonia that'll make or break your settlement: every single item has to be carried by hand. Your carriers move one item at a time, and they won't grab the next until that first one is delivered, which means walking distance becomes your single biggest bottleneck for throughput.
Carriers hoof it at 3.2 tiles per second on flat ground, but slopes and rough terrain slow them down proportionally. So you're not just thinking about raw distance; you're calculating round-trip time (RTT), and that RTT determines exactly how many carriers you need to keep a building humming at 100%. Here's where it gets nasty - if every carrier in town is busy, new settlers stop spawning, trade ships just sit there, and construction freezes completely. Your whole town stalls until someone finishes their delivery.
Luckily, you've got tools to fight this. Paved roads boost speed by 15%, and you should use them on any route where speed matters. Even better, build a ring-road with warehouses at the corners so nowhere inside is more than 15 tiles from storage. But the real game-changer? Micro-storages - those 2-slot stockpiles you can plop next to consumers. They'll slash your RTT and carrier requirements by more than half. Oh, and use the in-game path tool (hold right mouse on a flag and drag) to see actual walking time in real seconds. That number is your new best friend.
Production Chain Scale: 40 Buildings, 70+ Goods
Let's talk scope, because Pagonia doesn't mess around. We're looking at over 40 specialized production buildings processing more than 70 distinct goods, with chains that branch everywhere. This isn't just 'mine ore, make tools' - it's a sprawling web you'll need to untangle.
Your building roster breaks down into:
- Core housing (Venturers, Cottages, Residences)
- Resource extractors (quarries, lumber-camps, mines)
- Processors (saw-mills, smithies, bakeries)
- Infrastructure (warehouses, markets, roads)
- Civic buildings (schools, taverns, churches)
- And dedicated logistics structures
The flow goes like this: raw goods like wood, stone, clay, wheat, herbs, wool, ore, and fish feed into semi-finished stuff like planks, bricks, flour, iron bars, cloth, and leather. Those then become finished goods - tools, weapons, jewellery, furniture, cured meat, potions, even ships.
The 2x2 Micro-Hub: Your Secret Weapon for Traffic Control
What is a Micro-Hub and Why It's Essential
Think of a micro-hub as the smallest warehouse footprint you can build - a tiny 2x2 buffer you tuck directly inside your production clusters. Its entire job is to prevent your carriers from hiking across the map and to stop your main roads from turning into gridlocked nightmares.
Chain enough of these together and you're doing more than cutting haul times; you're decoupling entire supply chains so one bottleneck doesn't cascade into a total shutdown.
Core Micro-Hub Placement Rules
These four rules aren't suggestions - they're community-tested requirements that separate smooth operations from carrier chaos.
1. The Two-Tile Road Buffer Your warehouse only wakes up if the tile under its flagpole connects to your road network, so you have to leave a two-tile buffer in front of that flagpole for future upgrades. Skip this and you'll be demolishing buildings just to expand later.
2. The 15-Tile Collection Radius Auto-collection and delivery both work within a 15-tile walking radius measured from the nearest road tile to the item's location, not along roads. If your producers or consumers sit outside that bubble, the hub won't touch them.
3. The 18-Tile Separation Minimum Keep warehouse flagpoles at least 42 tiles apart unless you're sitting on a surplus of 30+ carriers. Crowd them closer and you get 'job ping-pong' - settlers bouncing between sites without actually moving goods, which is as maddening as it sounds.
Proven Micro-Hub Blueprints (Copy-Paste Ready)
These aren't theory; they're community-vetted layouts you can drop in right now.
Schnapps 12x12 Ring Picture a compact 12x12 ring: four Schnapps Distilleries in the corners, two Windmills and two Grain Farms along the edges, a Well in the center, and a single Warehouse-3 gate tucked on one side. That setup churns out 20 Schnapps per 70-second cycle, which breaks down to 0.29 per second per tile - rock-solid efficiency for the early game.
Ore-to-Iron Micro-Chain This is minimalism at its best: an Iron Mine, Smelter, and Coal Hut all strung along one short road segment. Feed it 1 coal and 1 iron ore, and you'll spit out 1 iron ingot roughly every 7 seconds. The footprint is only 3×4 road tiles, and you only have to pave 10 of them to keep your carriers sprinting.
Farm-Grid Cross For the 5x5 Farm-Grid Cross, every field sits within two tiles (taxicab distance) of the farm barn. The optimal counts you want are 11 fields for Corn, 17 each for Wheat and Flax, 18 for Pumpkin, and 22 for Cabbage. Stick to those numbers and you'll max out yield without wasting a single plot.
Optimal Production Chain Ratios and Layouts
Wood Processing: Lumberjack to Sawmill Ratios
The community's golden ratio for wood production is 1 sawmill for every 1 lumberjack hut - and this'll keep your carpenters humming at 85-95% workload, which is pretty much perfect.
A lumberjack on medium tree density cranks out a log every ~45 seconds, so that worker delivers roughly 1.3 logs per minute, while your sawmill chews through 1 log every ~26-30 seconds to make 1 plank. That's only about 2 logs per minute consumed, which means you're feeding the sawmill comfortably without burying it in logs.
Sawmill specs are worth knowing: it's a 3x3 footprint, costs 8 beams, and needs 3 workers (2 carpenters + 1 hauler), so that's the space you're working with.
But here's where it gets tricky: distance matters. If your forest stands are more than 35 tiles away, your lumberjacks spend more time walking than chopping, which torpedoes that ratio. In that case, you'll want to either drop to a 1:2 ratio or plop a second sawmill halfway to cut down on foot traffic.
The real pro move is watching your input piles. If the sawmill's log buffer hits zero, you need another lumberjack hut yesterday. But if you're sitting on more than 20 logs, you've got too much supply - either add a second sawmill or crank up your construction demand. That's how you adjust dynamically without overbuilding.
Agriculture: Farm-to-Field Maximums by Crop
Farms in Pagonia aren't just 'more fields = better.' There's a spoilage mechanic that'll wreck your harvest if you push too hard - crops will literally rot in the fields if your farmers can't harvest them within that tight maturity window. This means each crop type has a hard limit on how many fields one farmhouse can actually handle.
Here's what the community has tested to death:
| Crop | Max Fields | Best Soil Type |
|---|---|---|
| Corn | 11 | Sandy grassland |
| Wheat | 17 | Fertile dark-green grass |
| Flax | 17 | Dusty brown areas |
| Pumpkin | 18 | Regular light-green grass |
| Cabbage | 22 | Muddy wet ground |
Notice the pattern? Fast-growing corn hits the spoilage wall at just 11 fields, while slow-and-steady cabbage can stretch to 22. The soil types aren't suggestions either - planting wheat in sandy grass is just asking for disappointment.
If you're a perfectionist with perfect soil and short paths, you can push wheat or flax to about 20 fields, but 17 is the safe standard that won't leave you with dead crops and angry villagers.
Bread Production: The Complete 4-Step Chain
Bread is your reliable workhorse food - it won't make you rich, but it'll keep starvation at bay across large islands. The full chain is more complex than a 1:1:1:1 ratio. A single wheat farm can support multiple windmills and bakeries, while wells and firewood sources must be scaled to match the bakery's output.
The key here is the 1:1:1 input consumption rate: 1 flour + 1 water + 1 firewood produces 1 bread. Your bakery runs with 2 workers and a 6-slot queue, cranking out a theoretical max of 120 bread per hour when fully supplied.
Now, here's the bottleneck most people miss: firewood. A single lumberjack camp only produces about 3 bundles of firewood per minute, and you need that much to keep one bakery running at 100 loaves/hour. Don't cheap out on this - your bread chain will stall without enough wood.
The well, on the other hand, is generous. One worker with a 10-water queue pumps out 20 water per minute, which is enough for two non-stop bakeries. So you can run a 2-bakery operation off a single well, but you'll still need separate firewood sources for each bakery.
Road Hierarchy and Traffic Management Systems
The Three-Tier Road System: Trunk, Collector, Feeder
Here is the thing: Pioneers of Pagonia only gives you one buildable road type - a 2-cell-wide dirt path that auto-upgrades visually when buildings touch it. That sounds simple, but veteran players have reverse-engineered a full traffic hierarchy anyway.
They do this by faking width. For trunk arteries, you want 6-8 tile-wide esplanades so two carts can pass without fighting. Branch off those every 25-30 tiles with 3-4 tile collector roads, then cap everything with 2-tile dead-end feeder spurs that stay under 8 tiles long; anything longer and settlers start using them as cross-map shortcuts, which wrecks your whole flow.
You will want stone roads as soon as you can afford them. They bump movement speed by +65%, so two carts can actually pass each other. The magic moment is when your first stone quarry hits ~8 stone per minute and your marketplace is down; that surplus means you can pave without stalling construction elsewhere.
At any spot where three or more 4-tile roads meet, drop a 5×5 plaza. The game treats plazas as low-cost path-finding nodes, so settlers route around them like a roundabout instead of queuing at the junction.
Eliminating Micro-Choke Points and Deadlocks
Building entrances are not hard-coded to a specific edge; you can rotate buildings to face the desired direction. You can rotate with [R] until you see a tiny pennant flag - that tile is where all interaction happens. The problem is that entrance apron must stay clear of other building aprons. You can overlap the backs and sides all you want, but if two front aprons touch, the game won't let you place the second building.
You do not need a road touching that apron, but goods get dropped directly on it. If you forget to connect a road later, haulers create an implicit path that new construction can block, permanently locking the building. So always path roads to apron tiles, even if it feels redundant.
That is where plazas save you again. Place a 5×5 plaza at T-junctions and 4-way intersections; settlers flow around the edges instead of competing for the center tile. For high-traffic workshops, build a 3×3 plaza directly in front so carriers have space to queue without spilling onto the road.
Separate your flows at the source: put warehouses and markets directly on collector roads so carts merge onto trunk lines without crossing pedestrian footpaths. If you let foot traffic mix with carts, you get deadlocks where a single settler blocks a 10-cart convoy.
Carrier Population Management: The 10% Buffer Rule
Every specialist you train permanently consumes a carrier - once promoted, they never return to the logistics pool. So your entire economy depends on keeping enough idle pioneers around to actually move goods.
The hard rule: maintain at least 10% of your total population as free carriers. If you have 200 islanders, you need 20 carriers doing nothing but hauling. Drop below that threshold and production queues back up, newborns stop spawning, and you risk a soft-lock where nobody can build anything because everyone is stuck carrying a single log across the map.
The easiest way to track this is to rename one warehouse 'BUFFER' and set its minimum labour slider to 10% of your population. If that warehouse ever reports 'not enough carriers,' you've drifted below the safety line and need to act fast.
If you screw up and dip under 5%, here is the emergency fix: halt every workshop worker (this returns specialists to the carrier pool), import 10 pioneers for 150 gold each via the Ship, and overproduce comfort meals in at least two taverns until your buffer is restored. Do not train anyone new until you see that warehouse staffed again.
Early Food Quad: Supporting 80 Pioneers
The 7x7 food quad is your early-game workhorse, and it's stupidly efficient. Everything - four farms, their fields, two silos, and a market - sits inside a single influence square, which means you're hitting the practical limit of about 20 fields per farm before your farmers start standing around doing nothing.
The magic is in the silo placement: each one touches four field tiles, so your farmers never walk more than two tiles to dump grain. That's a 45% reduction in delivery distance, which translates to more planting and less hiking.
Here's the layout:
F F F F F F F F . . . . . F F . S . S . F F . . . . . F F F F F F F F . . . . . . . M . . . . . .
(F=Farm, S=Silo, M=Market, .=Field)
You'll want 12 wheat tiles, 8-9 corn, 12 pumpkin, and 16 cabbage to hit zero rot. Throw wheat on those dark-green fertile tiles for 4.2 food/min per farm. Corn loves sandy grassland, cabbage wants muddy wet ground, and pumpkins? They'll grow pretty much anywhere. The key is staying under that 20-tile ceiling per farm - go beyond that and your farmers will idle, and you'll watch your food production tank.
Iron-to-Tools Micro-Complex: 60 Tools/Day
Tool production is where most early towns stall, but this 5x3 footprint fixes that. Picture a straight east-west line: Coal Heap → Smelter → Shared Bar Stock → Toolmaker → Tool Chest.
The trick is distance. Keep your coal heap within six road tiles of the smelter - any farther and the hauling job spawns but nobody grabs it in time. Place small warehouses directly between your iron mine, smelter, and toolsmith so every building touches one road tile from its feeder. That cuts idle time to near zero.
Here's the math: the smelter chews through 1 ore + 1 coal and spits out an iron bar every 30 seconds. The toolmaker grabs 1 bar + 1 stick and makes a tool every 25-35 seconds. One fully fed pair cranks out roughly 3.0–3.3 hammers per minute, which is enough for 10-12 new builders before you need a second toolmaker.
One warning: queue a separate stick-maker (lumberyard → carpenter) and feed sticks into the toolmaker via a different road. If you don't, you'll hit the 'hammer vs. pliers deadlock' where your toolmaker chokes on its own supply chain.
Brick & Roof Tile Combo: Supporting 120 Pioneers
This 6x6 square is pure elegance. Four clay pits feed one brickyard, which feeds two roofers, and every building that touches clay, bricks, or tiles lives within one screen. The shared small warehouse accepts both bricks and roof tiles, which keeps your haulers focused and traffic internal.
Place the roofers directly opposite the clay pits so the brick rack sits between them - that shared storage cuts roofer idle time dramatically.
Under Update 13, the throughput is clean: you're pulling 24 clay/min into the brickyard, which converts to 2 bricks/min, and the roofers push out 2 tiles/min. That's enough to support 120 pioneers without breaking a sweat.
The best part? This block scales vertically. Copy-paste the same 6x6 layout one road away and you've doubled your output without redesigning a single path.
Troubleshooting and Maintenance Optimization
Diagnosing Common Production Chain Issues
Nothing kills your vibe like watching a perfectly good bread chain stall because the mill can't dump its flour. When you see 'Output Full' flashing, that's your building telling you its internal buffer - usually 2-4 stacks - is jammed with nowhere to go.
Here's how to unclog it:
| Problem | What's Actually Wrong | The Fix |
|---|---|---|
| Output Full | Internal buffer locked, no hauling order spawned | Click 'Move to Warehouse' on the jammed slot to force a cart in 10-15s |
| No Resource flashing | Upstream building too far or road is congested | Check buffer distance (should be ≤15 tiles) and clear any traffic jams |
| Idle Despite Resources | Pathfinding bug or stockpile facing wrong way | Verify road connections and rotate stockpiles so the arrow points toward the workshop |
That middle column is the key. The 'Move to Warehouse' button is your emergency lever - it yanks a cart from the void and clears the stack in about ten seconds flat. But if you're seeing this error more than once, you're already behind.
The real fix is a Small Storehouse within two road tiles of the producer, filtered to only accept the jammed good. That ultra-short hauler trip keeps the buffer clear before it ever fills up.
And here's the silent killer: if a guild hall or shop has even one tier of tool or food unchecked in its Requested column, it won't generate any orders at all. Your upstream buildings will just sit there, completely backed up, and you'll be tearing your hair out wondering why. Always double-check those tickboxes.
Monitoring and Adjusting Ratios in Real-Time
You can't fix what you can't see, and that's where the F2 overlay becomes your best friend. Tap it and the whole map lights up with a live stock snapshot: green tiles mean you're swimming in surplus, amber is the sweet spot, red is screaming shortage, and gray is just... empty.
Here's how to read it like a pro:
First, hold F2 and pan around. Those red tiles jump out immediately, and you don't even have to click a building to know which node went dry. Trace the chain backward from that red flag and you'll find the idle farm or the wagon that got stuck.
Next, park yourself on a key workshop and watch the input versus output piles. If your sawmill's input stack is bright green but the output planks stay amber, congratulations - you've got a carpentry workshop that's hungry and draining faster than you can cut. That's your signal to drop another sawmill. The rule of thumb: when input stays green for two full days while output flickers red, you're due for an upgrade.
The overlay does have a catch. Once your settlement punches past 2,000 population, the Unity engine starts huffing and the overlay can lag 3-5 seconds behind reality. You'll think you're short on bread when really the game just hasn't caught up. Drop the speed to 0.5× and give it a moment to breathe - this stops the false alarms.
The Pause & Sweep Method for Emergency Unclogging
Sometimes your whole settlement just... freezes. Pioneers stand around stepping on each other's toes, carts are stuck, and nothing moves. This is when you bring out the pause & sweep.
Here's the one-minute unclog:
- Hit Space to freeze the simulation cold. Nothing moves, nothing collides.
- Set every warehouse to 'Accept Everything' in one sweep. This tells the game 'just take it all, we'll sort later.'
- Count to ten, then re-enable your filters one by one, starting with the most critical goods. The game reassigns every stuck item to the nearest valid destination, and carts start moving again.
- Unpause. The logjam should melt within seconds.
If you're still seeing gridlock after that, you've got a deeper pathfinding knot. While still paused, click any blocked pioneer and hit 'Send back to headquarters' or 'Drop cargo.' The game instantly reassigns that job to the closest free settler, redistributing the load.
For really stubborn traffic, there's a micro-step trick: pop the game to triple-speed, let it run for exactly one second, then mash Space again. Watch how the pioneers shuffle, and if a new queue forms, repeat the sweep. It's tedious, but it works.
One last tip: before you start the sweep, build a 2-tile 'passing lane' right next to the problem building. After the release, pioneers naturally flow into that gap and keep things moving.
Conclusion
Success in Pagonia hinges on efficient logistics and precise production ratios. By implementing micro-hubs, adhering to the 10% carrier buffer rule, and using the F2 overlay for real-time monitoring, you can prevent crippling bottlenecks. Remember, a well-planned road hierarchy and proactive troubleshooting are the keys to keeping your pioneers productive and your settlement thriving.
More pioneers-of-pagonia Guides
The Ultimate Guide to Trade in Pioneers of Pagonia: Mastering Logistics, Diplomacy, and Empire Building
A comprehensive guide covering everything from basic trade mechanics to advanced multi-island strategies in Pioneers of Pagonia. Learn how to optimize logistics, manage factions, and build a profitable empire.

Mastering Tribe Diplomacy in Pioneers of Pagonia: The Complete Guide
A comprehensive guide to mastering tribe diplomacy in Pioneers of Pagonia, covering trust meters, quests, alliances, and late-game strategies.
Pioneers of Pagonia: Complete Guide to Lore, Factions, and Gameplay
A comprehensive guide to Pioneers of Pagonia, covering the Great Calamity, factions, the Tower of Visions, artifacts, campaign acts, and strategies for survival and rebuilding.
AI Tactical Companion
Consult with our specialized tactical engine for pioneers-of-pagonia to master the meta instantly.