Ultimate Guide to Boss Fights in Ori and the Will of the Wisps
Boss fights in Ori and the Will of the Wisps are less about brute force and more about precise preparation. The right shards, mastered abilities, and a clear strategy for each encounter are what separate victory from a frustrating reload. This guide breaks down every major boss, from the first tutorial to the final gauntlet, giving you the exact tools and tactics you need to conquer them all.
Essential Pre-Boss Preparation
Optimal Spirit Shard Loadouts for Different Boss Types
Your Spirit Shard setup isn't just about stats - it's about matching your build to the fight's demands. For aerial nightmares like Shriek, Triple Jump is basically mandatory since it extends your aerial reposition and gives you more invincibility frames, which you’ll need to maintain proper positioning for damage windows. Ultra Sticky is another must-have for that fight, as it lets you cling to walls indefinitely and completely removes the time pressure from her vertical final phase. If you're running a parry-focused build, Deflect widens your parry window and fires back 200-damage counters, which is clutch against her projectile spam.
When you're facing stationary targets like Kwolok, the game changes completely. Splinter transforms your Spirit Arc into a close-range shotgun that can triple-hit immobile bosses, and the damage is absolutely bonkers. Stack that with Reckless for +35% damage - that's your top burst shard, and speedrunners consider it mandatory for phase-skip strategies on Hard mode. If you're running an energy-heavy build, Spirit Surge adds another +20% spirit damage that stacks multiplicatively with Reckless, so you're hitting even harder.
For endurance fights where you're in for the long haul, survival becomes the priority. Resilience reduces damage taken by 25%, which math-wise gives you about 33% more effective HP - this is what gets you through Shriek's triple-phase slog. Overflow is your 'oh crap' button, automatically healing you to 15% health every 60 seconds, essentially a free potion on cooldown. You can skip the glass cannon shards on Hard mode, but don't skip these.
Essential Abilities to Master Before Boss Fights
Raw stats won't save you if your movement's clunky. These techniques are what separate clean runs from controller-throwing sessions.
Bash-Cancel for Extra Height: You've probably used Bash for projectiles, but canceling it's a whole different beast. Release and re-press Bash within two frames, and you can double-bash off the same target for extra height while conserving that precious projectile. It takes practice, but once you nail the timing, you'll wonder how you lived without it.
Grapple-Dash-Jump Momentum: This is your bread-and-butter for covering distance. Grapple toward something, then dash at the end of the arc and immediately double-jump within six frames. Done right, you get 40% more distance, and the momentum carries you through boss arenas in ways that feel almost broken. Charge Dash is worth mentioning here too - spending one energy gives you locked enemy impact and 50% more momentum than a normal dash, which is essential for Shriek's aerial phases.
Sentry Jump for Sequence Breaking: Here's a weird one. Press Sentry and Up-Slash on the exact same frame while grounded, and you get a triple-bounce that you can cancel directly into a Grapple-Dash. Speedrunners use this for arena skips, but even in normal play, it's a massive mobility tool once you get the one-frame timing down.
No-Sink Swim for Water Fights: Kwolok's fight has water sections where the sink animation will get you hit. The fix? Dash just above the water surface and you'll avoid sinking entirely. It's a small tech, but it'll save your run when you're trying to reposition during his water projectiles.
Advanced Tech for the Brave: Corner Boost is niche but powerful - touch the bottom pixel of a curved wall and you'll preserve your dash velocity for sequence breaks. If you're in the sand worm tunnels, the Sand-Ball Grapple-Dash (holding Up + Dash during Grapple pull) lets you skip ground contact entirely. These aren't essential for your first clear, but they're what you'll need for no-hit or speed runs.
Early Game Bosses (Story Progression 1-3)
Your first few major hurdles in Will of the Wisps aren't your typical 'stand in an arena and trade blows' type fights. They mix chase sequences with pattern recognition, and honestly, they're pretty good at teaching you the movement mechanics you'll lean on for the rest of the game.
Howl: The Combat Tutorial Boss
Howl's the big bad wolf you meet in Inkwater Marsh, and he's basically a crash course in parrying. The fight kicks off right after you grab the torch, which is perfect since he's terrified of fire and light.
Phase 1 is pure chase - you can't hurt him yet. Just focus on dashing between platforms and jumping to each ledge. Don't waste energy trying to attack; there's no way to damage him during this part.
Once you're in the actual arena, Phase 2 begins. This is where you learn his two main moves:
- Lunge Bite: When his jaws open and you see that red spark flash, you've got a 10-frame window to parry. Nail it and he'll be stunned for 1.3 seconds.
- Overhead Claw: This one's trickier with only 8 frames. Watch for his paw to reach its highest point, then parry just before the swipe starts forward.
The safest way to deal damage is hanging on that higher boulder to the right. Drop down, smack his snout with the torch twice, then retreat back up. Rinse and repeat.
Phase 3 triggers around 30% health when he howls and leaps back to the left wall. This gives you free hits, so take advantage while he's recovering.
Phase 4 adds a double-claw attack - parry the first claw, then immediately hop to avoid the second. You only need to get him to about half health to finish the fight, not zero, which is a nice relief.
Hornet Queen: The Boss That Doesn't Exist
Here's something weird - there's no Hornet Queen in Will of the Wisps. I know some guides mention her, but the database shows zero records. The game has aerial combat sections and flying enemies, but this specific boss simply doesn't exist. Don't waste time looking for a fight that isn't there.
Wellspring Core: The Water Wheel Escape
This isn't a boss with a health bar, but that mill-wheel chase at the end of the Wellspring will kill you just as dead if you screw up. Here's how to survive it.
Prep Work: First, you must clean the water by finishing the side rooms before turning the main valve. Skip this step and the wheel section floods with instant-kill purple sludge. Not fun. I'd recommend equipping Triple Jump, Bash, and either Launch or Spirit Smash before you start.
The Grinder Tunnel: A spiked log drops at a 45-degree angle. As soon as you see it falling, dash-jump and bash off it to reach the hanging lantern. The timing's tight but completely doable.
Vertical Shaft Skip: Stick to the left wall and jump up using wall-grab, then bash off water bubbles. This lets you skip the middle cog entirely, which saves precious seconds.
Crusher Corridor: Trigger the first column, retreat just a half-step, then dash under as it rises. For the second column, there's a secret hole in the ceiling - use Launch to go straight up and bypass the whole thing.
Final Ramp: Whatever you do, don't ground-dash here. Chain your triple jump, bash off the spawning bat, then glide to skip the last two collapsing platforms.
One last thing - there's a nasty despawn glitch. If you die after the crusher corridor, sometimes the wheel just vanishes on respawn. If that happens, quit to main menu and continue; that usually fixes it.
Mid-Game Bosses & Major Encounters
Mora: The Spider Matriarch in Darkness
Mora’s the first boss that’ll make you hate the dark. You’ll find her deep in Mouldwood Depths, and she’s got this nasty trick where she kills the lights halfway through the fight. Before you even drop in, you’ll want Sticky on your walls and Flash ready to flex—that portable light source is literally life or death here. Grab Burst or Spirit Edge too, since platforms start vanishing and you’ll need solid aerial control.
The Light Phase (100%–50% HP)
While the arena’s still bright, Mora sticks to the ceiling and walls, which means you’ll be chasing her around the room. The glowing sacs in the middle are your best friends here—they pump out safe zones of light. When she gets close, bash one of those sacs straight at her face, and her head will pop open for damage. At 75% health, she’ll shatter one sac and start spawning mini-spiders, so you’ll want to keep the other sac alive as an emergency pit stop while you clear the adds.
The Darkness Phase (50%–0% HP)
This is where she gets mean. The final sac breaks, and the arena plunges into pitch black except for a few scattered light flowers. You must stand under a flower or keep Flash active—otherwise, the corruption fog will insta-kill you. At 25% health, even those flowers start dying, leaving only your Flash ability to see. Ignore the spiderlings now and just unload everything you’ve got: charged slashes, rapid arrows, whatever you’ve got left in the tank.
Kwolok: Corrupted Guardian Showdown
Kwolok’s a giant toad in Luma Pools, and this fight turns into a swimming lesson real fast. The arena floods at 66% HP, which changes everything from how you dodge to where you can actually hit him.
Phase 1 (100%–66% HP): Dry Land
Stay at mid-range and bait out his tongue sweeps or ground-pounds. After he slams the ground, the bulb on his back becomes vulnerable, so dash in for a few hits. It’s pretty straightforward until the water starts rising.
Phase 2 (66%–33% HP): The Flood
Now you’re swimming, and Kwolok starts spitting homing globs that’ll track you across the screen. You can break these with Spirit Arc or use them for extra air-time with Bash. The trick is swimming in a tight U-shape underneath him—this out-paces the globs and keeps you safe. When he submerges, strike the sac underneath for bonus damage, or Bash-sling off a glob to close the gap.
Phase 3 (33%–0% HP): Desperation
He spits two globs at once now, and the jet-spouts get faster. Keep those U-loops tight and save at least one energy cell for emergency heals, because this phase gets chaotic. The kill window is tiny, but if you stay patient and keep the pressure on, he’ll go down.
Mandatory Chase Sequences (Sand Worm, Avalanche, Mouldwood Escape)
These aren’t traditional bosses, but they’ll kill you just as often. Each chase has its own rhythm, and most guides completely skip the frame data that separates a clean escape from a reload.
Sand Worm (Windtorn Ruins)
When the cutscene kicks in, hold Dash—don’t mash it. You’ll want to hit that first vine at a 45° angle with a Dash-Bash for maximum speed. The worm tracks you at roughly 1.3 tiles behind if you burrow at 180 bpm, so keep that rhythm steady. Pro tip: after the second mural, reload from the pause menu not the banner checkpoint. This gives you a 2.3-second head start on the worm, which is huge.
Avalanche (Luma Pools)
The water rises in 64-pixel steps every 90 frames, so timing your gate entries matters. Aim to hit each gate on frame 89, and the next rising step will actually push you up instead of drowning you. For the micro-route: short-hop the first coral launcher to skip a 12-frame slide, then Bash-skip the kelp swing four frames before the blue flash. It’s tight, but it saves lives.
Mouldwood Depths Blackout Dash
This one’s about light manipulation. Brush a light petal mid-air, then Dash-turn away on the same frame. This stores the 3.0-second light reset for 0.45 seconds, letting you cross dark gaps without the lantern. It’s a frame-perfect trick, but once you nail it, you’ll skip entire sections of that nightmare chase.
Global Chase Rules
All three chases share the same kill plane logic: it’s tied to the right edge of the camera. Keep Ori at least 58% of the screen width from the left edge, and you’ll have a 0.7-second reaction cushion. Also, Dash has a 6-frame input queue, so you can buffer it before you actually need it—super handy for those split-second dodges.
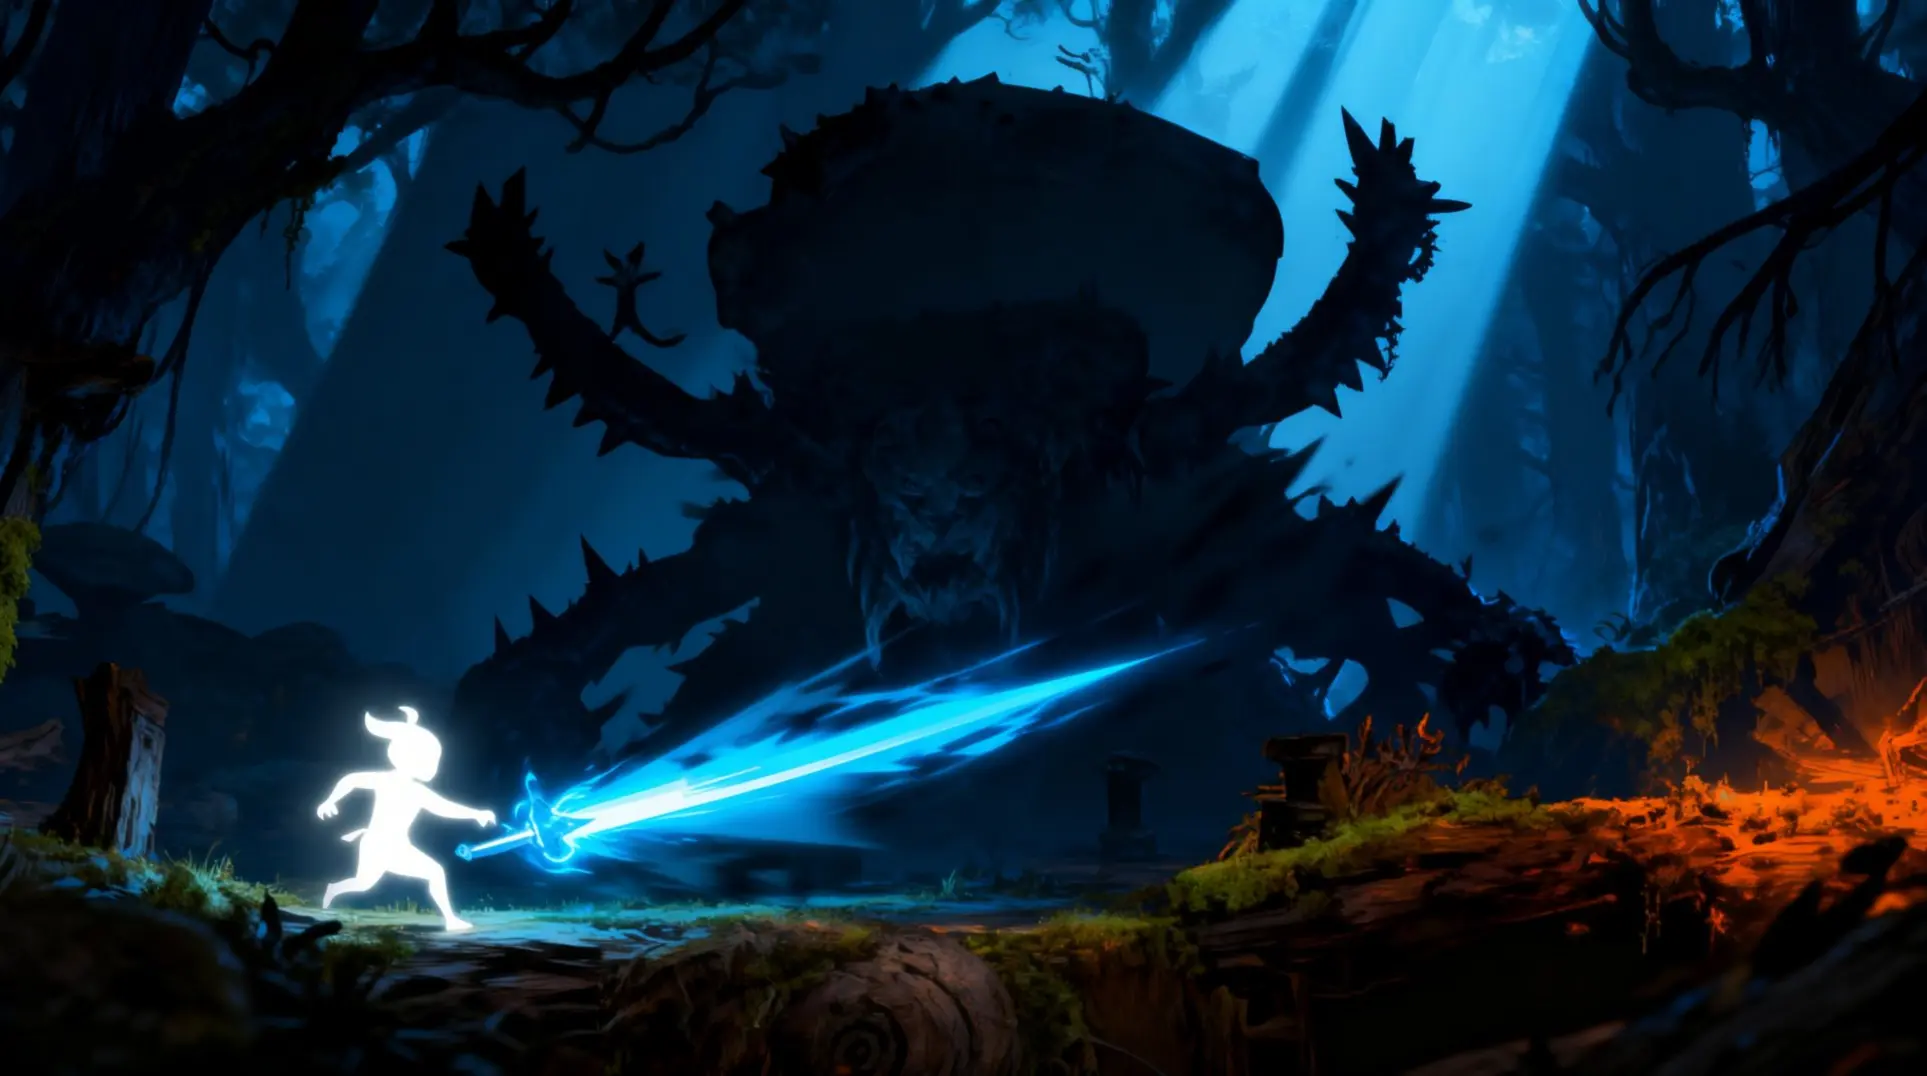
Shriek: The Three-Phase Final Confrontation
Shriek is your final hurdle, and she’s not messing around—this fight stretches across three distinct phases, each demanding a different mindset.
Phase 1 kicks off in the Silent Woods, and it’s deceptively simple. Shriek cycles through a low swoop (watch for the ground cue), a landing shockwave, a directional screech, and projectiles you can actually bash back at her. You’ll need to chip her down to roughly 25% health, which triggers a scripted ground collapse, so don’t get too comfortable.
Then comes the free-fall chase sequence, and this is where things get spicy. You’re plummeting through a vertical wind tunnel, grappling and gliding to catch a fluttering red tarp. Miss that tarp and the screen-scroll will kill you instantly, so stay sharp.
Phase 2 shifts to the Windtorn Ruins with a new arena and fresh attacks. She’ll rain down projectiles you should avoid—don’t try to bash these—and adds a diagonal swoop with a clear black wind pattern cue, so keep your eyes up and dash through the gaps.
Phase 3 is the real nightmare. The platform disappears entirely, which means you’ll be using her rising projectiles just to stay airborne. Shriek unleashes everything from the previous phases, plus arena-splitting slams that fracture the ground into four floating islands. Here’s the key: the right-most island is always the safest bet. When you see her hover top-center with a low-pitch screech, that’s your signal to sprint far right—she’s about to charge. After each slam, she’s stunned for about two seconds, giving you a perfect burst window for high-damage attacks like Spirit Smash with Reckless and Overcharge shards.
In the final 10%, Shriek hits desperation mode and doubles her meteor frequency. You’ll need to bash off those falling meteors to remain airborne and chain your attacks. It’s chaotic, but you’ve got this.
Recommended Build:
Shards: Spirit Smash, Reckless, Overcharge (burst damage); Spirit Edge (faster bash-cancels); Light Burst (chip damage)
Wisps: Lifeforce and Resilience for extra forgiveness
Optional Mini-Bosses (Most Guides Miss These)
If you’re gunning for 100% completion, you’ll need to hunt down these three hidden mini-bosses that most walkthroughs completely ignore.
Gorlek Miner Duo
Tucked away in a hidden mine tunnel in the Windswept Wastes, you’ll need the Burrow upgrade to break through a stone door. You’ll face two miners: one melee with a pick-axe and one ranged with seismic blasts. Kill the ranged miner first—you don’t want those blasts messing up your dodge rhythm.
Rewards: Gorlek Ore x2, 1,500 Spirit Light, and the Sand-Worn Hammer cosmetic.
Stone Sentinel
Head northeast of the sand-funnel in Windswept Wastes and look for a half-collapsed Gorlek statue. Stand on the pressure plate and charge your Flash ability to summon this thing. It’s completely immune to arrows, so you’ll need charged Spirit Arc or direct melee hits to damage its core. At 50% health, it summons two sand-wraith adds that drop health orbs when killed. Watch for its erupting ring of rocks when it burrows.
Rewards: Resilience spirit shard (+25% defense while airborne), Keystone x1, and 2,000 Spirit Light.
Windswept Wastes Guardian (Desert Watcher)
This one is highly missable. From the Stone Sentinel arena, grapple up to a flower in the ceiling, dash across three lanterns to reach a camouflaged ledge, then strike the owl idol three times. The Guardian fires tracking sand discs that are weak to Bash. At 75%, 50%, and 25% HP, it becomes invulnerable and spawns a sandstorm—just stand in the glowing safe circles to avoid rapid damage.
Rewards: Last Stand spirit shard (slow-motion at 1 HP), Exquisite Gem x1 (for Grom’s “Ancestral Home” quest), 3,000 Spirit Light, and the Wastes Wanderer map stamp.
Radiant Escalation: The Ultimate Boss Gauntlet
So you've been hoarding Dream Essence, huh? Well, once you hit 1,800 total—across your entire save, not just what you're carrying—a hidden door cracks open in the Silent Woods Spirit Well room. That's your invitation to Radiant Escalation, a five-wave boss rush that doesn't mess around.
The lineup is fixed, which means you can't cherry-pick easy fights. First up is Hornet (yep, that rematch), then Mora, followed by Kwolok, and finally two back-to-back phases of Shriek that culminate in a surprise sixth encounter: Radiant Shriek. No breaks, no mercy.
Each fight demands a different rhythm. Against Hornet, you'll want to bait that overhead lunge and bash the spike right back into her face—it's the fastest way to break her posture. Mora's web spray is a nightmare, but Launch gives you just enough height to float over it, and her back bulb is vulnerable to Spirit Smash if you time your descent right. Kwolok's acid blobs are actually your best friend; hug the right ledge, double-jump, and bash them back for consistent damage while staying safe.
Shriek's feather volleys require sharp air-dashes to weave through, but you can also bash her fireballs for counter-hits. The real trick comes in that final Radiant phase—when she hits 50% HP, she'll wind up a screen-wiping laser. Don't try to outrun it; instead, hide inside the broken statue head on the right side of the arena. It's the only safe spot.
If you manage to clear the whole thing, you'll walk away with the Radiant Skin cosmetic, a fresh 1,000 Dream Essence, and a permanent 20% damage buff against every boss in your main save. That's the good news. The bad news? Die at any point—wave 1 or wave 6—and you're kicked back outside the door with nothing to show for it. No checkpoints, no mid-fight saves, no Essence lost, but the whole gauntlet resets. It hurts.
No-Damage & Speedrun Strategies
If you're chasing perfect fights or shaving seconds off your PB, the normal rules don't apply. The meta shard loadout is Reckless and Quick Slash—Reckless gives you a flat 30% damage boost (the defence drop is irrelevant if you never get hit), while Quick Slash shaves 20% off your swing cooldown. Together, they let you delete bosses before they can even think about their second attack pattern.
Here's where it gets technical. The Sword Cancel Burst is a frame-perfect tech that nearly doubles your sword DPS. On the exact frame that third-slash freeze-frame ends, you press Jump+Dash to cancel the recovery animation. If you nail it, you can loop the three-hit combo twice per second. It's brutal to learn—most runners practice on the training dummy for hours—but it's the difference between a good run and a world record.
Movement is just as precise. Air-dashes only grant 5 invulnerability frames versus 8 for a ground dash, but you can chain them. Start your air-dash 3-4 pixels above the boss's hurtbox, clip the edge with those I-frames, land, and immediately chain into a ground dash for another 8 frames of safety. Done right, you can phase through entire attack sequences.
Then there's Charge-Flip momentum storage, which sounds like nonsense until you see it. Hold Down to charge your Spirit Edge, then tap Flip on the first airborne frame after running off a ledge. The charged hitbox carries forward about 1.5 meters, letting you smack bosses like Mora while staying well outside her claw swipe arc. It's weird, but it works.
One last thing: if you're serious about this, lock your game to a hard 60 FPS and disable dynamic resolution. Frame dips will break these frame-perfect inputs, and there's nothing worse than dropping a tech because your GPU hiccuped. Wired controllers with sub-4 ms polling are basically mandatory—Bluetooth lag will tank your consistency.
Boss-Specific Spirit Shard Recommendations
Early Game Boss Loadouts (Howl, Hornet, Wellspring)
You don't need a dozen shards to dominate the early game. Before you hit The Wellspring, the sweet spot is the R-R-V triangle—that's Resilience, Reckless, and Vitality—which gives you the highest damage and survivability combo you can squeeze into three slots.
Resilience is your best friend here; it gives a flat 15% damage reduction and you can grab it for free from a chest in Inkwater Marsh. That means you can tank mistakes while you're learning patterns, which is huge for first attempts.
Then there's Reckless, which boosts your melee damage by 15% at the cost of 10% defense. It costs 200 Spirit Light over in Kwolok's Hollow, but the trade-off is worth it for early boss DPS. Luckily, you can completely offset the defense penalty with Resilience.
Vitality rounds out the trio by adding a full life cell—that's 20% more health—with zero downsides. Lupo sells it for 200 Spirit Light in Inkwater Marsh, but you need to buy the area map first. If you're comfortable managing your health above 75%, you could swap this for Lifeforce instead. That gives you +10% damage and defense, but you lose that safety net.
Now, there's one major exception. For the Hornet chase in Wellspring, you'll want to swap Reckless for Splinter (also from Kwolok's Hollow). Spirit Arc splits into 3-5 short-range bolts that auto-clear the swarm adds, which means you won't get overwhelmed.
The practical farming route goes like this: grab Resilience and buy Vitality from Inkwater Marsh (400 SL total), then head to Kwolok's Hollow for Splinter and Reckless (another 200 SL). If you're short on cash, just sell some Gorlek Ores—it's way faster than grinding.
Mid-Game Optimization (Mora, Kwolok, Chases)
Mid-game is where you need to start thinking about hot-swapping. The Mora chase is a perfect example—you need the Sticky ability to wall-cling through the tunnel, but you should have unlocked that after your first Kwolok escape.
For Mora's actual arena fight, you want max casting uptime. That means Spirit Arc level 2+, Arcing Sparks (to stun the add spiders), Spirit Surge (free shotgun burst), Overflow (+40% damage on energy surplus), Ultra Spirit Smash, and Finesse. Energy economy beats raw damage here because both Mora and Kwolok have long invulnerability cycles, so casting as much as possible is the real win.
Here's the pro move: open your radial menu during Mora's brief cutscene when she crashes through the floor. Ori is invulnerable then, so you can swap sets without getting punished.
Kwolok is a two-phase beast. In Phase 1, you want to chip him safely with Spirit Arc from outside tongue reach. Your set should include Finesse (+25% crit), Energy Harvest (50% energy refund on hit), Lifeforce, and Quick Flame—this gives you near-infinite casting if you land your shots.
Phase 2 is all about burst damage. Swap to Overflow, Spirit Sentry, Ultra Spirit Smash, Splinter, and Blaze. The key is dropping three sentries on the central platform just before the flood hits. That way, they auto-track Kwolok even while you're dodging.
No matter what, keep a panic slot—either Quick Flame or Lifeforce—in both sets. On Hard mode, one mistake is a one-hit kill until you get that final life cell in Baur's Reach.
End-Game & Radiant Escalation Meta Builds
End-game is where you either go full glass cannon or abuse stun-lock mechanics. For Shriek, the Reckless Arcing build is disgusting in the best way. You're abusing +50% damage from Reckless Lv3 and +35% crit chance from Arcing Lv3, which means you can vaporize Shriek's 3000 HP in about 35 seconds.
Your core 10-slot setup looks like this: Reckless Lv3, Arcing Lv3, Quickshot Lv3, Lifeforce Lv3, Vitality Lv3, Energy Lv3, Finesse Lv3, Shard Magnet Lv2, Light Harvest Lv2, and Triple Jump as your flexible swap slot.
But if you want a zero-hit run, the Ultra Bash stun-lock build is the answer. You need Ultra Bash Level 2 (double radius, +1s stun) and Bash Master Lv3 (+50% bash damage, refunds 1 energy on kill). The combo is simple: jump, bash a projectile, redirect it into Shriek's face (30 damage), then trigger Light Burst Lv3 (150 DPS). When she hits 30% HP, you can ground-pound the stagger crystal for a 450-damage finisher.
The full Ultra Bash set includes Reckless Lv3, Quickness Lv3 (+30% movement), Energy Lv3 (Light Burst fuel), Light Burst Lv3, Lifeforce/Vitality, Triple Jump, and a swap slot for Shard Magnet or Finesse.
Before you start Radiant Escalation, pre-buff with Twillen's Battle Potion (+25% damage) and Spirit Surge (+30% energy). It makes a massive difference.
Oh, and if you're missing Ultra Bash, head to Luma Pools. It's behind a purple rock wall—you'll need to lure one of those purple flower projectiles to break it open.
Common Boss Fight Mistakes & How to Avoid Them
If you're hitting a wall with Will of the Wisps bosses, you're probably not under-leveled—you're just making the same positioning and resource calls that got me killed a dozen times. These fights are less about raw skill and more about not backing yourself into a corner (literally, in some cases). Here's what'll get you killed and how to fix it.
Movement & Positioning Errors
The biggest mistake I see is corner-locking yourself during Kwolok's ground-pound phases. When those shockwaves start, your instinct is to retreat, but that wall behind you is a death trap. Instead, stay about one Ori-body length away from walls and short-hop toward the boss's rear—this gives you room to maneuver and puts you in a better spot for damage.
Then there's the Mora spike wall problem. If you've got auto-dash enabled, you're going to dash straight into those instant-kill spikes during the two-Ori-width gaps. Disable that setting and practice single-dash micro-adjustments. Trust me, it's the difference between feeling like a pinball and actually controlling your movement.
Kwolok's tongue whip is another gotcha. You might think you can dash underneath it, but the hitbox is deceptive. Jump and bash the tongue instead—you get i-frames and perfect positioning in one move.
And for Shriek's first phase, that center platform is bait. Jump on the first audio echo, then glide to a side platform on the second. You'll still get your DPS windows without eating a face-full of dive-bomb.
Resource Management Pitfalls
Energy management will make or break your longer fights. You start with three energy pips, but a full playthrough can get you up to ten pips (remember, two fragments make one full cell). That sounds like overkill until you're in the thick of it.
Take Kwolok's Phase-2 tentacle slam—that attack spawns poison geysers everywhere, and you'll want at least two energy pips saved for emergency Heal after each wave. If you burn all your energy on offense, you're stuck choosing between dying and restarting.
Mora's minion spiders are resource vampires. They drop spirit-light but zero energy, so if you enter that fight with fewer than four pips, you're choosing between shooting adds and healing yourself. That's a losing choice every time.
And Shriek's aerial dive sequence? You need Flame Breath charged and ready. With ten energy cells, you can hold Flame through the entire chase without chugging flasks like a maniac. It's the difference between controlled damage and panic-spending.
When to Be Aggressive vs. Defensive
Every boss has a rhythm, and learning when to press the attack versus when to play safe is key.
Horn Beetle gives you a tiny window—after the third acid blob leaves its mandibles, you've got 0.9 seconds to land a Spike-flail downward combo. Hold Bash at mid-range to defend against its lunge, then counter.
Howl is all about interrupting. Shoot once during its roar inhale to cancel the wave and stun it, then immediately parry and swap to Torch + Explosive for a back-dash unload. It's risky, but the damage is worth it.
Mora wants you grounded during her leg-stab flurry, so stay airborne. When she leans back for silk spray, that's your cue—dash to her thorax and hammer-slam twice during that 1.1-second retreat window.
Kwolok's slam tells you what to do. The narrow slam has a gap centered on you—play defensive. But the wide slam gives you a 0.7-second sink window where you can punish with Spike + Drill Fall for 400-600 damage. Learn the tell.
Shriek is audio-based. In Phase-1, the screech audio cue (four beats) precedes the dive-bomb—use Hammer uppercut i-frames on landing. In Phase-2, after a projectile parry, you've got exactly 1.0 second to use Blaze through-dash. Miss that timing and you're eating damage instead of dealing it.
Success against Ori's most challenging foes comes down to smart loadouts, practiced movement, and knowing when to attack. Whether you're facing Shriek for the first time or tackling the Radiant Escalation, applying these targeted strategies will turn seemingly impossible fights into triumphs. Now, go put that knowledge to the test.
More ori-and-the-will-of-the-wisps Guides
Complete Spirit Shards Guide for Ori and the Will of the Wisps: Builds, Locations, and Upgrades
Master all 31 Spirit Shards in Ori and the Will of the Wisps. This guide covers early to late-game shards, optimal builds for speedruns and survival, and a 100% completion checklist.

Ori and the Will of the Wisps: A Deep Dive into Narrative, Sacrifice, and Disability Representation
An analysis of Ori and the Will of the Wisps, exploring its themes of sacrifice, family, and disability representation in video game storytelling.

The Ultimate 100% Completion Guide for Ori and the Will of the Wisps
A comprehensive guide to achieving 100% completion in Ori and the Will of the Wisps, covering optimal routes, collectibles, achievements, and troubleshooting the 99% bug.
AI Tactical Companion
Consult with our specialized tactical engine for ori-and-the-will-of-the-wisps to master the meta instantly.