Grounded 2 Omni-Tool 2.0: Complete Upgrade Guide & Strategies
The Omni-Tool 2.0 in Grounded 2 is a game-changer, replacing four clunky tools with one essential gadget. But to progress, you must upgrade it. This guide breaks down exactly how to find the upgrade station, what materials you'll need, and the optimal order to unlock its power.
Grounded 2 Omni-Tool 2.0 Upgrade Guide
What the Omni-Tool Replaces & Why It's Essential
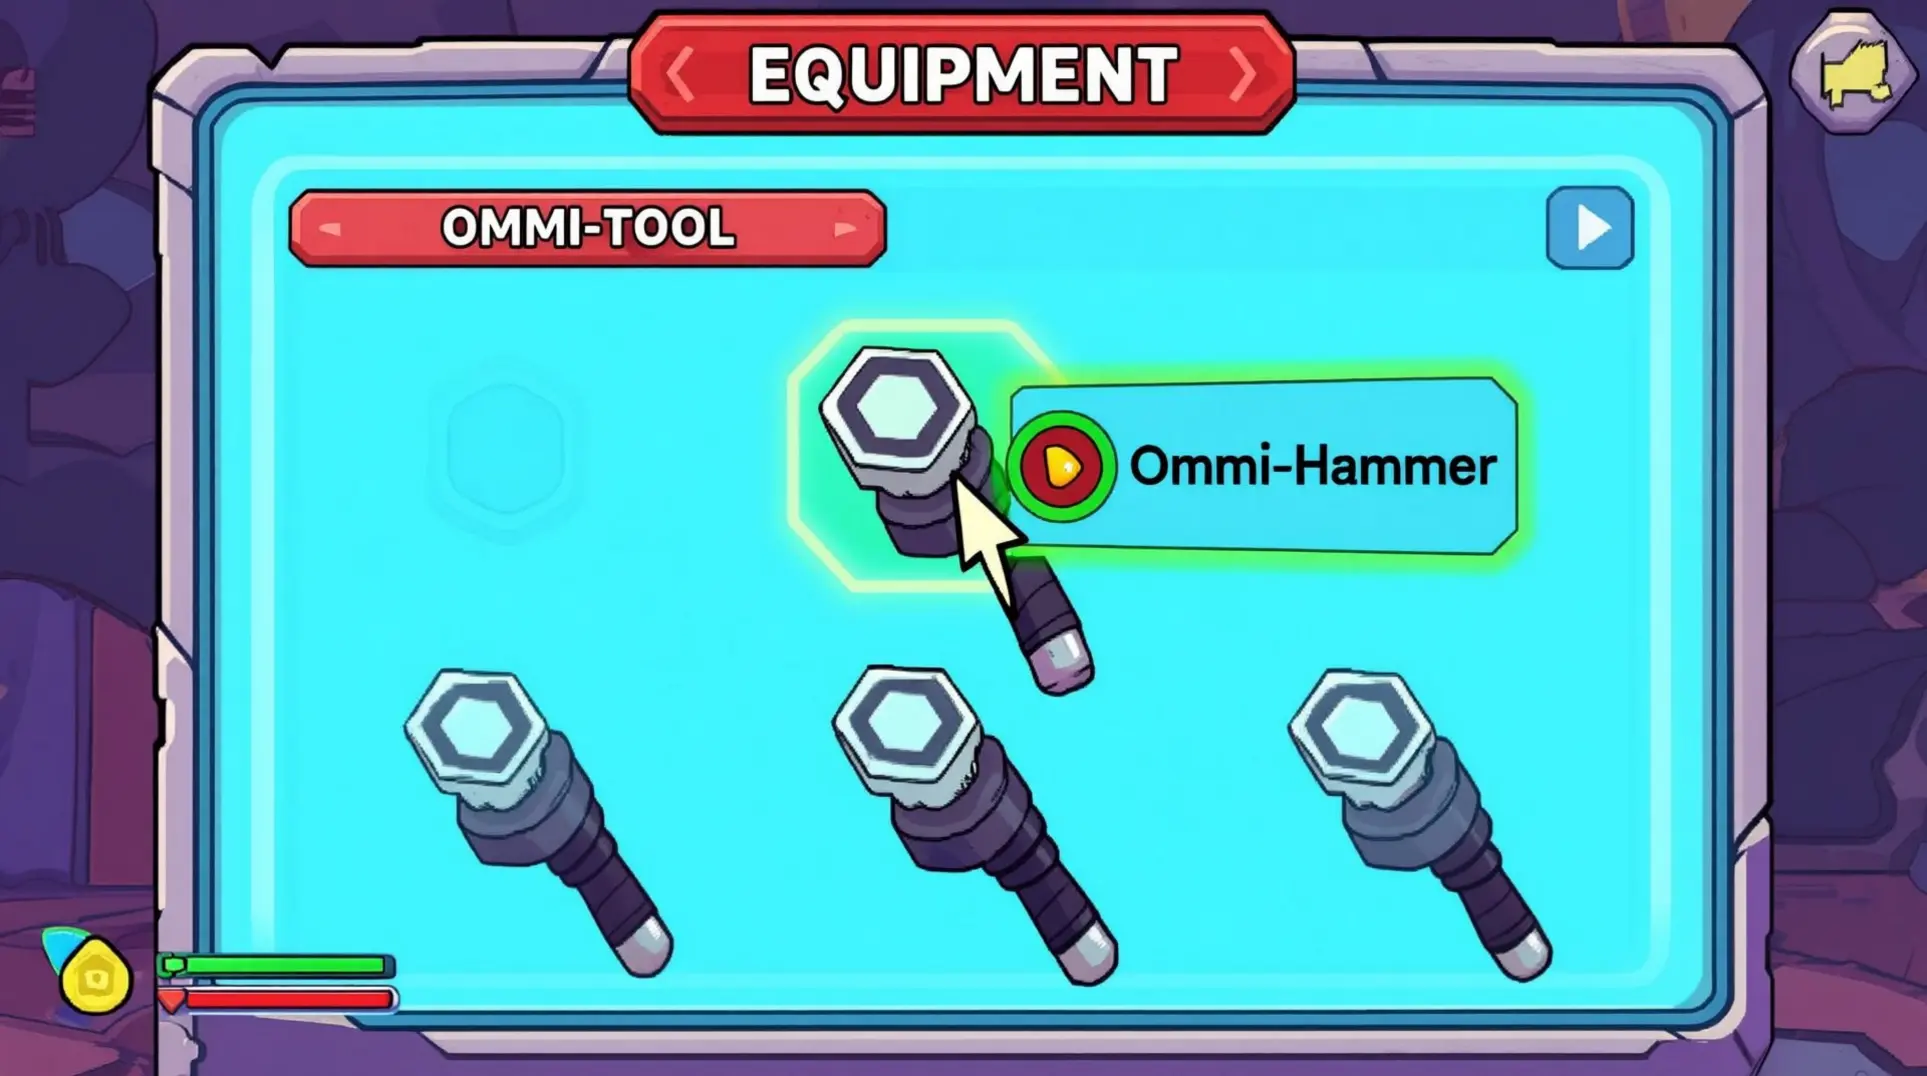
Let's talk about the Omni-Tool, because it's gonna save your life - or at least your inventory sanity. Grounded 2 ditches the old system where you'd juggle four separate tools, and instead hands you this all-in-one device that handles chopping, smashing, digging, and repairing by itself. Yep, Axe, Hammer, Shovel, and Wrench modes all live in a single gadget.
But this isn't just a convenience thing, it's the whole progression system. Each function levels up on its own, and you can't skip this if you want to get anywhere. You need a beefier Axe mode to chop tougher plants, a stronger Hammer to break those advanced materials, and upgraded dig/repair functions just to access late-game crafting. Without these upgrades, you're basically soft-locked out of the good stuff.
Here's the best part: your Hotpouch and Backpack get so much breathing room. No more swapping between four different tools or making panicked runs back to storage because you forgot your wrench. Everything you need for resource gathering and base maintenance fits in one slot, which means more room for weapons, food, and whatever random bug parts you've been hoarding.
Upgrade Station Location: Comms Array at Ranger Posts
You'll grab your first Omni-Tool at Snackbar, that Ranger Outpost in the Grasslands tutorial zone. But here's the annoying part - you can't just stroll in and use the Comms Array right away.
The station's sealed behind an arm scanner door, so you've gotta take a detour. Head into the nearby cave, loop around to the backside of the station, and you'll find a way inside. Once you're in, use the arm scanner from the inside to open those outer doors permanently. After that, you can waltz in anytime you want.
Inside, chat with Sloane through the communication screen, then find the Ranger Comms Array terminal. This is where you'll dump your materials and Raw Science to upgrade each Omni-Tool mode separately. The interface is pretty straightforward - pick a mode, pay the cost, and you're set.
Here's some good news: every Ranger Comms Array sells the same upgrades, so you can hit up any station you like once you've opened them up. Key spots include Oak Lab (under the oak tree), Pond Lab (behind that T-Roy scanner), and Upper Yard Outpost near the wheelbarrow. But honestly, once you've got Snackbar opened, it's probably the safest and easiest to reach.
Current Tier Availability & Future Roadmap
Early Access Tier Caps (What You Can Upgrade Now)
Here is the brutal truth for anyone grinding through Grounded 2 right now: you're hitting a hard wall at Tier 2. The Omni-Tool branches - Axe, Hammer, and Shovel - all max out there in the January 2026 Early Access build, while the Wrench barely scratches the surface at Tier 1. You can actually see the greyed-out T2 slot for the Wrench just sitting there, teasing you, but the materials don't even exist in the yard yet.
The upgrade costs aren't cheap, either, so you'll want to start hoarding resources before you even unlock the full tech tree:
| Omni-Tool | Tier 2 Requirements |
|---|---|
| Omni-Axe | 2k Raw Science + 2x roach chunks + 2x blueberry leather |
| Omni-Hammer | 2k Raw Science + 1x ladybug head + 3x lingonberry leather |
| Omni-Shovel | 3k Raw Science + 1x northern scorpion stinger + 2x pine needles |
| Omni-Wrench | 1k Raw Science + 2x red ant parts + 2x clay (Tier 1 only) |
The real kicker? Tier 3 recipes are already buried in the game files, complete with materials like durable marble shards, but you can't loot those items anywhere in the current build. Obsidian's essentially left the door locked with the key hidden in a future update.
Roadmap: Winter 2025 (Tier 3) & Summer 2026 (Tier 4)
Luckily, you won't be stuck at Tier 2 forever. Obsidian's roadmap is surprisingly aggressive with Omni-Tool progression, and the first major boost lands sooner than you'd think.
Winter 2025 Update (December 2025 – January 2026) finally drops Tier 3 unlocks across all four Omni-Tool branches. This patch also brings Creative Playgrounds and a handful of new bugs to fight, so it's not just a boring numbers bump - you'll have fresh content to test your shinier tools on.
Summer 2026 Update (June – August 2026) follows up with Tier 4 upgrades, which is when things get really interesting. That same update plans to introduce Swimming 2.0 and watery base modules, so Tier 4 tools might be essential for underwater exploration and building.
Beyond that, Tier 5 Omni-Tools are listed under 'Future Plans' with no date attached. Could be late 2026, could be 2027 - Obsidian's playing coy about that final tier. For now, just focus on grinding Raw Science and stockpiling the weird creature parts you'll need when Tier 3 finally drops.
Complete Upgrade Cost Breakdown: Raw Science & Materials
Omni-Axe Upgrade Costs (Tiers 1-3)
Your axe is the workhorse, and the good news is Tier 1 doesn't cost a thing - it's yours from the start. Tier 2 will run you 2,000 Raw Science, plus you'll need to hunt down 2 Roach Chunks and craft 2 Blueberry Leather. That's manageable if you've been exploring the hedge and trash heap areas.
Unfortunately, Tier 3 and any higher tiers are still on the cutting room floor as of January 2026, so don't start hoarding materials for an upgrade that isn't there yet.
| Tier | Raw Science Cost | Required Materials | Status |
|---|---|---|---|
| 1 | 0 | Unlocked by default | Available |
| 2 | 2,000 | 2 Roach Chunks, 2 Blueberry Leather | Available |
| 3+ | - | Planned for future update | Not Available |
Omni-Hammer Upgrade Costs (Tiers 1-5 Planned)
If you want to bust quartzite and marble deposits efficiently, you'll need to feed your hammer some upgrades. Tier 1 is dirt cheap: 350 Raw Science, 2 Pebblets, and 1 Sap. Tier 2 jumps way up to 2,000 Raw Science, 1 Ladybug Head, and 3 Lingonberry Leather, so you'll need to take down those tanky red bugs and gather berries.
Here's the frustrating part: Tiers 3 through 5 are completely absent from the current build. The plan exists, but you can't access them yet - so your hammer progression hits a wall early.
| Tier | Raw Science Cost | Required Materials | Status |
|---|---|---|---|
| 1 | 350 | 2 Pebblets, 1 Sap | Available |
| 2 | 2,000 | 1 Ladybug Head, 3 Lingonberry Leather | Available |
| 3-5 | - | Planned for future updates | Not Available |
Omni-Shovel Upgrade Costs (Tiers 1-3)
The shovel lets you dig up clay and other buried treasures, and Tier 1 costs 350 Raw Science, 1 Grass Seed, and 2 Sprigs - stuff you've got lying around. Tier 2 gets pricey real quick: 3,000 Raw Science, 1 Northern Scorpion Stinger, and 2 Pine Needles. That scorpion stinger means venturing into the upper yard's more dangerous zones, so be ready for a fight.
As for Tier 3? It's MIA. The devs have it on the roadmap, but you can't upgrade past Tier 2 right now.
| Tier | Raw Science Cost | Required Materials | Status |
|---|---|---|---|
| 1 | 350 | 1 Grass Seed, 2 Sprigs | Available |
| 2 | 3,000 | 1 Northern Scorpion Stinger, 2 Pine Needles | Available |
| 3+ | - | Planned for future update | Not Available |
Omni-Wrench Upgrade Costs (Tiers 1-3)
Your repair tool is crucial for keeping gear in fighting shape, and Tier 1 will set you back 1,000 Raw Science, 2 Red Ant Parts, and 2 Clay. That's not terrible early game - red ants are everywhere. But here's the real kicker: Tier 2 and Tier 3 simply don't exist yet. You're stuck with the basic wrench until a future update drops, so don't waste time looking for upgrade options that aren't there.
| Tier | Raw Science Cost | Required Materials | Status |
|---|---|---|---|
| 1 | 1,000 | 2 Red Ant Parts, 2 Clay | Available |
| 2-3 | - | Planned for future updates | Not Available |
Optimal Upgrade Order: Progression-First Strategy
Phase 1: Early Game (First 10 Hours) - Hammer T2 → Axe T2 → Shovel T2
If you're staring at that upgrade menu wondering where to dump your first Science Points, the answer is Hammer Tier 2, no question. Here's why: those cracked walls and Quartzite nodes you keep running into aren't just decoration - they're your ticket to early Science Points from smashing Tech Chips and BURG.L statues. Without Hammer T2, you're leaving free progress on the table.
Once you've got that sorted, you'll want Axe Tier 2 right on its heels, and here's the beautiful part: both upgrades chew through similar bug parts like Spider Chunks and share Science Point costs. So while you're out farming for one, you're knocking out materials for the other. This back-to-back crafting keeps you from wasting time on extra trips. Axe T2 lets you chop Milkweed Tiers 2 & 3 plus Dandelion Toughgum stalks, which means woven fiber and rope for days - critical for mid-game tools and armor sets.
After those two are in your pocket, grab Shovel Tier 2 to start digging up Grub Hide and clay from ant hills. Leave your Wrench at Tier 1 for now - its upgrades aren't doing anything crucial in the first 10 hours, so you're better off spending those resources elsewhere.
Phase 2: Mid-Game Push - Hammer T3 for Sandbox Access
Now you'd think the next move is Hammer Tier 3, and you're absolutely right - when it actually releases. As of right now, the game's Early Access build hard-caps you at Tier 2 for Axe, Hammer, and Shovel, with Wrench stuck at Tier 1. The update that drops Tier 3-5 isn't expected until Q1-Q2 2026, so we're in a holding pattern.
But when that patch hits, Hammer T3 becomes your top priority because it's the key to three massive areas. The Sandbox has Compacted Sandstone nodes that a Tier 2 hammer just laughs at uselessly. The Pond Lab hides breakable walls with Tier-3 crack decals guarding juicy loot like Dust Mite Fuzz and EverChar Coal crates. And the Undershed contains these 'Tier3Bustable' rock plugs blocking off an entire cavern system. None of these open without Hammer T3, which means you're stuck until that update lands.
Phase 3: Late Game & Future-Proofing
So what do you do while you wait? You stockpile like it's the apocalypse. The upgrade ceiling is planned to be Tier 5 for Axe, Hammer, and Wrench, while Shovel taps out at Tier 3. Since you can't upgrade yet, smart players are farming materials now to be Day-1 ready.
Here's what you'll want to hoard:
- Brittle Marble and Termite Chompers for future Hammer upgrades
- Lint Rope (yep, that's a thing you'll need)
- Acorn Shell pieces and Ladybug Heads for Axe progression
- Raw Science - and lots of it. We're talking ~10,000 RS for Tier 4 Hammer and ~15,000 RS for Tier 5 Axe
Once the patch drops, the community-vetted sequence is clear: rush Hammer to Tier 5 first to access the JavaMatic and start busting through Upper-Yard walls. After that, alternate Axe and Shovel to Tier 4, then finally circle back to Wrench since its utility is less critical for raw progression. Wrench is nice to have, but it won't open new zones - Hammer and Axe will.
Material Farming Guide: Where to Find Everything
Early Game Materials (Tier 2 Upgrades)
If you're still rocking woven fiber armor and clover sandwiches, here's where to stop scavenging like a peasant and start farming like a pro.
Cockroach Chitin is your first real bottleneck, and luckily, there's a few trash zones where these pests cluster. The SnackBar Front spawns six adults, the Trash Heap under the picnic table has four adults plus nymphs, and inside the Moldorc PVC pipe, you'll find the O.R.C. den. Here's the key: you need to wipe out every single bug in a population to trigger the respawn, which means you'll get 10–11 Chitin per 3-day (72-hour) cycle. It's slow, but predictable.
Wolf Spider Fangs come from the Hedge region, and the good news is you can loop three reliable spawns: the Hedge Lab Podium, the bottle ledge at Hedge Ascent, and the Oak Tree root tunnel exit facing the Hedge. Run this loop in about eight minutes, then rest for one in-game day to force respawns, and you'll pull 3–6 Fangs per session. Just don't get cocky; these things still hurt in tier two gear.
Grubs are easier, but you've gotta know what to look for. Watch for moving dirt trails in the Grasslands, then dig them up like a lunatic. The best spots are the Oak Hill slopes, the starter cave mouth northeast of the first Field Station, the dandelion patch trenches, and along the stone path toward the Mystery Machine. They respawn every two in-game days and drop Raw Grub Meat, Grub Hide, and Grub Sludge, so they're worth the shovel work.
Acorn Shells are the simplest farm: smash Acorns with a hammer under any Oak Tree. The densest clusters are the Entrance Oak (south of the first Field Station, eight Acorns) and the Pond-Side Oak (southwest near the koi pond, six Acorns). You'll get 16–20 Shells per daylight-hour loop, and they respawn in about five in-game hours, which means you can literally farm these all day.
Mid-Game Materials (Tier 3 Preparation)
Welcome to the actual difficulty spike. These enemies don't mess around, and neither should you.
Ladybug Heads drop from Ladybugs and Ladybirds in the Flower Bed biome around the Koi Pond rim. You'll need a slashing weapon like a bone dagger or ant club, which gives you a 40% head drop rate from Ladybugs and about 60% from Ladybirds. Hit this loop at dawn, kill five Ladybugs and two Ladybirds in fifteen minutes, and you'll average 3–4 heads per run with daily respawns. It's tedious, but it beats grinding for hours.
Fire-Ant Mandibles come from the Fire Anthill in the northeast corner of the Upper Grasslands, just east of the Lawnmower MIX.R. Fire Soldier Ants have roughly a 70% chance to drop one mandible when you harvest them with a Tier-2 Insect Axe. The outer tunnels respawn in 60 seconds, which means you can loop this in three minutes and pull 15–20 mandibles per twenty-minute session. It's one of the fastest farms in the game if you don't get lost in the tunnels.
The Termite King is a different beast entirely. This thing guards the Woodpile BURG.L Chip deep inside the Termite Den beneath the Woodpile in the northwest Upper Yard. There are five entrances (four on the front, one on top under a blue tarp), and the King respawns exactly three in-game days after death, but only if you stay out of range. Bring salt or spicy weapons for extra damage, because this fight is a slog without them.
Bombardier Beetles spawn outside the Haze, so you don't even need a gas mask. Two reliable clusters are the southwest Oak Hill (between Oak Lab and the lower-yard stone wall) and the Upper-yard Frankenline (west of the laser toward the wheelbarrow). They patrol in pairs, drop Boiling Glands and Bombardier Parts, and they're honestly easier to kill than they look if you dodge the acid spray.
Raw Science Farming: Maximize Your Points
If you're chasing the last few mutations or just want to flex your science hoard, here's how to break the economy.
BURG.L Quests are the only infinite repeatable source of Raw Science, which means you'll be best friends with that robot. Prioritize the 40- or 50-point tasks, and if the board looks garbage, accept a quest then hard-save to refresh it. Batch your quests by zone, and with optimized zipline routes, you'll clear 150–200 Science in under fifteen minutes. It's monotonous, but it works.
Analyzing new items at a Field Station or Lab Resource Analyzer gives a one-time 30 Raw Science bonus per unique item. The starter set (Clover Leaf, Pebblet, Sprig, Mushroom, Sap) nets 150 points within the first twenty minutes. Each station has three charges that refill after one in-game hour (about two real-time minutes), or you can just visit a different station to reset instantly.
Ranger Challenges are 47 one-time quests that award 30 Raw Science each for tasks like crafting a Dandelion Tuft, killing 10 Larvae, or scanning every tape. Clearing the full list provides roughly 1,400 Science without dedicated grinding, and the first flight, airtight, and larvae slayer challenges are quick to complete early.
Milk Molars are permanent stat boosts, and a fast daily route (about sixty minutes) can net you six regular and three Mega Milk Molars. Hit the Oak Hill lab ventilation shaft (1 Mega + 1 regular), the Koi Pond soda can rim (1 Mega), the Hedge zipline toolbox and frisbee web (2 regular), the Spade Gulch blade and dandelion stem (1 Mega + 1 regular), and the Northern Grasslands baseball tear (1 regular). Prioritize max health, stamina, and healing efficiency with the first three Mega cores, and you'll feel the difference immediately.
Advanced Strategies & Pro Tips
Storage & Organization: Tier-Based Chest System
If you're dumping everything into one chest, you're gonna have a bad time. The move is to sort by tier, not type, and the community has already cracked the code: use six colors. White holds all that T1 junk you'll never touch again, Green stores T2 basics, Blue is for T3 refinables, Yellow covers T4 organics, Red locks down T4 metals, and Black hoards T5 rares. You'll want two chests per color - that's 80 slots total - which sounds excessive until you unlock Tier 4 and your inventory explodes.
Here's the kicker: production benches automatically pull from any Nearby Storage within six tiles, so you can park your Yellow and Red chests inside that halo and skip the manual plate-shuffling dance. Just make sure you build those chests on half-walls; otherwise grass planks love to spawn on top and block the lid. Each chest holds 40 stacks and unlocks early, so there's no excuse for clutter.
Co-op Efficiency: Divide & Conquer Strategy
Four players means four jobs, and you'll hit Tier 2 tools by the end of Day 2 if you stop stepping on each other's toes. Split the squad into Lumberjack (axe), Excavator (shovel), Smith (hammer), and Engineer (wrench), then assign each person a parallel farming route across the map. By 16:30 in-game, everyone meets at the Mysterious Machine to dump spare Pebblets, Sap, and Clay into a shared pile - nobody should be waiting on Bombardier Beetle segments or Larva Spikes because you've already traded them.
That coordination only works if you grab the Omni-Tool from the Ranger Outpost: Snackbar wall first, and you'll want to scan everything in sight. Sprig, Pebblet, Plant Fiber, and Sap nodes each give 20–50 Raw Science on first scan, which shaves serious time off your early upgrade costs. With four people farming in sync, you'll have Tier 2 axe/shovel/hammer wrapped in about 90 minutes of real-time.
Future-Proofing: Prepare for Tier 3-5 Updates
The cap is 14,000 Raw Science, and the Tier 3 axe alone costs 4,500 RS plus another 1,200 RS for its overclock mod - so you'll need to bank the full cap before the patch drops. Don't sleep on rare drops either; Ladybug Heads only drop 15% of the time from Flower Bed ladybugs, and Black-Ox Horns have an 8% drop rate from beetles under the trash heap. Farm these now while spawn rates are still untouched, because they're the bottleneck mats for Tier 3 hammer and Tier 4 axe.
Satellite Bases 01–03 each hide a Ranger Console that will eventually unlock Tier 3–5 schematics, so activate their fast-travel ziplines early. Each line needs 2x Silk Rope, 1x Bombardier Part, and 1x Berry Leather, and you should pre-stock chests at each base with 20x Ladybug Head, 15x Black-Ox Horn, 40x Pupa Leather, and 10x Lint Rope. When the Tier 3 hammer questline goes live, you'll be the first kid on the block swinging it.
FAQ: Common Omni-Tool Questions Answered
Why Can't I Upgrade Past Tier 2? (Early Access Limitation)
If you've been staring at those ??? markers in your upgrade menu, wondering why you can't push past Tier 2, here's the deal: those question marks aren't a bug, they're a promise. Tier 3 upgrades for your Omni-Tools simply aren't in the current Early Access build. Obsidian's roadmap confirms they'll drop with the Winter 2026 patch, which means you'll be waiting a while to see what comes next.
Should I Upgrade Wrench Early? (Repair vs. Progression)
Short answer? Don't bother. The Omni-Wrench should be your absolute last priority, and the game design basically tells you why. Nothing you actually need breaks in the early hours, so Repair Glue handles any issues just fine. Plus, upgrading the Wrench requires Clay, which you can't even dig up until you've upgraded your Shovel first. Oh, and it only has one tier anyway, so there's no long-term payoff here.
Total Raw Science Needed for All Upgrades
You're looking at roughly 24,500 Raw Science to fully kit out all your Omni-Tools - that's Tiers 1-3 for the Axe, Shovel, and Wrench, plus Tiers 1-5 for the Hammer. For content actually in the game right now, you'll need 2,350 Science for the Hammer, 2,000 for the Axe, 3,350 for the Shovel, and 1,000 for the Wrench. Just remember those higher-tier costs are estimates based on the roadmap, so maybe don't spend it all in one place.
Mastering the Omni-Tool is the key to survival and progression in Grounded 2. By following this strategic upgrade path and farming efficiently, you'll be ready to tackle the yard's toughest challenges. Now get out there, gather your science, and start swinging.
More Grounded-2 Guides

Grounded 2 Early Access: The Ultimate Fix Guide for Crashes, Bugs & Performance
Struggling with Grounded 2's Early Access bugs? This definitive guide compiles all community-tested fixes for multiplayer crashes, building glitches, save corruption, and performance issues.
Mastering the Perk Grid in Grounded 2: A Complete Guide
Learn how to navigate the perk grid, optimize builds, and use mutations for solo and co-op play in Grounded 2. Includes S-tier mutations and respec tips.

The Complete Guide to Buggy Mounts in Grounded 2: Taming, Maintenance, and Future Updates
Learn how to unlock, tame, and maintain buggy mounts in Grounded 2. This guide covers the Hatchery system, available mounts, upcoming features, and pro tips for survival.
AI Tactical Companion
Consult with our specialized tactical engine for Grounded-2 to master the meta instantly.