The Complete Guide to Buggy Mounts in Grounded 2: Taming, Maintenance, and Future Updates
Introduction
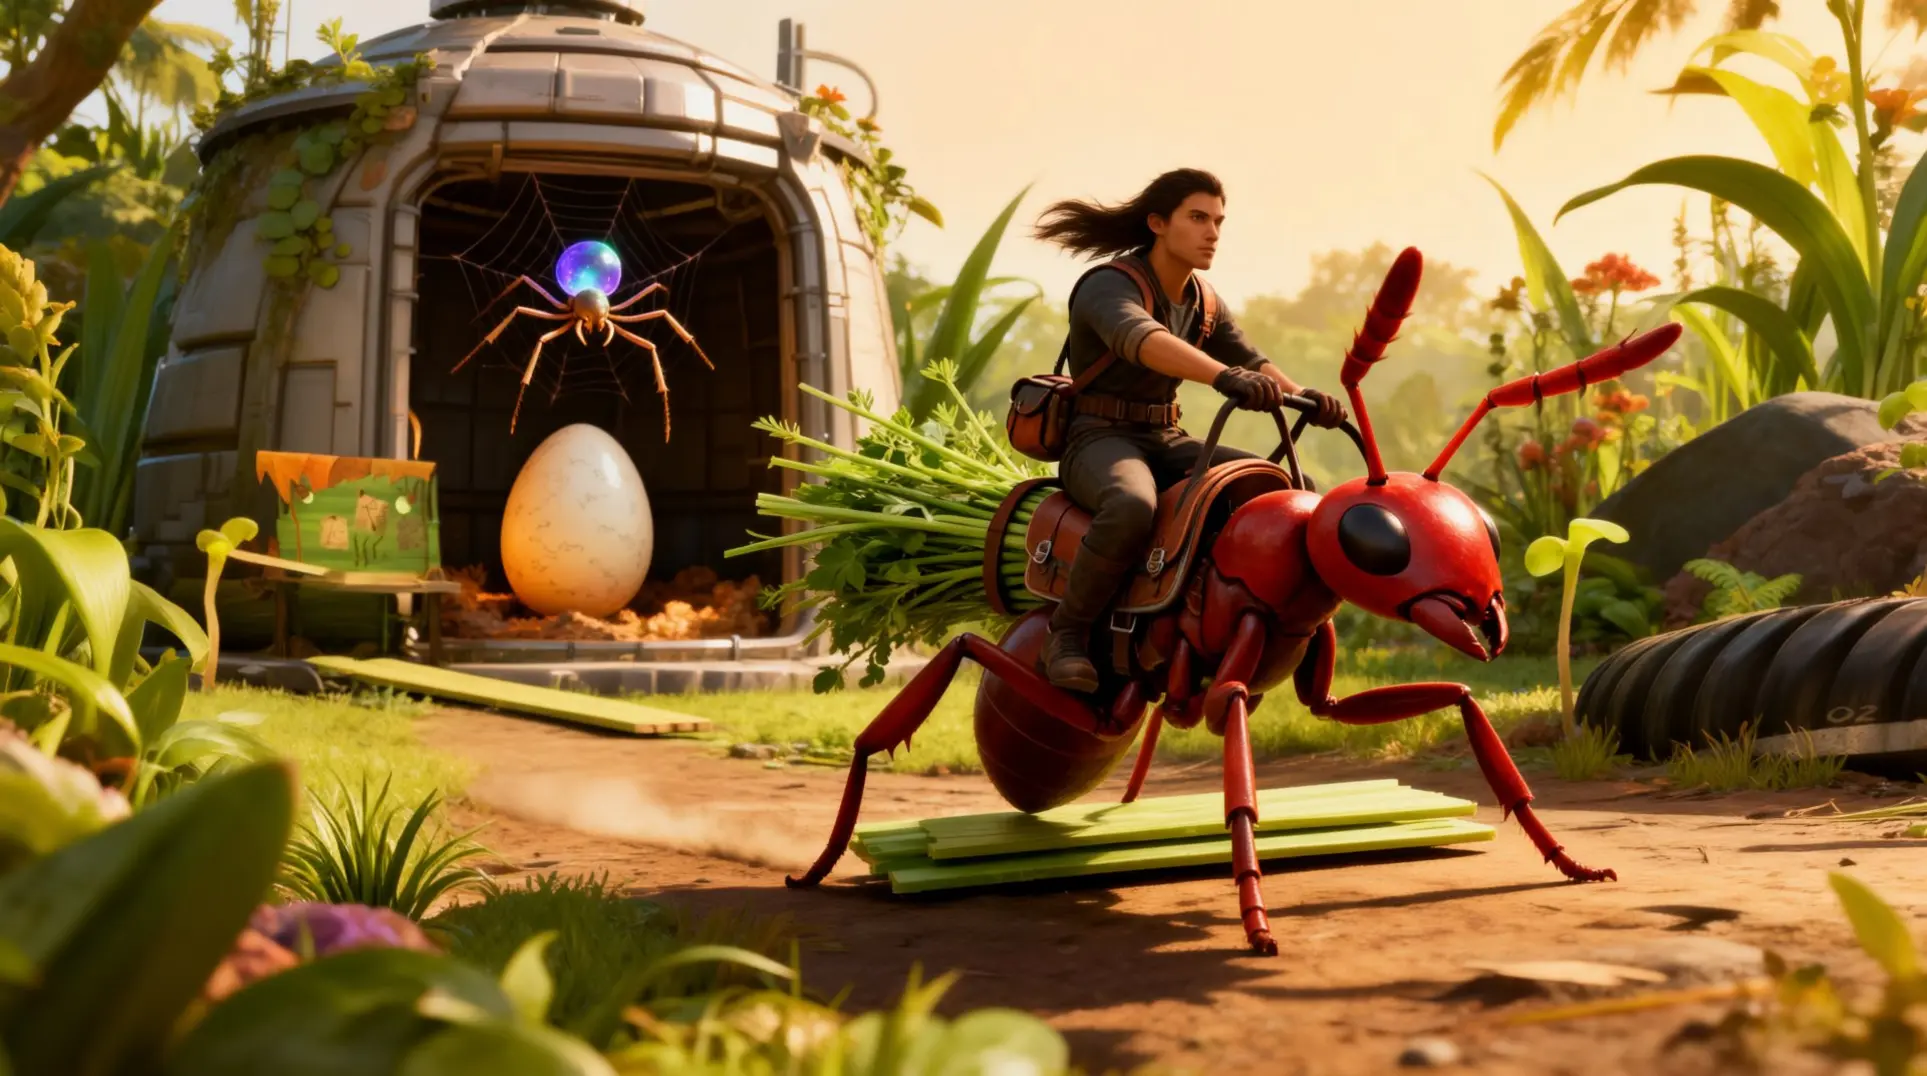
Unlocking a buggy mount in Grounded 2 is more than just a quest - it's a commitment to a living, breathing companion with its own needs and loyalty. This guide walks you through the entire Hatchery system, from finding your first egg to mastering advanced taming and maintenance, ensuring your new steed becomes a reliable partner in the backyard.
The Hatchery System: Your Gateway to Buggy Mounts
You won't get your buggy mounts right away. First, you need to trigger the 'Hatching a Plan' quest, which kicks off automatically once you poke around the ASST. Terminal at the Oak Lab. This mission is your ticket to the whole system, and luckily, it doesn't cost you a single scrap of Raw Science.
The quest itself sends you into the Snackbar Anthill to grab an Optical Disk. Once you've got that disk in your pocket, the Hatchery blueprint appears for free in the Science Shop terminal. No grinding for science points - just story progression.
Building It Right: Materials and Where to Park It
Here's what you'll need to slap together your first Hatchery:
- 6 Weed Stems (grab these from dandelions)
- 1 Acorn Top
- 5 Acorn Shells
- 5 Mite Fuzz (farm Red Mites for this)
Now, where you build this thing matters more than you'd think. The Snackbar Ranger Outpost is hands-down the smartest spot for your early Hatchery. Why? Because everything you need is within a short sprint - dandelions for weed stems, acorns for shells and tops, and Red Mites dropping fuzz everywhere. Plus, your first egg location is right there, so you won't be hauling materials across the map.
Hatching and Keeping Your Buggy Alive
Once you've built your Hatchery, the real waiting game begins. Dropping an egg into the chamber starts a 24 in-game hour incubation period, which translates to 48 real-world minutes. You can only process one buggy at a time, so plan accordingly.
Here's the kicker: Grounded 2 ditches separate saddle crafting. You dump the saddle materials - like Blueberry Leather, Red Ant Mandibles, and Acorn Shells for a Red Soldier Ant - directly into the Hatchery along with the egg. One recipe, one operation, and you get a ready-to-ride mount.
But here is where things get tricky. Your buggy has a hidden loyalty meter that starts draining the moment it hatches. It drops roughly 1% every 3–4 real minutes, which means an unfed mount will bail on you after about five hours - even if you just parked it safely in your base.
To prevent this, you've got to feed your buddy approved snacks like Aphid Honeydew or Larva Meat every 45 to 60 minutes. Each feeding restores about 25% loyalty, but if you neglect your mount, it'll become disloyal and eventually despawn. This isn't a 'set it and forget it' system - you're committing to pet ownership here.
Currently Available Buggy Mounts (Early Access)
Red Soldier Ant: The Balanced Starter Mount
If you're just dipping your toes into the buggy mount system, the Red Soldier Ant is your best bet. You'll find its egg deep inside the Hatchery Anthill, specifically in the deepest nursery chamber - that's the one with all the raised dirt platforms. The easiest way in is through the north-east entrance near the Snack Bar, and once you're there, take the right-hand forks to reach the eggs.
Here's the tricky part: the egg is both heavy and fragile, which means if you try to pick it up normally, you'll trigger a three-second animation that'll get every soldier ant in the room angry. Instead, just open your inventory and hit 'Take All' - you'll scoop it instantly without the aggro. Once you've got it back to the Hatchery, you'll need to feed the hatchling 3 Aphid Honeydew followed by 2 Mushroom Slurry to hit that 100% imprint.
Once it hatches, you'll get access to the saddle recipe, and it's surprisingly cheap: 2 Grub Hide, 3 Sprig, and 1 Acorn Shell. The stats reflect its balanced nature - it clocks in at 6.5 m/s speed, carries 12 slots with a 25% weight reduction, and can hold its own in a fight with 18 base damage and 250 health.
Orb Weaver Spider: The Combat Specialist
The Orb Weaver Spider is the mount for players who want to bring serious firepower to bug fights, but getting its egg is a whole different beast. It's tucked in a silk cradle inside the Headless BURG.L statue burrow - that's the one southeast of the Picnic Table. Unfortunately, it's not just sitting there; you'll have to deal with 3-4 Orb Weavers patrolling the area and one very angry Wolf Spider.
If you're not equipped for a brawl, there's a stealthier approach. Slap on some Acorn Armor, pop a Sleek Smoothie for that noise reduction, and hug the right wall of the burrow. When you spot the Wolf Spider, toss a Sticky Trap at it - that'll hold it in place for 8 seconds, which is just enough time to grab the egg and bolt. This isn't a leisurely stroll; you'll need to move fast.
The taming process is where things get really specific. You can't just dump food on it randomly - you need to feed it 5 Aphid Honeydew on Day 1, 3 Spider Chunks on Day 2, and 2 Aphid Honeydew on Day 3, and you can't skip a single day. Mess up the schedule and you'll have to start over. Once it's imprinted, the saddle requires 2 Silk Rope (that's 4 Spider Silk each), 3 Sprig, and 1 Acorn Shell.
What makes this mount worth the hassle? Web Shot slows enemies by 40% for 6 seconds with only a 5-second cooldown, Rampage unleashes 120 base damage plus knockback every 8 seconds, and it can climb walls without draining stamina. This thing is a mobile weapons platform.
Datamined Upcoming Mounts (Roadmap & Leaks)
Ladybug Buggy: The Tank (Winter Update)
The first confirmed mount is dropping with the Winter update, and it's exactly what you'd expect from something called Ironshell. When you activate the ability, the Ladybug Buggy hardens its shell for six seconds, which gives you a massive 90% damage reduction and reflects half of any blocked melee damage right back at the attacker. The downside is that you can't spam it - there's a 25-second cooldown, so you'll need to time it for those 'oh no' moments.
Finding the egg means heading under the picnic-table oak leaves near the Rose Bush canopy, but only after 20:00 in-game time. As for the saddle, you'll need 8× Ladybug Parts, 3× Berry Leather, and 4× Sprigs to craft it, plus you'll be scrounging for Ladybug shell fragments and Tough Gunk for related craftables.
Firefly Mount: Night Explorer (Spring 2026)
If you hate fumbling with a torch, the Firefly mount is your answer. The datamined SE_Firefly_Lantern ability creates a 360° mounting light with a 12-meter radius, which basically turns you into a mobile lamppost. It also comes with SE_Firefly_Flash, a defensive trick that applies the Dazed effect for six seconds - great for escaping sticky situations, though it hits you with a 45-second cooldown.
You can snag the Illuminated Egg from Level 3 Firefly patrols at the Upper Hedge canopy, but the drop rate sits around 22%, so you might be farming for a bit. The saddle recipe calls for 2× Firefly Abdomen, 4× Silk Rope, 6× Berry Leather, and 6× Glow Goo, which means stocking up on berries and spider silk.
Bombardier Beetle: Artillery Platform
Here is where expectations crash into reality. Despite datamine rumors, there is no playable Bombardier Beetle mount, and no acid-spray ability for players exists in the files. The beetle is strictly an enemy mob that drops Bombardier Parts and Boiling Glands, which you can use for sizzle-resistant gear. If you were hoping to rain acid from a buggy, you're out of luck - no egg, no saddle, no mount.
Water-Boatman: Aquatic Specialist (Summer 2026)
The roadmap teases this as a 'watery mount,' but currently it's only a wall trophy that grants a 15-minute buff to damage against passive creatures. That's disappointing if you wanted to skim across the pond, but the trophy itself still looks cool. You'll find its egg clusters in the Pond Depths cave, specifically on wall ledges and ceiling pockets above the cave floor - they're only inspectable with a Tier-2 scanner. To craft the trophy, you need 4× Lily Wax, 6× Pond Moss, 3× Silk Rope, and 2× Boiling Gland.
Rove Beetle: Stealth Assassin
The Rove Beetle is the most speculative of the bunch. Dataminers found a 'Shadow Dash' tag and a placeholder saddle string, but the mount has no functional animations or unlock recipe in the current build. The saddle recipe that exists is flagged TEST_ONLY, requiring 5× Rove Pincers, 3× Black Ox Parts, and 15× Silk Rope - so don't waste resources yet. If it ever goes live, the egg is expected to spawn in the darkest Trash-heap pockets, under garbage bags or inside knocked-over trash cans during early morning hours, and you'd need a Tier-2 scanner to harvest it.
Advanced Taming & Maintenance Guide
Food Requirements & Preferred Treats
Your buggy's stomach is just as important as its loyalty. Every mount's got a favorite snack that does way more than just fill its belly - preferred treats fully restore hunger and grant powerful buffs, while universal grub meals only top you off halfway.
Here's what each buggy actually wants to eat:
| Mount | Preferred Treat | Buff Effect | Hunger Timer |
|---|---|---|---|
| Red Soldier Ant | Ant Candy | +15% sprint speed (60 sec) | ~15 minutes |
| Orb Weaver | Spider Sliders | +15% jump height (60 sec) | ~15 minutes |
| Scarab | Fresh Grass Plank Chunks | No buff listed | 8-10 minutes |
| Scorpion | Raw Weevil Meat | No buff listed | 8-10 minutes |
Note: Universal meals like Aphid Sliders or Mite Fritters only provide 50% hunger restoration and no buffs.
The hunger timer is crucial - standard food lasts 8-10 minutes of active riding, but preferred treats stretch that to roughly 15 minutes. So you're not just getting a buff, you're also getting way more time between feedings, which means less micromanagement out in the field.
Loyalty System & Stabling Mechanics
Every buggy hides a secret loyalty meter from 0-100, and this number controls everything. High loyalty means your mount obeys from farther away and fights harder, while low loyalty turns your supposed steed into a stubborn liability.
It's constantly ticking down while your buggy is summoned, which means every minute you're riding, you're losing points. The decay gets even worse if you dismiss your mount and leave it wandering in the open world for more than 20 minutes - then it drops at double speed.
Luckily, there's a solution: stabling. When you park your buggy in a Buggy Berth inside a roofed Hatchery, the loyalty decay rate gets cut in half. So if you're planning a long building session, make sure to stable your mount first.
You can boost loyalty back up by feeding preferred treats, scoring kills while mounted, or simply petting your buggy. But watch out - if that meter plummets to 20 or below, your mount might ignore your summons, buck you off mid-ride, or even despawn permanently when dismissed. That last one's a real kick in the teeth.
Command Controls & Combat Usage
The controls feel clunky at first, but muscle memory kicks in fast. Here's what you need to know:
| Action | Input | What It Does |
|---|---|---|
| Mount/Dismount | Hold E | Get on or off your buggy |
| Sprint Burst | Double-tap Space | Short speed boost while riding |
| Command Ring | Hold Left-Alt / LB | Access Follow/Stay/Aggressive modes |
| Summoning Radial | Press T | Call your mount from anywhere |
| Whistle | Middle-Mouse | Toggle between AI modes |
The real game-changer is Aggressive mode. Switch to this and your buggy won't just follow you - it'll actively attack any hostile creature that targets you or gets too close. This turns your mount into a mobile turret, which is fantastic for clearing spider-infested areas. The other modes are pretty self-explanatory: Follow keeps your buddy close, and Stay keeps them parked exactly where you left them.
Pro Tips & Common Mistakes to Avoid
Egg Transport Safety Strategies
Listen up, because egg runs are where dreams go to die. The second you grab an egg, it locks into your left hand, which means you can't sprint, can't swing weapons, and can't even pull out your axe - you're basically a one-armed sitting duck. One bad drop and that shell cracks, or worse, it rolls straight into a spider pit.
So you need to prep before you touch the thing. Clear your hotbar of every two-handed tool and stick a one-handed weapon like the Torch, Larva Blade, or Red Ant Club in the far-right slot. This lets you quick-draw if something ambushes you, which it will.
Chug a smoothie first - something with defense or stamina like Liquid Rage - so you can actually survive the lumbering escape while encumbered. For ant hill runs specifically, grab Acorn Armor and a Sprig Bow; you'll need the defense and range.
Now here's where it gets clever: carry 2-3 Grass Plank ramps or Mushroom Brick half-ramps in your inventory. These are your get-out-of-jail-free cards - drop them instantly to bridge gaps or block pursuing ants. You can also drop a single Grass Plank vertically behind you every 10 meters; soldier ants have to path around it, which buys you 3-4 seconds per plank.
Never sprint while carrying - it'll make you drop the egg. Instead, chain fast crouch-slides (shift-crouch-release) to keep speed without the wobble. If you absolutely must fight, drop the egg on a flat, elevated patch first because those things roll downhill at the slightest angle and can glitch through the mesh on slopes over 20 degrees.
Water is instant death - swimming destroys eggs on contact. You need to drop lily-pad platforms to cross. Mark your route with trail markers, clear the path beforehand, and honestly? Bring a friend to watch your back.
Buggy Drowning Prevention
Here's something that'll make you rage-quit: your Buggy can drown in water that's barely ankle-deep. One slip off a soda-can bridge or one wrong step into the koi pond, and your tamed Red Soldier Ant or Orb Weaver is toast.
The solution is the Mushroom Float trinket, which gives every Buggy you ride passive water-walking ability so they skitter across the surface like a water strider. Unfortunately, it's a rare drop from mushroom nodes in those damp, shaded regions. You can improve the drop rate with the Lucky Eye mutation or by farming glow caps that respawn every in-game week.
Just remember: Buggies hate the cold, so you can't ride them into icy areas. If you're after the Frostbitten Key, you'll be doing that on foot.
Future Update Preparation
If you're not already hoarding eggs, you're doing it wrong. Obsidian's early-access timeline shows egg-centric features in at least three major drops over the next year, so that pile of spider eggs in your chest isn't clutter - it's an investment.
The Fall 2025 'Hairy & Scary' update adds a Tier-III arachnid boss that requires 20 Orb-weaver eggs plus fire-ant pincers just to craft the bait. Then the Spring 2026 Brookhollow expansion introduces a 'Bug Zoo' room that auto-spawns decorative insects if you feed it 5 eggs per in-game week.
Even further out, the Late 2026 Aquatic & Fishing Pack includes a 'waterproof egg membrane' refining ingredient that comes from grinding three eggs in the Mushroom Grinder.
So start building your 3×3 'egg vault' with nine chests labeled by species. Your targets should be:
- 150-180 Orb-weaver eggs
- 100 Bombardier eggs
And while you're at it, start hoarding rare materials like ladybug shells and firefly abdomens. Future-you will be swimming in crafting options while everyone else is scrambling to farm.
Conclusion
Mastering the Hatchery system transforms your backyard survival, turning a simple mount into a powerful ally. By understanding egg transport, loyalty mechanics, and future update preparations, you can build a stable of reliable buggies ready for any challenge. Now, go forth and claim your steed - the backyard awaits.
More Grounded-2 Guides
Grounded 2 Early Access: The Ultimate Fix Guide for Crashes, Bugs & Performance
Struggling with Grounded 2's Early Access bugs? This definitive guide compiles all community-tested fixes for multiplayer crashes, building glitches, save corruption, and performance issues.
Mastering the Perk Grid in Grounded 2: A Complete Guide
Learn how to navigate the perk grid, optimize builds, and use mutations for solo and co-op play in Grounded 2. Includes S-tier mutations and respec tips.
Grounded 2 Omni-Tool 2.0: Complete Upgrade Guide & Strategies
A comprehensive guide to upgrading the Omni-Tool 2.0 in Grounded 2, including costs, farming tips, and optimal order for progression.
AI Tactical Companion
Consult with our specialized tactical engine for Grounded-2 to master the meta instantly.