The Ultimate Guide to Getting Villager Photos in Animal Crossing: New Horizons
Introduction
Want that coveted villager photo in Animal Crossing: New Horizons? It's not just about random gifts - it's a calculated grind on a hidden 0-255 friendship scale. This guide breaks down the exact point system, the optimal gift-giving meta, and the daily habits you need to finally get those framed portraits.
Understanding the Friendship Point System
The 0-255 Friendship Scale Explained
Every villager lands on your island with 25 friendship points already in the bank, so you're not starting from zero. The system itself runs from 0 to 255, and it's divided into six favor levels that determine how chummy they'll get with you.
You're looking at 0-29 points for the 'acquaintance' tier (basically strangers), 30-59 for 'buddy', 60-99 for 'close friend', 100-149 for 'great friend', 150-199 for 'best friend', and 200-255 for the 'ultimate friend' ceiling. Each threshold opens up new interactions, so that number actually matters beyond bragging rights.
Level 6: When Photos Actually Drop
Here's where the grind gets real. You won't even have a shot at a villager's framed photo until you hit 150 points and reach Level 6, the 'best friend' tier. That's not a guarantee either - it's just when the game starts rolling the dice.
The daily chance breaks down like this:
• The photo gift caps at 6% per wrapped gift, but only if your pockets are completely full • That 6% is the ceiling - it assumes your friendship is maxed and you're handing over something valuable • If your inventory has empty slots or your friendship isn't at the top end, that percentage drops hard
So yeah, you could be best friends for weeks and still not see that photo. It's all about that daily roll and making sure you're optimizing every gift.
The Gift Value Sweet Spot: 2,500-7,499 Bells
Why Wrapping Matters: The +1 Point Bonus
Here's something the game doesn't tell you outright: that 160-bell wrapping paper from Nook's Cranny is secretly the best friendship investment you can make. Every single wrapped gift, regardless of what's inside, gets a quiet +1 bonus point tacked on when you hand it to a villager. This is what triggers them to give you a gift back - whether it's random clothes, furniture, or eventually that coveted photo.
You can buy wrapping paper daily from the cabinet, and don't stress about colors because pink, maple, festive, or plain white all do the exact same thing. One minute at a DIY bench and you're ready to go.
But here's the catch - and it's a big one for letter writers - this bonus only works for in-person gifts. Mailing a wrapped present looks thoughtful but does literally nothing for friendship levels, so save your paper for face-to-face exchanges.
Community-Tested Meta Strategies
The ACNH community has basically solved gift-giving, and it boils down to two main strategies depending on your resources.
The first is the infamous iron wall lamp meta. It costs 4 iron nuggets and 2 clay per lamp, which isn't bad, and when wrapped, players have gotten photos in as few as two exchanges. The appeal is that wall-mounted furniture doesn't immediately appear in a villager's room, so their house stays photogenic for a while.
Unfortunately, that 'safe' label comes with a timer. After 30 or 40 of these lamps, the game starts silently deleting their original wall decorations to make room. Their interior slowly turns into a hollow shell, which defeats the whole vibe of having them on your island.
If you'd rather not ruin their feng shui, the non-native fruit stack method is your friend. Two or three pieces wrapped together deliver about 12 friendship points in one shot, and even a single wrapped fruit still gets the delighted reaction. It's cheap, renewable, and won't destroy their decor.
Why 2,500-7,499 Bells Is the Optimum Range
This is where the math gets interesting. The game hands out friendship points based on sell-back value, and that 2,500-bell threshold is where everything changes. Gifts worth 2,500-7,499 bells give the maximum +3 points when wrapped, while anything cheaper only nets you +1.
Going over 7,500 bells is just flexing - there's no extra benefit, so you're burning money for no reason.
Practical gifts that hit this range:
- Assessed large fossils (2,500–6,000 bells) - free, plentiful, and perfectly calibrated
- Imperial/Cute/Rattan furniture (2,500–7,000 bells)
- Non-native perfect fruit (3,000 bells each)
- Star fragments (2,500–7,500 bells)
Starting from base friendship, you'd need roughly 76 wrapped gifts at the minimum value to hit the 200-point photo threshold, but daily chats and errands slash that number dramatically. Fossils remain the stamina king since they're just sitting in your storage waiting to be gifted.
Personality-Based Gift Optimization
Figuring out what to gift villagers can feel like a crapshoot, but their personalities actually follow patterns. Once you know what makes each tick, you can stop wasting Bells on junk they'll display for a day and then stuff in storage.
Male Personalities: Jock, Lazy, Smug, Cranky
You've got four male personality types to deal with, and they're all pretty different. Here's what actually works:
Jock villagers live for Red, White, and Green gear with Simple or Active styles. For these fitness fanatics, you can't go wrong with a Green pull-up-bar stand (if you've got the DIY recipe) or a Red speed bag from Nook's. These items nail both their color and style preferences in one shot.
Lazy villagers are way more chill. They universally dig Beige, Brown, Green, and Orange colors paired with Simple or Elegant styles. A Log garden lounge is basically perfect - it's Brown, it's Simple, and they'll park their lazy butts on it all day.
Smug villagers are where it gets tricky because they're split into two camps. The Elegant crowd (think Beardo) wants Gray and Brown tones, so a Noble coat will make them feel fancy. The Cool cats (like Raymond) prefer Gray and Black, which means a Leather jacket is your best bet. You'll need to know which type you're dealing with.
Cranky villagers keep it straightforward with Black and Blue colors and Simple or Cool styles. A Black sturdy sewing box or a Blue simple kettle are reliable winners that won't break the bank.
Female Personalities: Normal, Peppy, Snooty, Sisterly
Female villagers have their own gift rules, and they're just as picky. While Normal villagers have more balanced tastes that make them easier to shop for, the other three personalities are where you need to pay attention.
Peppy villagers are probably the easiest to shop for if you love pink - they go crazy for Pink and Red items with Cute or Simple styles. A Pink heart-shaped boom box from Nook Shopping is affordable and hits all their favorite tags.
Snooty villagers want to feel expensive, so stick to Black & White items with Elegant or Gorgeous themes. A Black fancy frame (if you can craft it) or a White whirlpool bath from Nook's will make them actually smile, which is rare.
Sisterly villagers are the cool older siblings who appreciate Red and Black colors with Cool or Simple styles. An Athletic jacket in Red or a Black biker jacket is basically guaranteed to get you best friend status.
Advanced Friendship Boosting Techniques
Daily Interaction Checklist
The friendship system runs on a hidden 0-255 point scale, and you're already starting at 25 points with every new villager. The magic number is 150 - that's when they'll start giving you their photo, so you've got some work to do.
Your daily routine is pretty straightforward, but the numbers add up fast. Chat with them whenever you see them - you can get up to 5 points per day from this, with the first hello giving 1 point and up to 4 more for extra interactions. Always wrap your gifts, since that adds a sneaky +1 bonus on top of whatever the present is worth. And complete any favors they ask, because these deliveries and item hunts are worth +3 points each.
But here's where you can really snag some bonus points. Keep an eye out for fleas - catching one off a villager is +5 points - and sickness. Giving medicine when they're ill helps, but trying without any in your pocket will actually cost you a point.
Once you hit 100 points, you'll be able to change their catchphrase, which is your first real sign you're making progress.
Birthday and Special Event Bonuses
If you want to absolutely cheese the system, mark your calendar for two things: birthdays and Toy Day. A birthday gift isn't just a nice gesture - it's worth a massive +7 points and guarantees you'll get their birthday cake item, which is pretty sweet.
But Toy Day on December 24th is where things get absolutely broken, because there's a 5x friendship multiplier active for every wrapped present you hand out. It stacks with existing bonuses like color and style preferences, which means a single well-chosen Toy Day gift can equal roughly half a week of daily interaction efficiency. You can basically max out a villager in one day if you come prepared.
Common Mistakes and Friendship Pitfalls
Friendship-Damaging Actions to Avoid
Here's something most players don't realize: you can hit villagers with nets, push them around, or completely flake on errands, and your friendship score won't budge. Those actions feel mean, but mathematically, they don't matter. The game only tracks two ways to actually lose points, and both involve gifts you shouldn't be giving.
The real friendship killers are surprisingly specific:
| Action | Point Penalty | What Counts |
|---|---|---|
| Handing over trash | -5 points | Boots, cans, tires, spoiled turnips, weeds, or wrong lost item |
| Giving a hated gift | -3 to -5 points | Garbage or furniture in a disliked style |
That spoiled turnip you forgot about? Yeah, that's -5 points. Same goes for returning a lost item to the wrong villager - if you find Pudge's book and hand it to Cookie, that's an instant -5 hit. For furniture gifts, you need to know their style preferences; ugly furniture to the wrong personality can drop you up to 5 points. The trash penalty is straightforward, but the gift one stings because you might think you're being generous.
Photo vs Poster: Don't Get Confused
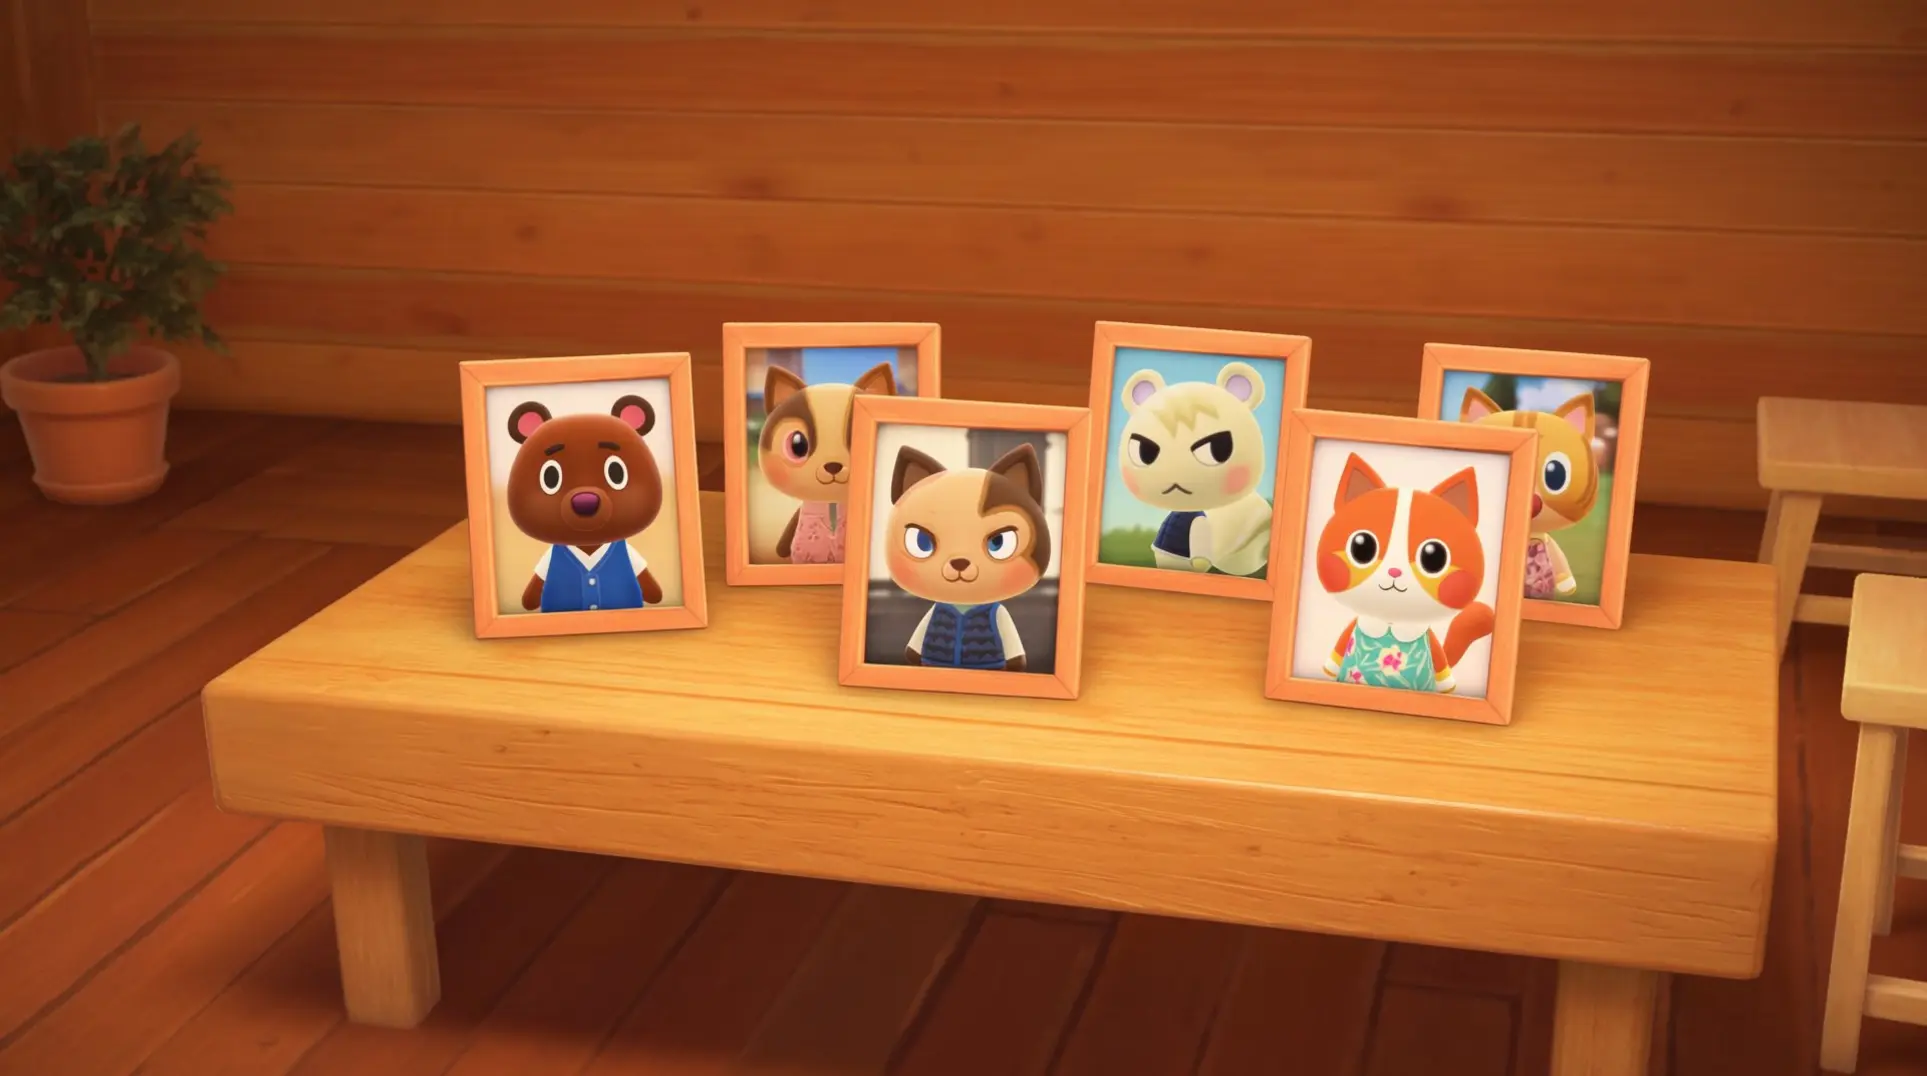
This mix-up trips up everyone, so let's set the record straight. A villager photo is the actual holy grail - a freestanding 3D portrait you get randomly once you're besties. You can't buy it, you can't reorder it, and it'll have a personal message from them scrawled on the back. That's proof you put in real time.
A villager poster is just a wall-mounted 2D print. You unlock it by having them pose on Harv's Island, then it appears in your Nook Shopping catalog for 1,000 Bells. And here's the kicker - scanning their amiibo at Harv's gives you the poster instantly, no friendship required. So don't let that catalog purchase fool you into thinking you've got the real deal.
Photo Collection Tracking and Display
Getting Multiple Photos from One Villager
So you've got your first photo, but you're wondering if you can score another one - maybe in a different frame color? While Nintendo never officially confirmed it, you absolutely can get duplicates from the same villager. The trick is simple: don't let that friendship bar drop. Keep chatting daily, deliver wrapped gifts, and maybe send a letter or two. The game basically treats it as a repeatable reward for max-level friends, which means there's no secret cooldown timer - just consistency. If you're grinding hard, stockpile some wrapped fossils since villagers love those, but any thoughtful gift keeps the heart points flowing.
Photo Frame Customization Options
Once you have a stack of photos, you'll want to display them right. Each Framed Photo can be customized to four different frame colors: Natural Wood, White, Black, or Gold. To make the swap, you'll need to talk to Cyrus over on Harv's Island, and he'll charge 1,000 Bells per photo. That's not cheap if you're customizing a whole village's worth, but the gold frame especially pops in fancy builds. My advice? Batch them - bring a pocketful and do them all at once, so you're not making multiple trips and burning through your Bell stash.
Conclusion
Securing a villager's photo is a marathon, not a sprint, built on consistent daily interactions and smart, wrapped gifts. By understanding the point thresholds, avoiding friendship pitfalls, and leveraging special events, you can efficiently fill your collection. Now, go wrap those fossils and start collecting.
More animal-crossing-new-horizons-switch-2-edition Guides
The Ultimate Animal Crossing Villager Tier Guide - Rankings, Trading & Switch 2 Meta
A complete guide to Animal Crossing villager popularity, from S+ elite residents to underrated gems. Learn trading strategies, tier rankings, and how the Switch 2 Edition is reshaping the meta.
Ultimate Animal Crossing: New Horizons 2026 Island Design Guide
Discover advanced techniques, trending themes, and essential resources for creating your dream island in Animal Crossing: New Horizons with the Switch 2 Edition and 3.0 update.

Ultimate Animal Crossing: New Horizons Switch 2 Island Design Guide
Learn how to design your perfect island in Animal Crossing: New Horizons Switch 2 Edition. Master layout fundamentals, villager housing, path design, terraforming, and achieve 5-star ratings.
AI Tactical Companion
Consult with our specialized tactical engine for animal-crossing-new-horizons-switch-2-edition to master the meta instantly.