Complete VI-O-La Neuro Bike Customization Guide: Unlocks, Upgrades, and Skins
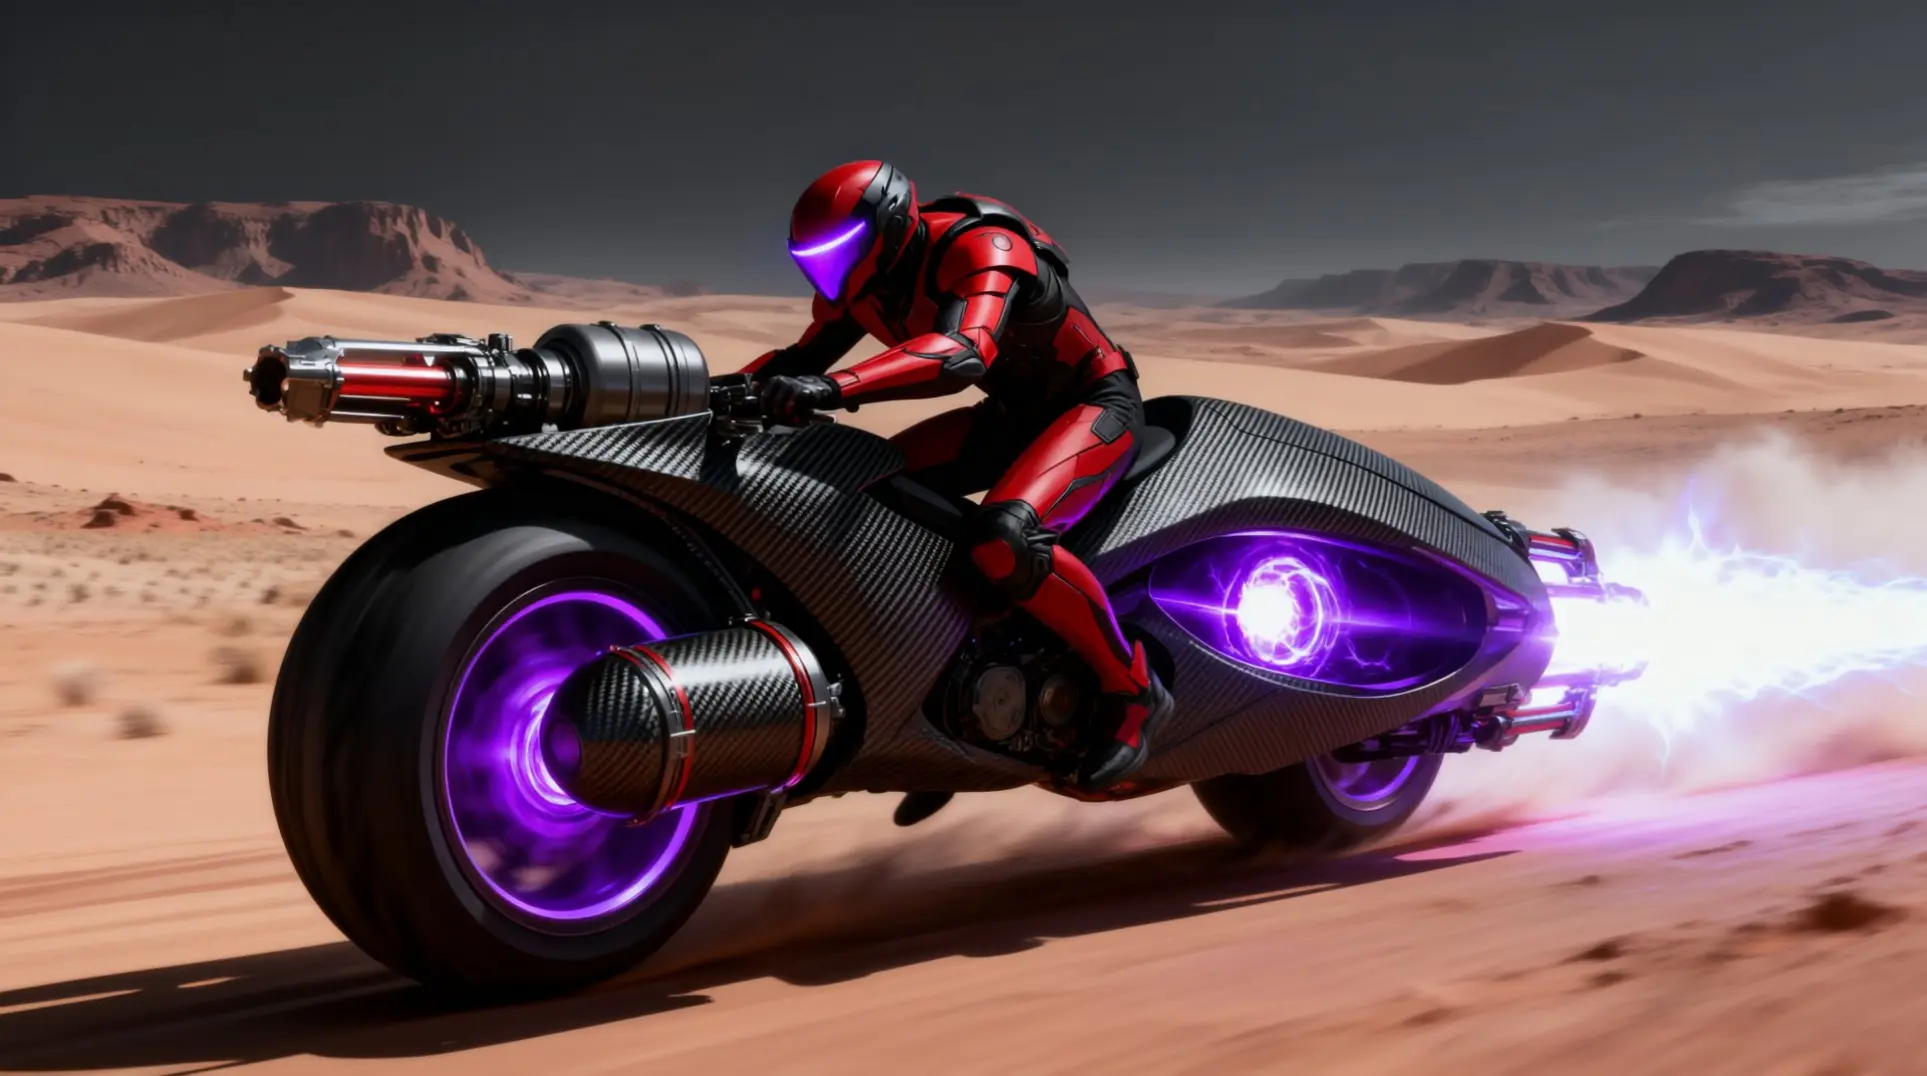
Unlocking the VI-O-La Neuro Bike in Volt Forge is just the beginning. To truly master the dunes of Sol Valley, you'll need to hunt down its hidden upgrades and customizations. This guide covers everything from essential unlock requirements and performance-boosting tanks to advanced tuning parts and cosmetic skins, ensuring you get the most out of your ride.
Essential VI-O-La Unlock Requirements
Story Unlock: Volt Forge Tower 1
You won't even lay eyes on VI-O-La until you've fought through Green Fury's jungle and ridden that cargo pod lift into Sol Valley. Once you're in Volt Forge, you'll need to climb Tower 1 all the way to the top floor - that's where the magic happens. The Vi-O-La Neuro Bike Mk VII sits on a massive pedestal in the main tower room, but you can't just hop on. There's a Vi-O-La Suit Printer planted right at the base, and that's your real ticket to riding.
VI-O-La Suit Module Acquisition
Here's the thing: this isn't a separate module you stuff in your inventory. Hit the printer interaction, and it fabricates the suit on the spot, dropping it right there at the pedestal. The Vi-O-La Suit auto-equips instantly, which means you're technically ready to ride, but hold up - immediately turn around and activate the bike console to sync the suit to the vehicle. That enables the 'Ride Vi-O-La' prompt permanently, so you won't have to guess later.
Basic Controls and Functions
The controls click pretty quick once you're rolling. Tap Plus to summon or dismount, but only in designated open areas (you'll see a driving-exit marker when it's available). Accelerate with ZR (or R), steer with the left stick, and use ZL or L to brake.
The boost system is where it gets interesting. Tap B to boost - this drains your gauge - but quickly tap and hold B again during a boost to perform a Power Slide, which creates a wider force wave to hit multiple enemies or slide under obstacles.
For combat, hold R to lock on - the reticle turns from blue to red - and release to fire up to five homing projectiles at targets or ore deposits while you're moving. It's shockingly effective.
And for the vibe: D-Pad Up toggles the Vi-O-La Radio (play/stop), Left and Right shuffle tracks if you've got the Samus amiibo scanned, D-Pad Down toggles your minimap, and Y handles free aim.
Performance Upgrades: Boost Tanks (All 3 Locations)
If you're looking to max out your Vi-O-La's boost capabilities, you'll need to hunt down all three Boost Tanks scattered across Sol Valley and Volt Forge. Each one pushes your mobility further, and the full set completely changes how you traverse the dunes.
Boost Tank α: Northern Magnetic Rail Tunnel
Your first stop is the Northern Magnetic Rail Tunnel, just north-west of Sol Valley's first save station. You'll spot it on a raised stone platform, but you can't just walk up there - you'll need the Vi-O-La bike to boost up the sandstone ramp. Once you're up top, look for a recessed floor panel and hit it with a charged Ice Shot to freeze it over, which reveals the first tank. This one's a game-changer because it bumps your instant boost count from three to four, giving you way more breathing room when those jerk Tyr-Skit enemies start swarming.
Boost Tank β: Glass Basin Rogue Drone Reward
Next up is Boost Tank β, and this one's locked behind a fight. Head to the Volt Forge area and find the Mag-lev Maintenance Shaft - drop a Morph Ball bomb on the cracked grate, then boost-jump across the magnetic rails to reach the boss arena. The Rogue Drone waits in a hexagonal chamber with an energy shield, but you can drop that shield by overloading its three rotating nodes with charged Control Beam shots. Once you drop the drone, the blast door to the Obsidian Spire elevator cracks open, and you'll get a permanent scan entry for the 'Caretaker-Class Rogue Unit' - plus the tank, obviously.
Boost Tank γ: Ruined Overpass Sandstone Platform
The final piece, Boost Tank γ, is tucked away in Sol Valley's Ruined Overpass, but you'll need the Fire Shot to reach it. Look for a flammable oil drum under a collapsed pillar - blast it to create a ramp, then back up and boost-jump from that ramp onto an overhead girder. The tank's sitting inside a cracked cargo crate that you can just drive over to grab. This last upgrade adds a third chevron to your heat gauge, which isn't just for show - you'll need it for that brutal desert chase sequence later on.
Boost Mastery: Red-Line Achievement
Once you've got all three tanks, you're looking at a maxed-out boost meter and the longest possible dash sequences in the game. This means you can finally cross those wide dunes and actually outrun the one-shot sand worms on Hard mode, which feels incredible. But here's the real kicker: collecting the full set automatically reveals every remaining collectible icon on your Sol Valley map - Missile Expansions, Scout Bots, everything - without spending a single credit. Plus, you get the 'Desert Hawk' paint job for Vi-O-La at any workbench, which you'll need for the 'Style Hunter' achievement. And if you're feeling spicy, try for the 'Red-Line' mastery feat by chaining boosts without overheating. Good luck with that one.
Hidden Tuning Parts (Most Guides Miss These)
Inertia Dampener: Air-Drag Reduction Module
The Inertia Dampener is what transforms your Vi-O-La from a ground bike into a genuine ceiling-crawler, letting you stick to magnetic rails and completely flip your pathing options. Unfortunately, it's split across three fragments you'll need to hunt down manually.
Your first stop is Volt Forge Sub-Level 02, inside the Mag-Rail Test Track. Ride left from Charging Station Alpha, grapple the gate blocking your way, and you'll spot the fragment on a central pedestal. Easy enough.
The second piece is trickier, hiding inside the Crucible Line Coolant Tunnel. You'll have to ride the maintenance rail against the coolant flow, then boost through steam jets to reach a Kinetic Lockbox. It's a rough ride, but the fragment's inside.
The final piece is up in the Foundry Overlook. After you take down the Aegis Drone MX-09 on Tower 1's top floor, scan the red coolant pipe nearby. That reveals a destructible grate, and behind it sits the last upgrade capsule.
Once you've snagged all three, the Dampener auto-installs - no menu fiddling required. You can now tap L mid-air to engage magnetic mode, and hold ZR for a Boost Slam. Those ceiling rails you kept seeing? They're suddenly your new best friends.
Ionized Suspension: Terrain Stability System
The Ionized Suspension is what keeps your Vi-O-La glued to the Viewros skybridges at high speed, auto-deploying retractable undercarriage and creating a glide cushion that prevents wheel slip. Here's the good news: that core skybridge functionality unlocks the moment you grab your bike from Tower-1 in Volt Forge. Just hit any skybridge ramp and you'll see 'Skybridge Drive System: Online' - no fragments required.
But the full terrain-stability package - the part that lets you glide over quicksand and chain-hop cargo pods - that needs actual parts.
The first fragment is stashed in Cargo Pod 7C, deep in the Viewros Wastes. Use your Plasma Winch to pry open the blast shutters, clear out the Lumigek swarms, and snag the schematic from the dropped crate. Once installed, you can hold ZL at cruise speed to glide across quicksand and glassified flats without waking up the sand-worms.
A third fragment is rumored to be inside the Machine Era Archive somewhere in Viewros, but unfortunately, no data-miner or speed-runner has confirmed it as of early 2026. So for now, consider it unverified.
Installation and New Game+ Transfer
Unlike your suit upgrades, you don't install these through a menu. Instead, you roll the Vi-O-La over glowing Neuro-Port pads and Samus auto-solders the component directly into the frame. No manual inventory step required.
You'll find blue-lit VI-O-La Docks in major hubs like Volt Forge, Aeion Bazaar, and Aurora Spire. These pads do three things at once: fully repair your bike, refill all boost charges, and write a secondary checkpoint that memorizes your cosmetic skins and Boost Tank totals. Just don't rely on the orange Save Stations for bike progress - they only save Samus's state, so if you save while dismounted, your bike's position and upgrade count won't be recorded.
For New Game+, here's the deal: all your Boost Tanks and cosmetic skins carry over, but the Vi-O-La frame itself gets re-locked behind the Tower-1 story gate. The upside? Once you reassemble the bike in NG+, all your upgrades snap back on instantly. And any Amiibo-unlocked skins are immediately selectable from the pause menu as soon as you re-acquire the Vi-O-La Suit and bike.
Cosmetic Customization: All 8 Skins & Unlock Methods
Default Skin: Gun-Metal Gray
You won't have to wait long to start customizing your ride. Once you clear Volt Forge Tower 1 and get your hands on the VI-O-La motorbike, it comes with the Default Theme already applied. It's a gun-metal gray chassis with factory-fresh Volt-Forge yellow accents, giving it that straight-off-the-line look. Not flashy, but it gets the job done.
Amiibo-Locked Skins (Samus & VI-O-La Figure)
Here's where things get interesting. If you've got the Samus & VI-O-La amiibo, scanning it doesn't just give you one skin - it drops a whole goodie bag. You'll get the Promo White skin, which is a clean, bright white variant, plus the Retro 2-D skin that wraps your bike in a pixelated NES-style aesthetic. The amiibo also throws in a Vi-O-La Radio so you can bump custom tunes while riding, and most importantly, an Odometer that tracks your total distance traveled. That last item is key because it gates another entire set of skins.
Milestone Skins: Distance-Based Unlocks
The Odometer isn't just for bragging rights - it's your ticket to seven more skins, and they drop at regular intervals. Every 50,000 meters you rack up earns you a new theme, which means you're in for a serious mileage grind. Here's the breakdown: it starts with Samus Varia at 50,000m, then Sylux at 100,000m. Keep pushing to 150,000m for Metroid Prime, and the rewards keep coming - Space Pirate at 200,000m, Ancient at 250,000m, Psychic Era at 300,000m, and finally, the big one at 350,000m: the Vi-O-La Suit theme. The best part? Each new skin also triggers a Boost Recovery buff for your current session, so your boost meter refills faster while you're cruising around. It's a nice little reward for the long haul.
Special Unlock Methods
If riding hundreds of kilometers sounds like a chore, there are a few alternative paths, since some skins hide behind tougher challenges. You can hunt down hidden Chozo shrine fragments scattered across the map to piece together Chozo glyph-themed armor skins. Alternatively, if you're a completionist, nailing 100% enemy scans in a single playthrough will award you the Prime glyph armor. And for the truly dedicated, finishing the game on Hyper difficulty with 100% item collection will also open up some exclusive cosmetic options. These aren't quick rewards, but they give you something to chase if you're already planning to scour every corner of the game.
Amiibo Rewards and Special Features
Samus Amiibo: Radio and Energy Shield
If you've got the Samus amiibo lying around, you're in for two upgrades that actually change how you experience Sol Valley. First up is the Vi-O-La Radio, which lets you swap out that default engine hum for any BGM track you've collected - so yeah, you can finally ride around with your favorite tracks instead of just the ambient noise. The second perk is a Daily Energy Shield that restores your energy and soaks up 99 damage from any source, but here's the catch: you can only use it once per day, and it runs on real-time, so you'll be waiting a full 24 hours for it to recharge.
Samus & VI-O-La Amiibo: Skins and Boost Recovery
The Samus & Vi-O-La dual-pack is where the cosmetic flexing really kicks in. Scan this one and your bike gets an odometer that tracks every meter you've traveled, plus you'll get a new Vi-O-La skin every 5,000 meters until you've collected all seven:
- Samus Varia Theme
- Sylux Theme
- Metroid Prime Theme
- Space Pirate Theme
- Ancient Theme
- Psychic Era Theme
- Vi-O-La Suit Theme
But it's not just about looks - this amiibo also grants a Boost Recovery bonus once per day that significantly speeds up your boost regeneration while you're in Sol Valley. The downside is that it deactivates if you leave the area, so you'll need to plan your route accordingly.
Sylux Amiibo: Lore Extras
The Sylux amiibo is really for the lore hunters out there. Scanning it adds a special flashback cutscene to your Gallery - though you can also get this by hitting 100% item and scan completion if you don't have the figure. On top of that, Sylux will occasionally drop random spoken lines or taunts in the menu, just to keep things interesting.
Advanced Customization Strategies
Early Game Upgrade Priority
Your first stop should be the Dash Jet in Sol Valley #1, which gives you a horizontal air-burst that completely changes how you move. You can finally cross those broken sky-bridges without waiting for the Grapple Beam, and you'll grab two missile expansions plus an Energy Part along the way.
Once you've got that, you'll want to head for Mach-2 Overdrive in Sol Valley #2, since it doubles your top speed and lets you climb those magnetized half-pipes you've been seeing everywhere. It also smashes the reinforced crates blocking the Thermal Visor, which means you won't have to backtrack later.
If you've got the amiibo, the Chrome-S skin (Samus Zero Suit) is a solid third pick. It halves knock-back when you clip enemies at top speed, so you basically get one free collision before your bike overheats.
Speed-Run Optimization
For Any% runs, you only need the three Boost Tanks on the final elevator path - everything else is optional if you're aiming for a sub-27 minute time. The real game-changer is the Inertia Dampener skip (IDS), which requires some tricky timing: you have to hold ZL, tap B, and flick the stick 180° at the third engine flash. This cancels the dampener animation but keeps the 'no-friction' flag active, giving you infinite momentum.
The payoff is huge: IDS lets you reach Desert West Tank #2 without the Gravity Suit or Space Jump, which cuts out a six-minute detour and saves roughly 28 seconds overall.
100% Completion Checklist
If you're going for the 'Tuned to Perfection' achievement, you only need to grab three specific Boost Tanks plus the Samus & VI-O-La amiibo skin with the Velocity finish, so don't waste time on every single upgrade.
The first Boost Tank is at Glass-Ridge Overlook, which you can reach with a mid-air boost-jump off the eastern ramp after Volt Forge Tower 1.
The second one is in the Submerged Transit Tube of Hydro-Works' flooded tunnels - just hit it with a charged dash to shatter the cracked ferro-glass half-pipe.
The third sits on the Skybridge Spire service balcony; ride the magnetic rail, jump across, and scan the 'Bounty-Box' terminal to open the security locker.
Finally, tap the Samus & VI-O-La amiibo anywhere while your bike is active to unlock the 'Velocity' skin.
Farming Routes for Shine Shards
The community gold standard is a five-minute circuit that pulls 25–30 Shine Shards: start with the Dune Loop, hit Gibardaum Row, clear the Bag Rooms, then deposit at the Altar of Legacy.
The Central Sol Valley 'Dune Loop' gives you 4 shards in about 90 seconds; spawn at the Green-Fury gate, boost north-west to the first crystal spire, then drift-slide clockwise to grab three out-croppings plus the altar behind the save station.
Next up is East Sol Valley's 'Gibardaum Row' for 6 shards in 120 seconds - three house-sized boulders in the rust-red sand each hide two shards, and they respawn every 90 seconds, so you can loop indefinitely for 12 shards per cycle.
Finally, the North-East Shrines 'Bag Rooms' drop 5 shards in just 60 seconds; shoot the ceiling crystal bags in the entry hall and side alcove, then exit and reload the shrine for a sub-one-minute repeat.
FAQ: Common VI-O-La Customization Questions
Are Skins Purely Cosmetic?
Yes - every VI-O-La skin is 100% cosmetic with zero impact on your stats, weapon damage, or traversal abilities. They're just for flexing on Space Pirates while you explore, so don't expect any hidden bonuses.
The Phazon Eclipse skin is a perfect example: it swaps your suit for an indigo-black palette with glowing orange Phazon fissures running through the plating. It looks incredible in dark environments, but you won't jump higher or hit harder. Style points only.
Missable Upgrades and Points of No Return
Here's a big one to watch for. The Inertia-Dampener fragment in Volt Forge is sequence-locked, which means you absolutely need the Psychic Boots wall-jump upgrade before you can even reach it.
If you leave Volt Forge before grabbing it? Don't panic - it's not permanently missable. You can always circle back later once you have the boots, though it's a hassle. The game just won't let you scale that specific wall until you're properly equipped, so don't waste time trying to cheese it early.
New Game+ and Upgrade Retention
Let's be real - we don't have official confirmation on New Game+ mechanics yet. Nintendo hasn't detailed whether you can carry over gear or if there's a 'Retain Vehicle Upgrades' toggle, and no patch notes have mentioned it.
Until we get an official announcement, this is still up in the air. If you're holding off on a second playthrough hoping to keep your maxed-out VI-O-La, you're gambling on future updates.
Cross-Save Skin Sharing
This is where things get split. amiibo-earned skins (like the classic Vi-O-La Suit theme) are tied to your user profile, not your save file. Once you scan that amiibo, any new save under that profile can use the skin immediately, no extra work needed.
But - and this is a big but - skins you get through 100% scan completion (Sylux, Space Pirate, Ancient, Psychic Era, Metroid Prime) are save-specific. Starting a fresh file means you'll have to grind those scans all over again, unfortunately.
From essential unlocks to hidden tuning parts and cosmetic skins, fully customizing your VI-O-La transforms how you explore Sol Valley. Whether you're chasing the 'Red-Line' achievement or just want to ride in style, these upgrades are key to mastering the desert. Now, get out there and push your bike to the limit.
More metroid-prime-4-beyond Guides
Metroid Prime 4: Beyond Amiibo Guide - Rewards, Scanning, and Daily Perks
A complete guide to using amiibo in Metroid Prime 4: Beyond. Learn which figures work, how to scan them, and unlock exclusive skins, music, and powerful daily buffs.
Metroid Prime 4 Beyond: The Ultimate 100% Completion Guide for the True Ending
Unlock all four endings in Metroid Prime 4 Beyond. This guide details every missable scan, one-time item, and biome strategy required for the secret 100% true ending.
Mastering Neuro-Points in Metroid Prime 4: The Complete Guide
Learn how to earn, spend, and optimize Neuro-Points (NP) in Metroid Prime 4. This guide covers farming locations, skill trees for Telekinesis, Pyrokinesis, Cryokinesis, advanced synergies, and optimal progression paths.
AI Tactical Companion
Consult with our specialized tactical engine for metroid-prime-4-beyond to master the meta instantly.