Complete Guide to Indiana Jones: Order of Giants DLC - Achievements, Collectibles, and Walkthrough
Introduction
The Order of Giants DLC for Indiana Jones and the Great Circle is here, dropping you into the heart of Rome's ancient mysteries. This expansion weaves a new chapter directly into Indy's main campaign, sending you on a hunt for the elusive Nephilim Order. Our complete guide will walk you through every achievement, collectible, and puzzle to ensure you conquer the catacombs and claim your 100% completion.
DLC Overview & Essential Information
DLC Release & Story Premise
So the Order of Giants DLC dropped worldwide on September 4, 2025, and it's available on Xbox Series X|S, PlayStation 5, and PC. Note that it is not included with Xbox Game Pass; it must be purchased separately or is included with the Premium Edition. Unlike most expansions that tack on after the credits, this one actually slots right into the middle of Indy's main campaign. You'll kick things off with a fresh field-work assignment called 'A Mystery Begins' near the Vatican's Fountain of Confession, which feels way more organic than some awkward post-game add-on.
Father Ricci tips you off about the Nephilim Order resurfacing - that secretive 'tribe of giants' the base game only teased at you. This sends you deep into Rome's ancient streets and its maze-like catacombs, and MachineGames wasn't kidding about the 'stunning new locations.' We're talking twisting subterranean passages that'll have you reaching for your map every five minutes, and trust me, it's easy to get turned down here.
Collectible Totals & Achievement Breakdown
If you're hunting for that sweet Gamerscore, the DLC throws 10 new achievements your way totaling 250 points. Here's what you're up against:
| Achievement | Description | Gamerscore |
|---|---|---|
| The Order of the Giants | Complete 'The Order of the Giants' | 100 G |
| Roman Scholar | Collect all Journal notes in Rome | 20 G |
| Symbol of the Past | Find every Artifact in the DLC area | 20 G |
| The Seven Grades | Solve the Seven Grades mystery | 20 G |
| Gear Master | Solve all five gear-box contraptions | 20 G |
| Whip-Flutter | Save yourself from falling with the whip while dangling from a ledge | 10 G |
| Brawler in Bracciano | Defeat all five Black-Shirt militia soldiers in the Bracciano sinkhole chamber using only hand-to-hand combat | 20 G |
| Feline Friend | Pet the stray cat on the Roman rooftops | 10 G |
| Giant's Shadow | Photograph every fresco depicting the mythical giant | 20 G |
That story achievement alone nets you 100 points, so you're already halfway there just by playing through. For the collectible hunters, you're looking at 118 Journal Notes, 7 Mithraic Artifacts, and 3 Mysteries to wrap up. The notes are particularly grindy, but at least there's a 'Chronicler' trophy that pops after just 25 of them, which is a nice early milestone to keep you motivated.
Estimated Completion Time & Difficulty
A straight story run clocks in around 3-5 hours, though speedrunners are already blasting through it in 2-3 hours by sprinting past everything - and yeah, that means spending most of your time in Rome's sewers, which is... a choice.
If you're going for 100% completion with every collectible and achievement, budget 6-8 hours instead. The difficulty sits at a comfy 2/10 since there's no permadeath, no time-limited sequences, and the combat's pretty forgiving. That said, there's dynamic difficulty scaling that'll adjust Nazi patrol strength based on your main-game progress, so don't expect a complete cakewalk.
Watch out for missables though. Gear Master requires collecting all 9 Mithraic Gears across the three mystery zones. While the final escape sequence is a point of no return, you can backtrack and collect all gears before triggering it. Feline Friend has a stray cat that only spawns at dusk, so you'll need to time your rooftop visit carefully. And Brawler in Bracciano requires defeating all five Black-Shirt militia soldiers in the Bracciano sinkhole chamber using only hand-to-hand combat. Taking damage during this encounter does not disqualify you.
Main Story Walkthrough: Vatican to Mithraeum
Starting the Quest: Vatican Investigation
Your first stop is the Vatican Gardens, where Father Ricci - yes, the priest with the parrot named Pio - hands you the lead that kicks everything off. He's stationed right near Casina Pio IV, but you can't just waltz in. First, you need to loot his office for journal notes. Five specific ones unlock the zipline to the Casina, and three of those - Research Note, A Letter of Warning, and Father Borgnino's Letter - are mandatory for story progress.
Inside the Casina basement, you'll hit the Serpent Puzzle, which is a 12-segment mosaic you rotate to form an unbroken snake line. The trick is getting that serpent to point directly at the Crusader cross - it's not enough to just make a shape.
The Crusader's Helmet waits in a candle-lit ossuary, resting on a sarcophagus, but grabbing it starts a timed collapse. You'll need to whip-pull a support beam and slide under a dropping gate to escape, so be ready for a quick exit.
Once you grab the helmet, you can actually backtrack to the upper basilica confessionals, where three additional notes become accessible. Don't skip these if you're hunting for 100% completion.
Underground Exploration: Serpent Puzzle & Junia's Tomb
The Water Serpent Puzzle in Junia's Tomb uses a 5x5 grid of rotatable water nodes, and you're piping water from A3 to E3. Rotate nine specific nodes to create a snake-shaped path: down, left, up, across, then finally up into the statue's mouth. The solution is specific, but the visual feedback is clear when you get it right.
If you mess up, there's a reset lever on the left wall, and you can keep the same camera angle to retry without confusion. Luckily, you can take your time once you know the sequence.
Your reward is the first Cylinder Piece, which sits inside a small bronze chest on the lowest platform that rises after you solve the puzzle. Keep an eye out for hidden Journal Note #17 ('Mithraic Plumbing') on the middle platform - it only appears during the puzzle, so grab it before you finish.
Rome Sewers & Palazzo Ricci
The Palazzo Ricci bookcase puzzle is what stands between you and the Cloaca Maxima. You need to pull three specific books - Wheel, Crown, Pyramid - in that exact order, and a spiral staircase drops you straight into the sewers.
Inside the library, after the bookcase opens, you'll find the Pugilist's Primer skill book on a shelf. This grants you the heavy-punch skill, which is pretty handy for the fights ahead.
The Cloaca Maxima is massive, containing 38 of the DLC's 118 journal notes. The path loops in a circle: Upper Duct → Hypogeum → Giborrim Tomb → Gladiator cells → exit lift. Follow that route and you'll scoop up most of the sewer's collectibles.
For achievement hunters, the sewer cat is hiding in a half-collapsed brick alcove lit by a hanging lantern. You can only reach it via a whip-swing after resurfacing from the Giborrim Tomb, so don't leave without petting it.
Tomb of Gibborim Puzzle Solutions
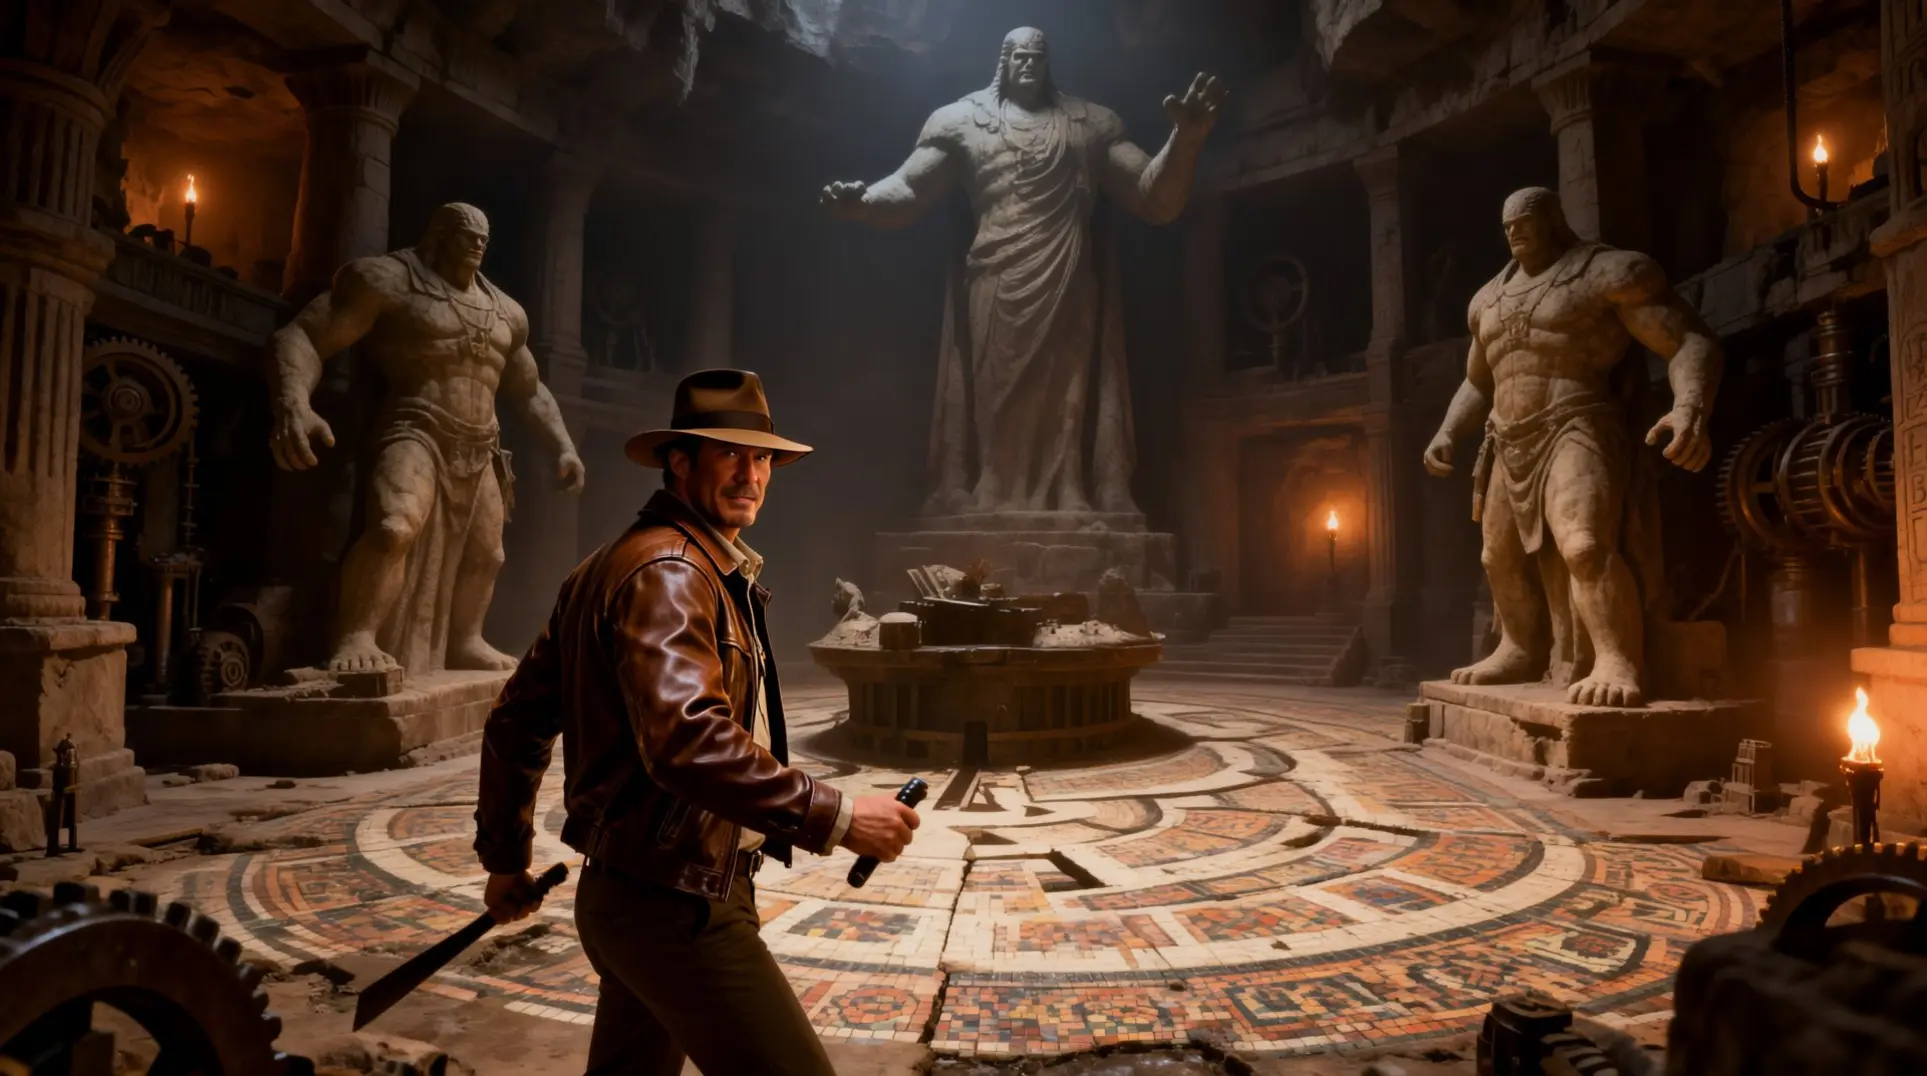
The Tomb of Gibborim throws four mural puzzles at you - Cross, Shield, Trinity, and Sword - each tied to rotatable floor rings that must match symbols on the opposite murals.
The Cross puzzle is all about map orientation. You need to align Halygast to East and Aethopolis to West, but here's the kicker: North on the map equals West in actual space, so you'll be rotating the rings thinking in reverse. Take a moment to reorient yourself or you'll spin in circles.
With the Shield puzzle, you're dodging fire jets that cycle every 30 seconds while you rotate three fleur-de-lis switches to release the Shield Scepter. The fire pattern is predictable, but you'll need to time your movements between bursts.
The Trinity puzzle uses a ring of sigils that must be rotated in order: Key → Shield → Apple → Snake. More fire avoidance here, but the sequence is what trips most people up - miss one and you'll have to start over.
Finally, the Sword puzzle caps everything off by having you place the Sword of Gibborim into Gibborim's heart statue, which reveals the third Cylinder Piece and opens the path to the Mithraeum.
Mithraeum & Final Confrontation
At the Monster's Gate, you're placing five animal tiles in Roman numeral order: Lion (I), Snake (II), Horse (III), Crow (V), Scorpion (VI). Once those are set, you insert the cylinder roll into the center hole, turn it, and the gate swings open.
The Mithraeum itself holds seven Mithraic Artifacts, tucked away in hidden panels behind torch-lit statues and breakable walls. They're easy to miss in the dark, so whip out your lighter and check every corner.
The Abgal boss fight plays out in three distinct phases. First, you throw spears at his helmet to stun him, then you whip-yank three armor pieces off his body. After that, a QTE finisher triggers - nail it and you'll automatically receive the final Cylinder Piece, which rewards you with the 'Giantslayer' trophy.
Mystery Side Quests Walkthrough
A Collegial Mystery
You'll bump into your first mystery almost immediately after starting the Order of Giants DLC, and it's hiding in plain sight within Casina Pio IV's council chamber. To get the ball rolling, you'll need to snag two letters - Federico's Letter and Allesandro's Letter - which are scattered around the council chamber and basically hand you the safe code on a silver platter.
Now here's where it gets interesting. The room's got several paintings, but you're only concerned with three specific details: the 12 Apostles, 2 Cherubim, and 2 beasts (that's a dog and a calf). Combine those numbers and you've got your safe code: 1222. Punch that in and you're golden.
Inside you'll find two classified documents, the Hard Crust Combat Adventure Book, and 100 Adventure Points, which is a pretty sweet starter package for your mystery-solving career.
A Tale of Wine Making
The second mystery sends you crawling through the Cloaca Maxima sewers, where you'll stumble on a hidden chamber tucked away from prying eyes. Fair warning - Blackshirts are patrolling down there, so you'll want to deal with them before you start fiddling with puzzles.
Once you're inside, you'll face six wine-making mural tiles that need to be restored in the proper order. The game clues you in through the vine roots, which basically tell you to follow the actual wine-making process. You'll want to arrange the tiles as: Plant, Grow, Harvest, Process, Ferment, Drink. Nail that sequence and the chamber rewards you handsomely.
Your prize is Mithraic Artifact #3 (the Perses Artifact) plus another 100 Adventure Points - not bad for a little sewer spelunking.
A Bull in the Sky
The final mystery is lurking behind a carved face in the Mithraeum, and this one's the real head-scratcher of the bunch. You'll be working with a weight puzzle that controls six columns, and your endgame is rotating them into the Taurus constellation pattern.
You've got five weights to play with - 1, 1, 2, 2, and 3 - and seven platforms to place them on. It takes a bit of trial and error, but you'll start to see the constellation take shape as you mess around with the weight placements. Keep at it until all six columns align just right.
Finish this last challenge and you'll bag Mithraic Artifact #6 (the Nymphus Artifact), 100 Adventure Points, and the 'Depths of the City' trophy, which means you've officially cleaned up every mystery the Order of Giants DLC has to offer.
Journal Notes by Category & Location
You've got 118 Journal Notes to hunt down in The Order of Giants, and they split into three distinct flavors: 60 Adventure Notes, 45 Field Notes, and 13 Discovery Notes. The good news is they're spread across four major zones, so you won't be combing the entire map at random.
Vatican City alone holds 17 notes, scattered from St. Peter's Square all the way down to the Catacombs – Mithraeum. If you're moving through Nero's Golden House, keep your eyes peeled for another 31 notes tucked into places like the Octagonal Room Puzzle and the Subterranean Aqueduct. The Via Giulia & Tiber Embankment area contributes 45 notes, while Via Appia & Circus of Maxentius rounds out the set with 26 notes.
Here's the catch: some of these notes won't register until you snap a photo. If your camera's out and you see something worth documenting, take the shot - you might be locking in a collectible. Grab that final note and the Master Archivist trophy pops immediately.
Mithraic Artifacts (All 7 Locations)
The Seven Grades achievement is yours as soon as you pocket the seventh artifact, so you don't need to wait for the credits to roll. Here's where they hide:
Mithraic Relief of Cautes sits in the first large sewer chamber (Cloaca Maxima), buried behind oil barrels in a crumbling brick alcove, and you'll need your shovel to pry it loose.
Altar of the Raven glows yellow in your survival instinct, waiting in the southeast corner pit of the Palatine Hill Dig Site - this one you just walk up to.
Lion-Headed Figurine is trickier - it's in the Subterranean Necropolis 'ghost lamps' puzzle room, where a hidden floor grate opens only when you place the middle statue on a pressure plate before lighting the brazier.
Torch-Bearer's Phiale is underwater... or at least it was. Once you drain the central pool in the Baths of Caracalla Basement, whip-pull a loose marble slab to reveal the reliquary.
Zodiac Sundial Fragment requires some star-gazing in the Vatican Scavi, Corridor 7 - photograph a graffiti wall to reveal a constellation pattern, then align Aquarius to the bull to pop open a compartment.
Mithraic Tauroctony Votive lurks in the Colosseum Hypogeum maze. After the second crank lift, backtrack across a suspended cage roof and smash through a wooden barrier to find a small Mithraeum.
Celestial Compass is perched near the end. In the Final Ascent, on the Giant's Stair spiral staircase just before the boss, chisel away a cracked fresco of Sol Invictus to expose the hollow compartment.
Missable Collectibles & Progression Tips
Relax - nothing is missable in this DLC. Once the credits finish, you'll drop back into the Roman catacombs with every shortcut unlocked and enemies respawned, perfect for cleanup. The journal menu even adds a Collectible Counter showing 0/118 notes, 0/7 artifacts, and 0/3 mysteries, updating in real-time as you nab them.
That said, don't forget to pet the cat. You'll find the furry friend in a moon-lit basilica ruin about halfway through the main path, and if you somehow walk past, just fast-travel back to the Basilica Sancta checkpoint after the finale - the cat will still be there waiting.
For the most efficient 100% run: blast through the story first (takes about 3-4 hours), then use the post-credit free-roam. Tackle zones clockwise - Catacombs, Mithraeum, Aqueduct, Basilica, Imperial Vault - so you don't waste time backtracking. The upgraded camera highlights hidden fresco symbols, and finishing each Mystery grants Skill Books that make finding the remaining collectibles easier. Clean up takes roughly 3-5 hours on Normal difficulty, and the whole thing sits at a comfortable 4/10 challenge with zero unobtainable trophies.
Achievement/Trophy Roadmap
Efficient Achievement Order
The Order of Giants DLC brings 10 achievements worth 250 Gamerscore total, and you won't need multiple playthroughs if you're smart about it. Your best bet is to focus on the story first, which means you'll naturally grab the first two achievements during that initial Vatican stealth segment - Locked Doors Hide Secrets and Out of the Vatican pop early, so you can't miss them.
But here's where you need to pay attention: there's a missable cat interaction in Via Giulia that counts toward The Seven Grades achievement, and if you blow past it, you'll have to replay the whole chapter. You also need to grab 5 fresco fragments during your final exploration of the complex, and this has to happen before placing the seal that triggers the ending. Once the credits roll, you're in luck - the replay mission becomes available immediately, and you can select 'The Order of Giants' from the Chapters list to clean up anything you missed without starting over.
Story & Miscellaneous Achievements
You'll earn 4 story achievements just by completing the main narrative, so don't stress about these. Locked Doors Hide Secrets pops when you get inside Villa Pia by snagging Father Ricci's Castila key and zipping across, while Out of the Vatican triggers when you reach Rome after finishing Junia's Tomb and crawling through the sewers. The big one, The Order of Giants, appears after you defeat Abgal to complete the DLC's namesake mission.
Then there are the two miscellaneous achievements that might trip you up. Pet the Cat is exactly what it sounds like, but it's missable - you have to pet that cat at Via Giulia in Rome before you move on, or you're replaying the chapter. Rolling Thunder triggers automatically when you survive the on-rails truck escape sequence, so you can't really mess that one up.
Collectible & Puzzle Achievements
This is where your completionist instincts kick in, and you'll be hunting down four separate achievement categories. Roman Scholar wants you to collect all 118 Journal notes, which breaks down to 60 Adventure Notes, 45 Discovery Notes, 6 Mystery Notes, plus the notes that come from the 7 Mithraic Artifacts - so yeah, it's a lot of scanning everything in sight.
The Seven Grades has you collecting all 7 Mithraic Artifacts, and that includes that same missable cat interaction we mentioned earlier, so it's pulling double duty in your cleanup run. For Depths of the City, you'll need to solve the 3 specific DLC mysteries: A Collegial Mystery, A Tale of Wine Making, and A Bull In The Sky. Finally, Books of Power is straightforward: find and purchase the two specific Adventure Books available in the DLC, and you're done.
Puzzle Solutions & Gameplay Tips
Major Puzzle Walkthroughs
These three puzzles will test your patience if you don't know what you're doing, so let's break them down properly.
Water Serpent looks simple at first - just a 5x5 grid of rotatable nodes that needs to channel water from a central basin. But the goal is raising four stone platforms and opening a five-snake-head door, which means you're juggling five separate water drains simultaneously. The puzzle unlocks in sections as water hits pressure plates, so you can't just solve it all at once. Here's the kicker though: the third platform gets stuck. You'll see the gears grind but nothing moves, which means you need to climb the giant snake statue looping around the room, follow its body to a side platform, and whip-yank the jammed Serpent Wrench out of the mechanism. Only then will that final platform rise and let you finish.
Gladiator Shrine swaps water for fire. You're guiding a fireball through a circular gutter-maze to light four animal-themed statues in a specific order: Lion → Horse → Eagle → Bull. You've got roughly 25 seconds before the fireball fizzles out, and you'll need seven precise lever pulls to rotate bridge platforms at the right moments. The pressure is real, but luckily there are two loop shortcuts - one between the Tiger and Bear statues, another southeast of the Boar - that let you trap the fireball in an endless cycle. This buys you extra time to reposition other pieces or just catch your breath, since the fireball won't extinguish while looping.
Monster's Gate is a two-stage nightmare. First, you need to rebuild a cracked mural by placing five tiles showing animals with Roman numerals: Lion (I), Snake (II), Horse (III), Crow (V), and Scorpion (VI). Once that's done and you've mounted the gear in the revealed mechanism, the real challenge begins. The Cylinder Roll must be used to match each animal's numeral to its planetary symbol. The correct pairs are Scorpion (VI) → Uranus, Crow (V) → Venus, Horse (III) → Mercury, and Snake (II) → Saturn. After setting all four pillars, insert the cylinder into the center hole and turn it to crack the gate open.
Combat & Stealth Strategies
The Abgal boss fight is a four-phase slog in a flooded Mithraic chamber, but you can cheese it with the right approach. In Phase 1, two riflemen and a shotgunner spawn immediately, so whip-pull the central chandelier for AoE kills and cover. Grab the shotgun - it staggers Abgal in two hits and exposes his ankle bracers when he roars with a white flash. Phase 2 floods the arena with knee-high water, so lure Blackshirts into it, then shoot the fuse box above the mural to chain 250V stun damage that insta-kills them and stuns Abgal for four seconds. The Brawler's Digest skill book is clutch here since it knocks helmets off, letting you one-shot Blackshirts with their own sidearms.
Phase 3 is where Abgal gets his shield aura that reflects bullets, but you can break it by destroying two Mithraic sun-disks embedded in pillars (two revolver shots each). A flamethrower elite spawns, but whip-pull the valve on his back for an AoE explosion that also topples the left pillar. This creates a grapple platform for a drop-kick that shaves off 15% of Abgal's HP and skips the next add wave entirely. Phase 4, Noah's Echo, slows time for eight seconds while spectral flood waves appear. You need to land three whip-strikes on Abgal's glowing rib seals (those orange runes) while headshotting respawning Blackshirts to extend slow-mo by one second per kill, maxing out at twelve seconds. Crack the final seal and Indy automatically triggers the Nephilim Chain whip finisher.
For optimal loadout, bring the Silenced Hi-Power from mystery #2 to destroy sun-disks without alerting extra Blackshirts. You only need 2 med kits anyway since healing is capped at two uses per fight. Craft an Adrenaline Shot at the campsite before the Mithraeum for a one-time slow-mo refill, and equip the Blackshirt Disguise from the Vatican vault to delay Blackshirt aggro by two seconds each phase.
If you'd rather avoid fights, stealth fundamentals are simple: crouch-walking on stone is nearly silent, but splashing through ankle-deep water alerts enemies within 15 meters. Use moss-covered ledges as quiet bypass routes, and remember giants' vision cones are horizontal - any ledge two meters above floor level is a safe observation post. The Blackshirt Disguise lets you infiltrate Palazzo Ricci smoothly; hide behind the small wall jutting out near the courtyard entrance or whip the arch trellis to reach an open window for silent entry. For silent takedowns, crouch-aim at a solitary guard's belt satchel and whip-yank them into water - the splash masks the body-hit noise and counts as an environmental kill that won't trigger alarms.
Navigation & Exploration Tips
Getting around efficiently saves more time than you'd think. In the Cloaca Maxima, boat stealth relies on rhythm: tap the paddle button at 1.2-second intervals. Faster strokes create ripples giants can spot even in darkness, so stay inside those striped shadows cast by overhead grates to break line-of-sight unless you're directly beneath one within six meters. If spotted, dive under the boat and swim beneath a low arch - the detection meter resets after four seconds.
The torch's wider light cone reveals tiny brass wall hooks that mark climbing routes, and whenever you spot a mural fragment depicting a winged bull (that Mithraic symbol), a hidden crawlspace is within eight meters. Yellow mooring ropes at boat checkpoints trigger auto-saves, which means you can experiment freely since dying reloads you right there instead of three rooms back.
Your whip is more than a weapon. Crack it against a metal gate to create a 20-meter audio lure with a 45-second cooldown - use this for repositioning, not chain-luring. During platforming, you can whip while crouched, and in the Water Serpent puzzle, the bas-relief snake icon mirrors the correct node alignment path. For silent takedowns, whip-launch to overhead beams above giant patrols, then drop directly behind for an instant 'Back-breaker' stealth finisher (requires the Brutal Takedowns skill book from mystery #1).
In Casina infiltration, after ziplining down, turn around immediately to grab the Barracks Key from a nearby post - unlocking the east door saves major backtracking during cleanup. The Blackshirt Disguise is crucial here to avoid the courtyard captain. Finally, in Palazzo Ricci's library, a burnt paper note reveals a bookcase puzzle: pull books in Wheel, Crown, Pyramid order to open a secret door. This pattern repeats throughout the DLC - always cross-reference environmental clues like burn marks and symbol placements with interactive objects.
FAQs & Troubleshooting
Common Questions Answered
When does the DLC actually start? Once you have unlocked the Vatican hub area. You can start the DLC by finding Father Ricci near the Fountain of Confession in the Vatican and accepting the fieldwork quest 'A Mystery Begins'. This quest is available once the player has unlocked the Vatican hub area, regardless of whether 'The Vatican Break-In' main mission has been completed. You'll need the Premium or Collector's Edition, or at least the Premium Upgrade add-on. If you're running the standard base game or Game Pass without the upgrade, you'll just see a locked grate with a store link, which is a pretty clear 'buy this' message.
What level should I be? The DLC difficulty dynamically scales based on your progress in the main campaign, so there is no specific level requirement. You can jump in with any post-Vatican save. That said, the giant brute mini-boss will absolutely demolish you if you're underleveled, so maybe don't rush in at level 12 unless you hate yourself.
How long is this thing? A straight story run will take you about six to eight hours, but if you're the type who needs every collectible, budget ten to twelve hours on standard difficulty. The sewers are bigger than they look on the map.
What can I miss forever? Pay attention before Chapter 4, 'The Sarcophagus Road'. There are four items that get destroyed by a scripted giant swing: the Bronze She-Wolf relic, Nero's Lyre Pin relic, Field Notebook Page 04, and Field Notebook Page 07. You'll find them on scaffolds that turn into matchsticks. Also, Luca the Graverobber in the Mosaic Chamber is not missable. You can return to talk to him at any time.
Any trophies that are easy to screw up?
What do I actually get for finishing? Rewards include the Mare's Leg repeater (a unique revolver skin), two outfit sets (Roman Legionary and Catacomb Explorer), a 'Lupa' whip color variant, and a permanent Field Dressing upgrade that gives you an extra health segment. It's a solid haul.
Bug Fixes & Workarounds
DLC won't trigger? Install the free Compatibility Unlock mini-patch (it's only 23 MB). The DLC uses the base game's autosave system; there is no separate 'DLC flag' tied to a specific autosave.
Giant's Seal door stuck? If you opened the inventory inspect screen while your companion was talking, that's your culprit. Reload the save from before the second ring, wait for all voice lines to finish, then insert both rings without inspecting them.
Elevator freeze in Nero's bathhouse? Unequip your whip and make sure Indy is standing completely upright before stepping on the lift. The default jacket outfit can cause an animation conflict that soft-locks the game.
Crusader mural puzzle missing the final interact prompt? Fast-travel to the surface, manually save, close the application entirely, then continue. The tile re-initializes when the area reloads.
DLC checkpoints overwriting your base-game saves on Xbox? Create one manual save slot in the base game and label it 'Safety' before you enter the Colosseum portal. Never overwrite that slot while playing the DLC - treat it like your emergency exit.
Photo-mode crashes on ultrawide monitors? Drop your resolution to 16:9 before opening photo-mode, or cap your FPS to 60. The crash happens above ~100 fps on 21:9 and 32:9 setups.
Whip-latching dropped you into an untextured pit? Toggle 'Skip Climbing Sequences' in the Accessibility menu to warp to the nearest valid nav-mesh point. It's a get-out-of-jail-free card for geometry bugs.
NPC duplication in the Cult archives? Lure the guard away from the door, wait a full 15 seconds for the suspicion cooldown, then reopen the door. This prevents the frozen guard spawn that blocks progression.
'Order of the Giants' achievement won't pop? Using the 'Reveal All' cartography skill will break it. You need to collect all journal pages manually before buying that skill - otherwise, you'll need to start New Game+ to fix it.
Optimization & Performance Tips
Rome sewers and the Mithraeum chugging? Set Shader Quality to HIGH on PC. It reduces VRAM pressure without any real visual loss in those candle-lit chambers.
On console, ignore the 120 Hz toggle. The DLC ignores the 'Favor Performance' setting and can cause the dynamic resolution scaler to overshoot in reflective water zones. Leave your system output at 60 Hz.
Turn Shadow Cache to On (not Auto). This pre-caches almost 300 unique shadow-casting lanterns, which completely cuts the stutter you'd normally get when extinguishing flames for puzzles.
Screen-Space Reflections are expensive in the sewers. Turn them OFF there - you'll still get point-light reflections, and you'll only lose some smeared fedora reflections that you won't notice in the dark anyway.
Install on internal NVMe, not SATA or external. The sewers stream six 1.2 GB tilesets rapidly, and the 5 GB/s bandwidth of internal NVMe eliminates the 0.3-second door hitch you'll feel on slower drives.
Cap your FPS. The Mithraeum's central chamber renders around 1,700 visible light sources, and the engine can start prepping frames internally up to 300 fps, which burns unnecessary CPU time. Cap at your refresh rate minus 2 (so 118 on a 120 Hz monitor).
Set Volumetric Lighting to Standard in the Mithraeum. The fog shafts are mostly pre-baked, and only moving torches use real volumes, so the visual difference is tiny.
Disable Film Grain on consoles. The dark limestone textures can cause the grain dither pattern to ghost on surfaces like Giant Statue #2's face.
Quick settings checklist for best performance: Shadow Cache On, SSR Off (in sewers) or On (in Mithraeum if you have an RTX 2070 or better), Volumetric Lighting Standard, Shader Quality High, and capped FPS (60, 120, or 118 on 120 Hz).
Conclusion
With this guide, you're equipped to navigate every twist of the Order of Giants, from the Vatican's secrets to the final confrontation in the Mithraeum. Whether you're here for the story or the full 250 Gamerscore, you now have the map to uncover all the DLC has to offer. Grab your whip and get ready for adventure.
More indiana-jones-and-the-great-circle Guides

The Ultimate Guide to 100% Completion in Indiana Jones and the Great Circle
Complete guide to finding all 333 collectibles in Indiana Jones and the Great Circle. Learn strategies, locations, and tips for 100% completion.
Indiana Jones and the Great Circle: Complete Puzzle Guide and Solutions
A comprehensive guide to all puzzles in Indiana Jones and the Great Circle, with solutions for early game, Vatican City, Giza Plateau, Sukhothai, Shambala, and more.

Ultimate Fix Guide: Indiana Jones and the Great Circle Technical Issues and Solutions
Comprehensive guide to fix stuttering, crashes, visual bugs, audio problems, and more in Indiana Jones and the Great Circle on PC, Xbox, and PS5.
AI Tactical Companion
Consult with our specialized tactical engine for indiana-jones-and-the-great-circle to master the meta instantly.