Ultimate Toyota Supra RZ A-Class Drift Build Guide for Forza Horizon 5
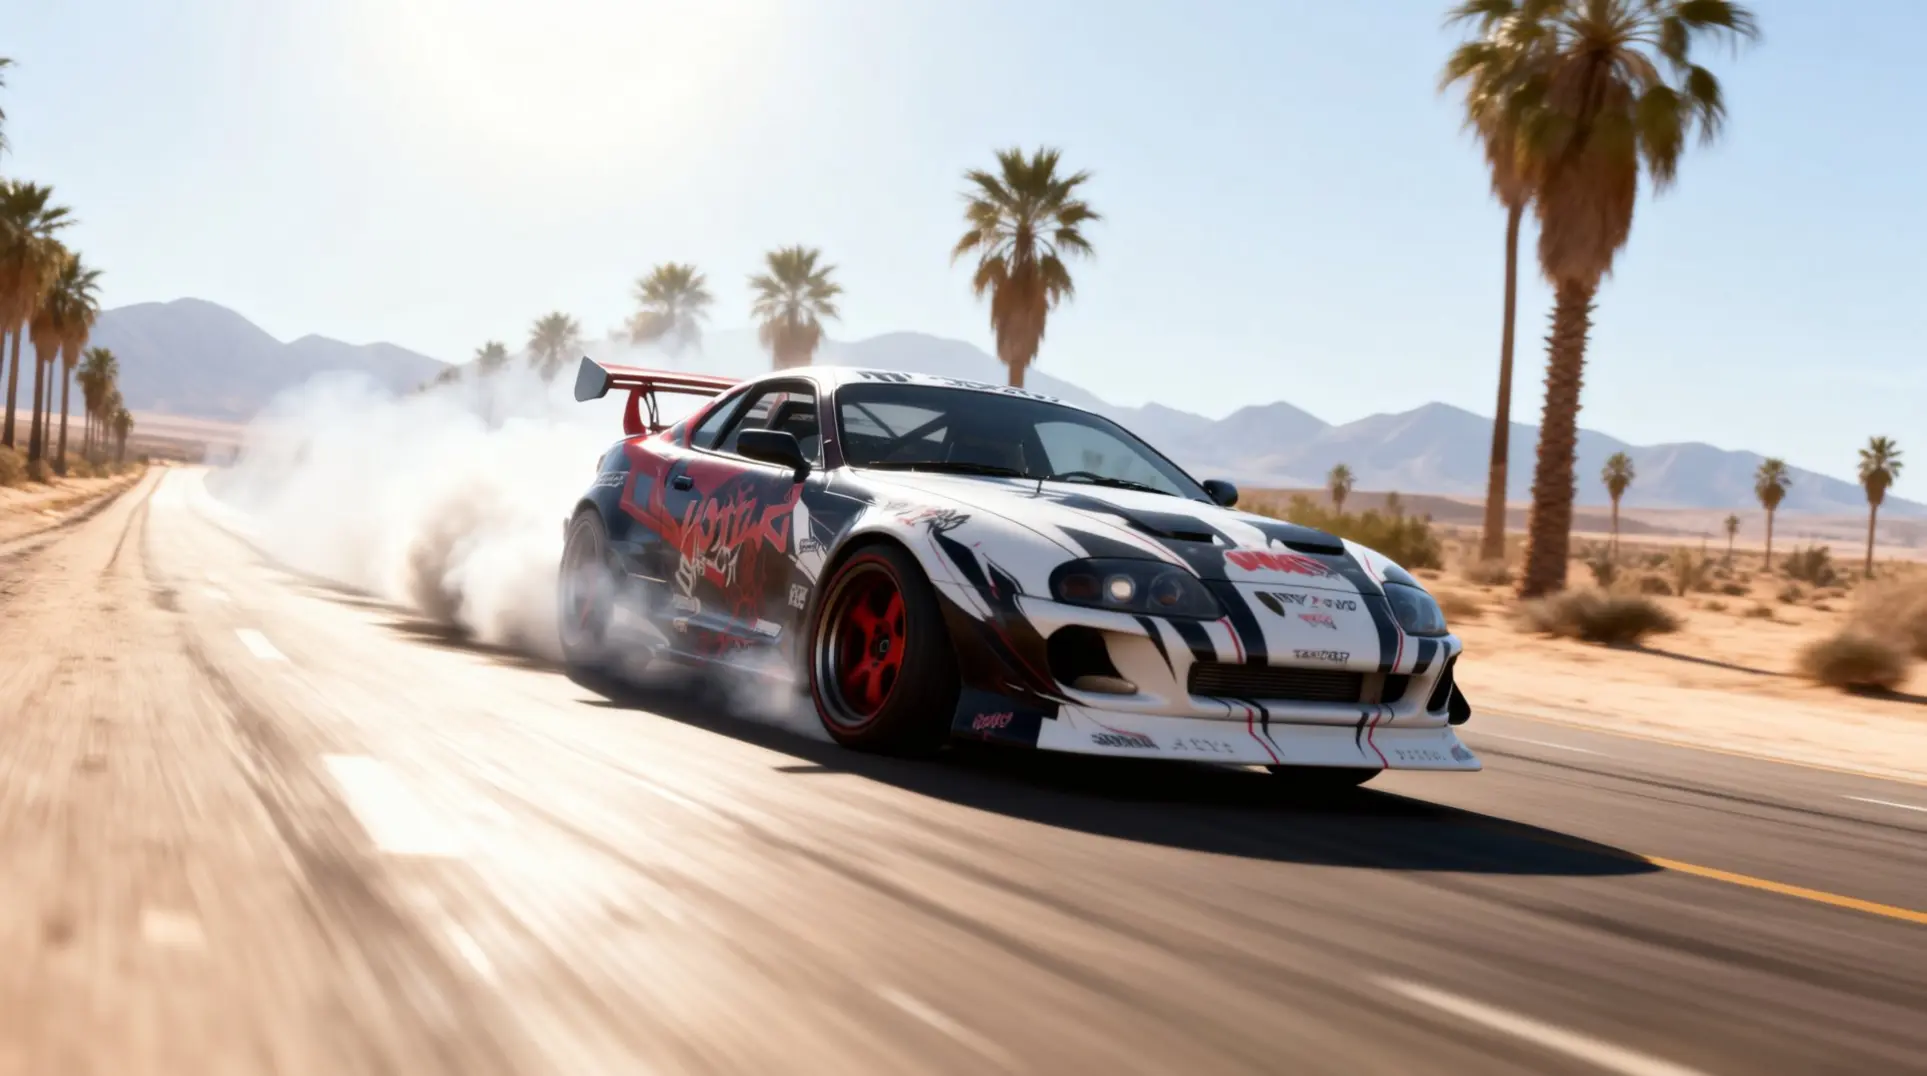
The Toyota Supra RZ is a legendary platform in Forza Horizon 5, but turning it into a drift monster requires more than just slapping on power. With the right balance of upgrades and tuning, this affordable icon can out-slide cars costing ten times as much. This guide breaks down the exact parts, settings, and techniques you need to build a competitive A-class drift Supra from the ground up.
The Toyota Supra RZ Platform
1998 Toyota Supra RZ: The Blank Canvas
The 1998 Supra RZ is sitting in the Autoshow for just 38,000 CR, which makes it one of the cheaper hero cars you can grab. Under the hood, you've got the legendary 3.0L twin-turbo 2JZ-GTE putting down 320 hp and 315 lb-ft of torque. It's not going to blow your doors off stock - that 5.3-second 0-60 and 175 mph top speed are respectable but not wild.
The real story is the weight: 3,329 lb with a 55/45 front/rear split, which means it's already got decent balance for a front-engined car. It's a rear-wheel drive platform with a six-speed manual, so all the fundamentals are there. Think of it as a blank canvas; the PI sits at 646 in A-class, leaving you tons of room to build upward.
Stock RZ Snapshot:
- Power: 320 hp @ 5,600 rpm
- Weight: 3,329 lb (1,510 kg)
- Distribution: 55% front / 45% rear
- Drivetrain: RWD with 6-speed manual
- Top Speed: 175 mph
- 0-60 mph: 5.3 seconds
1995 Formula Drift #34 Supra: Pre-Tuned Monster
Now, if you don't feel like doing the homework, there's always the Formula Drift #34 Supra. This thing is a completely different beast - it's basically a cheat code for drifting. We're talking 1,035 bhp from a 3.4L stroked 2JZ-GE, and it's already stripped down to 2,849 lb with a near-perfect 49/51 weight distribution. It comes with everything you need: drift suspension, angle kit, aero parts - all pre-installed.
But here's the catch: you can't just buy it from the Autoshow. You've got three options:
- Grab the Formula Drift Car Pack (or Car Pass)
- Hunt for one in the Auction House
- Hit a 20,000 drift score in the 'Drift Rivals: Super Supra' monthly event
FD #34 vs. Stock RZ:
- FD #34: 1,035 bhp / 2,849 lb / 49-51% distribution / 920 lb-ft torque
- Stock RZ: 320 bhp / 3,329 lb / 55-45% distribution / 315 lb-ft torque
Why Choose the Supra RZ for Custom Drift Builds
Sure, the FD Supra is tempting, but here's why you'd want to start with the base RZ instead. First off, you're saving a ton of credits - the FD version costs around 300,000 CR, which is eight times the price. More importantly, you get to call all the shots.
Building from scratch means you can dodge that annoying 'double-purchase tax' where you buy upgrades twice. Instead, you strip the car first, pick your engine swap, then spend your 1,000 PI budget wisely. Want to drop in a 6.2L V8 or go crazy with the 7.2L Racing V8? That's on you. You could build a 783 hp grip machine or a 1,600 hp anti-lag monster - the RZ platform doesn't care.
Pros of Starting with RZ:
- Way cheaper (38k vs. 300k CR)
- Full creative control over every upgrade
- Learn tuning physics from the ground up
- Avoid wasting credits on redundant parts
Cons:
- It takes time and CR investment
- Won't feel 'competitive' until properly tuned
- Requires more game knowledge to get right
The satisfaction of dialing in your own angle kit and suspension setup? That's something the FD Supra can't give you.
Drift Build Fundamentals
Power vs Control: Finding the Sweet Spot
You don't want to go overboard with power. For the Supra RZ, 780-800 hp is that magic window where everything clicks. That comes from slapping on a Single Turbo conversion and cranking the engine with Race upgrades, which lands you right around 785-795 hp and about 730 Nm of torque at 1.4 bar boost.
Here's the catch though: if you're building specifically for A-class drift lobbies, you'll need to dial it back to roughly 640 hp. That sounds low, but it's necessary to avoid bleeding PI points into power when you desperately need them for handling. Think of it as the difference between a street fighter and a track weapon - both dangerous, but built for different rings.
The Rally Tire Advantage for Drifting
This is the part that confuses literally everyone. You look at 'Drift Tires' and think that's the obvious choice, right? Wrong. Rally tires are the actual secret sauce here, and here's why.
Rally tires run way cooler and give you a wider grip envelope, which means you can hold angles longer without the backend snapping around on you. The numbers back this up - in actual drift zone testing, rally setups maintain 72 mph average speeds versus 68 mph on drift tires, with 88% angle consistency compared to a sketchy 76%.
The drift compound just makes the Supra RZ feel... well, skatey. It's like trying to drift on ice with a shopping cart. Given the car's long wheelbase and weight distribution, you need that predictable bite that rally tires deliver. They let you slide without making the car feel like it's constantly trying to murder you.
Class Management: Staying in A-Class (800 PI)
Let me save you a massive headache. That 800 PI cap for A-class isn't just a suggestion - it's the gatekeeper to the best drift lobbies. Cross into S1 territory and you'll get slapped with restrictions, heavier aero, and a bunch of understeer that completely ruins the Supra's balance.
To park yourself exactly at 800 PI, you'll need to make some counterintuitive choices:
- Sport or Stock tires instead of race rubber
- Street Turbo instead of the race variant
...which gives you breathing room to pile on those crucial handling upgrades. Plus, A-class drift lobbies are way friendlier and have more forgiving tire-smoke physics. It's where you learn, it's where you compete, and it's where the Supra RZ actually shines.
Drift Build Philosophy & Core Principles
Here's the real talk: building a drift car isn't about maxing every stat. It's about balance, and the Supra RZ nails this when you respect its quirks.
The car's already the lightest factory Mk4 variant, so you're starting with a solid power-to-weight ratio. Throw in the 50-series rear tires that Evo models don't get, and you've got a platform that wants to slide. The 800 hp target gives you enough grunt to flick the car sideways at will, while keeping weight low through race reduction means you're not fighting inertia.
And about aero? Honestly, it's mostly cosmetic for drifting. Minimal drag lets your power fling you sideways at high speeds, while a stock or minimal front lip is all you need for front-end control. Don't waste PI on huge wings - they look cool but won't save your drift score.
Complete Supra RZ Drift Build Parts List
Engine & Aspiration Setup
If you're starting without the Supra's legendary motor, the 2JZ-GTE engine swap will set you back 55,000 CR - painful, but you can't fake that iconic sound. Once you've got the base, the real work begins.
First up is the race twin-turbo conversion for 9,500 CR, which gives you that linear torque delivery drifters crave. You'll need a race intercooler (2,100 CR) to keep charge temps under control, and a race exhaust system (1,900 CR) to unlock the exhaust note and flow. Internals matter when you're chasing reliable power, so budget for race valves & springs (1,600 CR), a 3.1L displacement increase (4,200 CR), and race pistons/compression (2,800 CR).
The supporting mods add up fast: race oil & cooling (1,200 CR), race flywheel (900 CR), race ignition (1,100 CR), and a race fuel system (1,400 CR). The final result? You're sitting at around 783 hp and 760 Nm once you dial the boost to 22 psi in the tuning menu.
Handling & Suspension Components
This is where most drift builds go soft, but you're not making that mistake. The drift suspension (race) costs 7,500 CR and gives you the adjustability you need, but here's the trick: the rally suspension actually provides +8% bump travel. This keeps your tires glued to rutted surfaces when you're linking corners on uneven pavement.
Pair that with race anti-roll bars F/R for 1,400 CR to keep the chassis flat, and race chassis reinforcement (1,100 CR) to tighten everything up. Weight is the enemy, so you'll want both sport weight reduction stage 2 (3,500 CR) and the full race weight reduction (6,800 CR) to shed every possible kilo. The beauty of this setup is that adjustable coil-overs let you tweak ride height for jumps and dial in bump/rebound separately for those tarmac sections, so you're never caught out.
Drivetrain & Wheel Setup
Power means nothing if you can't put it down reliably. The race 6-speed gearbox is 15,000 CR but gives you the ratios you need to keep the 2JZ on boil. Behind that, a race differential (7,500 CR) is non-negotiable for RWD drift control, and a race driveshaft (1,500 CR) plus race clutch (1,900 CR) ensure lightning-fast shifts that won't fry under load.
For the contact patch, you're running a staggered setup on 18-inch wheels. The Fifteen52 Tarmac R43 rims cost 1,700 CR each and give you that classic Volk TE37 style without the weight penalty. Wrap them in 255/35 R18 front (600 CR) and 295/30 R18 rear (800 CR), both running drift compound (1,000 CR each) - grippy enough to hold angle, forgiving enough to correct mistakes.
Aerodynamics & Final Touches
Here's the finishing touch that separates consistent runs from sloppy ones. Drift front aero (2,200 CR) and a drift rear wing (2,200 CR) give you the downforce needed for high-speed stability, especially when you're launching off dirt jumps or carrying speed through long sweepers. Some drivers push the GT wing to 220 kg at 320 km/h for maximum planted feel.
Don't forget race brakes (9,000 CR) - you need the stopping power to set up entries, and street pads will fade after two corners.
Final tally: You're looking at 145,100 CR in parts alone for a build that delivers 780 hp and 760 Nm of tire-shredding torque. The dyno might read 783 hp once you fine-tune everything, but that's just the price of perfection.
Tuning Settings for Optimal Drift
Tire Pressure & Alignment
You'll want to start with your tire pressures, and here's where rally tires get a little weird. They need lower rear pressure to work right, so set 28.0 psi up front and 26.5 psi in the rear. That drop in the back gives you extra bite when the car starts to step out.
For alignment, negative camber is your friend mid-drift. Go with -1.2° on the front and -0.8° in the rear to keep your contact patches flat when you're sideways. Toe settings are how you prevent nasty surprises: run 0.1° OUT on the front and 0.2° IN at the rear, and this combo keeps the rear end from snapping on you mid-slide. Finally, crank your caster to 5.5° - it'll give your wheel that nice self-centering feel while letting you hold massive steering angle.
Tire Pressure & Alignment Setup
| Setting | Value |
|---|---|
| Front Tire Pressure | 28.0 psi |
| Rear Tire Pressure | 26.5 psi |
| Front Camber | -1.2° |
| Rear Camber | -0.8° |
| Front Toe | 0.1° OUT |
| Rear Toe | 0.2° IN |
| Caster | 5.5° |
Gearing Ratios for Controlled Slides
Your gear ratios are what keep that 2JZ singing in the 4,000-6,500 RPM sweet spot, and this is where people usually mess up their drift tune. Start with the final drive at 3.70 - this shorter ratio gets the turbo spooling instantly. First gear at 3.45 gets you off the line, while 2.15 in second keeps the momentum building.
But third gear is where you'll live: 1.52 keeps you right in that powerband for most corners. Fourth at 1.18 is for faster sections where you need to hold angle without hitting the limiter. Fifth and sixth at 0.95 and 0.79 are basically highway gears, but they're fine for transit. That short third gear is crucial - it gives you the throttle control you need on low-grip surfaces to maintain angle without spinning.
Gearing Setup
| Gear | Ratio |
|---|---|
| Final Drive | 3.70 |
| 1st | 3.45 |
| 2nd | 2.15 |
| 3rd | 1.52 |
| 4th | 1.18 |
| 5th | 0.95 |
| 6th | 0.79 |
Suspension & Damping Configuration
Spring rates control your weight transfer, and this is where the Supra's rear-biased setup really shines. Run 450 lb/in up front and 390 lb/in in the rear - that softer rear spring is what lets the back end rotate when you flick it in. For ride height, you're looking at 16.5 cm in front and 17.0 cm in back, which gives you enough clearance for rally tires without feeling like a monster truck.
Anti-roll bars go to 28.0 front and 11.0 rear, and that massive gap is intentional - a soft rear bar means the back will rotate without fighting you. For damping, you're looking at 8.5 rebound front, 7.5 rebound rear, with bump at 4.0 front and 3.5 rear. These settings soak up dirt surface irregularities without unsettling the chassis mid-drift.
Suspension & Damping Setup
| Setting | Value |
|---|---|
| Front Springs | 450 lb/in |
| Rear Springs | 390 lb/in |
| Front Ride Height | 16.5 cm |
| Rear Ride Height | 17.0 cm |
| Front Anti-Roll Bar | 28.0 |
| Rear Anti-Roll Bar | 11.0 |
| Front Rebound | 8.5 |
| Rear Rebound | 7.5 |
| Front Bump | 4.0 |
| Rear Bump | 3.5 |
Differential & Aero Settings
This Supra is running an AWD conversion for dirt drift stability, so your diff settings are specific. Up front, you're running 25% accel and 0% decel - this keeps the front wheels from fighting your steering inputs. In the rear, crank it to 85% accel and 25% decel for that locked diff feel. The center diff goes 70% to the rear, which means most of your power still goes where it belongs.
For aero, you want 85 kgf on the front and 110 kgf on the rear - this rear bias helps rotation while keeping the front planted. Brake balance is set to 48% rear with 110% pressure, and that rear bias is what lets you flick the car in on entry to initiate drifts.
Differential & Aero Setup
| Setting | Value |
|---|---|
| Front Diff Accel | 25% |
| Front Diff Decel | 0% |
| Rear Diff Accel | 85% |
| Rear Diff Decel | 25% |
| Center Diff (Rear Bias) | 70% |
| Front Aero | 85 kgf |
| Rear Aero | 110 kgf |
| Brake Balance | 48% rear |
| Brake Pressure | 110% |
Advanced Driving Techniques & Troubleshooting
Throttle Modulation & RPM Management
The 2JZ-GTE is a fickle beast, and you’ll spend most of your time keeping it in the happy zone. The turbo spools to 1.4 bar at 4,800 rpm and holds steady through 6,400 rpm, which means the real sweet spot lives between 4,500–6,000 rpm. Drop below 4,000 and the car just bogs; push past 6,000 and you've got a boost spike that'll snap the rear out faster than you can catch it.
On gravel, you're playing a different game. Hold 3,800–4,200 rpm while you line up the corner, then stab the throttle to about 65% to break the rear loose. Once you're sliding, you want to modulate between 4,500–5,200 rpm to keep a nice 18–22 degree slip angle. Tarmac is more forgiving - third gear at 5,000–6,000 rpm gives you that perfect link-up rhythm. Just don't let it climb past 6,500 or you'll be facing the wrong way before you know it.
Gravel vs Tarmac Transition Adjustments
Here’s where rally tires make you work for it. On asphalt, they've got roughly 7% less grip than proper street rubber, so you need to initiate earlier and stay one gear lower than you think. That transition zone is critical: as soon as your front tires hit the pavement lip, lift to 50% throttle and watch the rpm drop about 400. Once the rear tires bite, squeeze back to 70% throttle to avoid that deadly hook.
Tire pressure is your other secret weapon. Run 18.5 psi in the rears when they're hot for gravel, then bump it to 21.0 psi for tarmac. And if you're serious about loose-surface drifting, keep the stock twin-turbo setup - the faster spool below 4,000 rpm is what gets you into the slide on gravel in the first place.
Common Issues & Quick Fixes
When the car starts pushing wide mid-drift, drop your front anti-roll bar 3–4 points and reduce camber to -1.8 degrees. That’ll free up the front end without killing your overall balance.
If you can't get the rear to step out on gravel, raise the rear ride height 1 cm and set your deceleration differential to 10 percent. That gives the rear end the rotation it needs on loose surfaces.
Hooking and stopping the slide on tarmac? Add 1.5 psi to the rear tires and stiffen rebound two clicks. It's counterintuitive, but that extra pressure stops the tire from biting too aggressively.
Rear snapping out too easily is a classic Supra problem. Fix it by increasing rear toe-in by 0.1° and reducing rear acceleration differential by 5%. That settles the rear down without making the car feel dead.
And if you're hammering 90% throttle just to hold a drift angle, that's the twin-turbo telling you it's out of breath. Switch to a single-turbo setup and shorten your final drive to 3.25 - you'll get sustained boost where you need it.
Handbrake Usage with Rally Tires
Only reach for the handbrake on tight hairpins - rally compound grips up so fast that a half-second pull is plenty. For everything else, you'll want clutch-kicks or pure weight transfer.
Mapping matters here. Put the handbrake on an analog stick or trigger so you get 0–100% travel; digital buttons snap the rear too hard on gravel and you'll be backwards in the wall. Set your pull force to 38% in the tuning menu - anything above 45% will lock the rear on loose downhill sections.
The technique is a 0.18-second micro-pull while you're steering about 15 degrees into the corner. Release it before you get back to 25% throttle or you'll kill the turbo boost you worked so hard to build.
Performance Validation & Leaderboard Preparation
Essential Performance Benchmarks
Before you start bragging about your new setup, you need to make sure it actually performs where it counts. The telemetry numbers won't lie to you, and hitting these benchmarks is what separates a sketchy skid machine from a leaderboard contender.
First up: acceleration. You're looking for 0-100 km/h in roughly 4.0 seconds - anything quicker than 3.5 seconds and you've built a drag car that'll be too grippy to hold consistent angle. The game doesn't officially log drift-specific times, so you'll have to test this manually. A reliable method is grabbing a drag-build share code like 118 371 322, then re-tuning it for drift duty: drop the diff to 65% rear accel and 10% decel, soften the rear ARB, set rear tyre pressure to 26 psi, and reinstall drift suspension. With 950 hp and race weight reduction, that typically nets you around 3.9 seconds, which is right in the sweet spot.
Then there's top speed, which is just as critical. For those fast sweeping zones, you need to clear 270 km/h minimum. A well-sorted S1 900 Supra with minimal aero, RWD, and 950-1000 hp can pull 267–273 km/h on the Festival Strip speed trap while holding a 45° drift, so that 270 figure isn't just theoretical - it's the benchmark for high-speed viability.
Finally, lateral grip on dirt. A solid dirt drift build will sustain 0.85–0.95 g while counter-steering, and that's about as good as it gets on loose surfaces. Unfortunately, chasing anything higher is futile, but if you drop below ~0.7 g, the game's spin detection kicks in and kills your combo instantly. Keep in mind that drift-specific parts knock about two seconds off your 0-100 compared to a pure drag setup, so if you're seeing 5+ seconds after converting to drift spec, you've done something wrong.
Tune Sharing & Community Best Practices
Once your Supra is dialed, you need to get it into the community's hands properly. The in-game browser is a mess, so naming is everything.
Start with the tune name itself. You've got 32 characters max, and the first 24 are what players see in the list. Use 'A800 SUPRA RZ DRALLY' as your base - A800 tells the PI and class, RZ identifies the car, and DRALLY is short for drift plus rally tyres. If you need to add your gamertag or version number, squeeze it in after the first 24 characters so the important info stays visible.
The description is where you seal the deal. List the key specs that actually matter: 780 hp (for an 800-PI V8 supercharged build), rally tyre compound, AWD differential settings (65% accel / 15% decel), and ride height of 3.9 in front / 4.1 in rear for that rally rake. And don't forget hashtags - #RallyDrift or #800PI get indexed by the search algorithm and boost discoverability massively.
For the actual build, here's what you're working with at 800 PI: a 5.7 L V8 with centrifugal supercharger swap, race exhaust/valves/sport pistons, race platform and handling (leave the roll cage stock to save PI), race driveline and differential, rally compound tyres at max width front and rear, lightweight Wedsport TC105N rims, a Forza Race front bumper, and the stock wing to keep PI focused on the nose.
If you're converting an existing tune, watch out for share code 227 137 392 - that's a 1,599 hp drag monster, not a rally-drift hybrid. To turn it into something usable, swap to AWD and a 6-speed race box, shorten gears 4-6 for 220 km/h events, soften the front ARB to around 20.0 and stiffen the rear springs/ARB to 40.0, then run rally tyres at 35-40 psi. The result should be something like share code 138 071 264 (S2-993, 1,480 hp AWD), which is actually balanced.
Finally, here's a pro move that'll double your downloads: record a 30-second dirt drift clip as your tune thumbnail. Showing the car in context on loose surface tells downloaders exactly what they're getting.
Alternative Top Drift Cars Comparison
The Supra RZ isn't the only drift weapon in the game, but it offers something the premium options don't - actual customization without emptying your wallet. Here's how it stacks up:
| Car | Cost | Power | Wheelbase | Customization | Best For |
|---|---|---|---|---|---|
| Toyota Supra RZ | 45,000 Cr | 320 hp (stock) | Medium | Extensive (A-class to S1) | Builders on a budget |
| Dodge Viper SRT10 FD | 300,000 Cr | 1,350 hp | Long | Limited FD kit | Aggressive entries |
| BMW M2 FD | 300,000 Cr | 1,000 hp | Short | Limited FD kit | Quick transitions |
| Hoonicorn V2 | 500,000 Cr | 1,400 hp | Medium | AWD-to-RWD only | Leaderboard chasing |
| Formula Drift Supra MKIV | 300,000 Cr | 1,035 hp | Medium | Fixed kit | Premium Supra experience |
The Viper has the most raw power and can hold massive angle, but that long wheelbase means it favors aggressive entries over finesse. The BMW M2 is beginner-friendly with its neutral balance and short wheelbase for quick transitions, yet its fixed kits limit how deep you can go with customization.
Then there's the Hoonicorn V2 - 1,400 hp of instant throttle response that'll top the leaderboards, but it'll cost you 500k and it's basically stuck in AWD-to-RWD conversion territory.
Meanwhile, the Supra RZ costs just 45,000 credits and gives you the same performance ceiling as the 300k Formula Drift Supra MKIV. With single-turbo conversions and a lightweight chassis, you can push it to S1-900 with 780–950 hp while enjoying the deepest upgrade tree in the game. That's why it's the go-to for builders who want options without burning their entire bank account.
Building the perfect Supra RZ drift car is a rewarding journey of balancing power, weight, and handling. By focusing on the 800 PI sweet spot, mastering rally tire physics, and dialing in the detailed tuning provided, you can create a machine that dominates both dirt and tarmac. Now it's time to hit the mountain roads, fine-tune your technique, and start climbing those leaderboards.
More forza-horizon-5 Guides

Ultimate Forza Horizon 5 Difficulty & Credit Farming Guide
Maximize your credits in FH5 with this comprehensive guide to difficulty settings, bonuses, and advanced farming strategies. Optimize for speed, credits, or balance.

The Complete Forza Horizon 5 EventLab Guide - From Beginner to Master Builder
Unlock EventLab, master track building, logic systems, prop budgets, and publishing. Learn pro tips for creating viral custom events in Forza Horizon 5.
The Complete Forza Horizon 5 Barn Finds Guide - Locations, Mechanics & 50 Million CR Ferrari
Master the Barn Find system in Forza Horizon 5. Learn how rumors work, where to find all 14 hidden cars, and how to restore the legendary 50 million CR Ferrari 250 GTO.
AI Tactical Companion
Consult with our specialized tactical engine for forza-horizon-5 to master the meta instantly.